Categories
On Vehicles Resource

Do 29 inch wheels fit a 2009-2013 Subaru Forester? 265 70R15

Sadly, no they do not… stock.

The largest wheel that will fit a 2009-2013 Subaru Forester is 28″ in diameter. If you own a 2014 Subaru Forester or newer, well then you are in luck. As rumour has it, your vehicle will fit the 29″ wheels.

This is because 2009-2013 have a pinch weld in the front fender well.

Is it possible to fit 29 inch wheels in 2009-2013 Subaru Forester?

Yes, happy to confirm it is possible. They can be made to fit with simple modifications.

Update, what’s it like driving after 4 months?

I love it. It took a while to sort out the wheel rubbing inside the front wheel well when turning at full lock. That sound really drove me nuts.

Now that it’s quiet, I love it.

Our city got hit with the most snowfall I’ve seen in recent history. My snowbanks were 4 feet high. The large Toyo tires are perfect for these conditions. Many side roads were not plowed and vehicles were getting stuck in the huge amount of snow we’ve had.

With the lift and tires I have 13″ of clearance to the sidewalls and 11.5″ to the rear diff. You’re capable of getting through anything winter throws at you with this setup.

Why I went with 29″ wheels?

The plan for this Subaru is a winter driver to get out to the backcountry service roads for skiing. So I needed all terrain tires that were good in winter. And I needed approximately 12 inches of clearance, to clear the center ridge of snow pack.

Toyo Open Country A/T tires fit the bill perfectly. They are winter rated, well reviewed and the right weight for a Subaru.

I also installed the Flatout suspension lift.

Combined I now how 13″ of clearance to the sidewalls and 11.5″ of clearance to the rear diff.

*If I did not have these requirements I go with a 28″ A/T wheel setup.

What to do?

Step 1: Add a 1.5″ lift. I went with 2.3″

I wrote a post on how I installed that.

Step 2: Trim or roll the front pinch weld. 

This is fairly straightforward. Ideally you will want to keep the pinch weld.

First, remove the rubber wheel well liner.

Then, using a heat gun, heat up the exposed metal pinch weld.

Next, using a 4lb metal hammer, hit the pinch weld until it folds flat. You can also use a grinder to grind relief cuts. Word has it that it makes it easier to fold the welds, without damaging the integrity of the pinch weld.

This is not my picture but used as an example of relief cuts, found on a forum.

Sand the area to remove any rough spots and prep the metal for paint. Then using a wax and grease remover or rubbing alchohol, clean the area thoroughly.

Product I used to clean the pinch welds

And then prime it using a rust inhibitor primer.

Rust inhibitor primer

Next, paint it with a good quality paint. I used a paint for brake callipers. It’s overkill, but better safe than sorry.

Brake caliber paint

Then, once dry apply a silicone seam sealant over the entire area to prevent rocks or other debris from building up or contaminating the area.

Once finished, reinstall the rubber wheel well liner. You will need to trim the area where the rubber used to overlap the pinch weld with a sharp utility knife.

Then using the heat gun, heat up the wheel well liner near the pinch weld and press it flat. Hold it there with leather gloves or a block until it is cold. About 5 minutes.

Now you should have enough room for your wheels with no rubbing. If you notice any rubbing from the front of the wheel well, you may need to heat those areas with the gun and press and hold them to create more space for your wheels.

Since installing them, I’ve had to do a few minor adjustments to the wheel well with a heat gun to eliminate the rubbing on full locked turns. It is taking me a few tweaks to get it right.

And now you can confidently drive with your 29″ wheels on your 2009-2013 Subaru Forester. Have fun.

Categories
Adventure Vehicle Journal On Vehicles Resource

Installing Flatout Suspension on a 2009-2013 Subaru Forester SH

This past weekend I installed the Flatout Suspension’s GR-Lite coil overs and Rallitek spacers. They arrived packaged in the box.

There were a couple things that to note for the install.

  1. They are longer than stock suspension. They do fit. I had to disconnect the front sway bar links to drop the control arm low enough. Then used a jack to lift the control arm. After that I reinstalled all the bolts. And presto, it was installed.
  2. If you hear a spring recoil noise when turning your front wheel after the install, this means the bottom lockout rings need to be tightened. To do this place the provided locking ring wrench on the locking ring and tap it using a hammer to tighten it. You’ll see it snug up an additional quarter turn. After that, the noise is gone.
  3. The top dampening adjustment is set to 0. I counted the number of quarter turns to tighten them up. Divided that by half and then set all the dampeners to half way. This gave me a good baseline. I could stiffen it (for cornering) or soften the bounce (for going over corrugated gravel), but it is feels good at this setting.

Step 1

On level ground measure the current ride height from the ground to the centre of the wheel well. This will give you the baseline height. After the install, you will measure each wheel again and you will know how many inches you’ve raised or lowered the vehicle by. You can then make adjustments to the ride height accordingly.

Step 2 setup the suspension

Front suspension: I adjusted the lower struts so the inserts were flush with the bottom. And set the top lockout ring so it is at 0 preload. Basically spin the lockout ring until it is snug against the spring so there is no up/down movement, but the spring isn’t too tight so it can rotate freely.

Rear suspension: Adjust the top lockout right so it is at 0 preload. Same as above.

Installing the front suspension.

I started with the front to get momentum.

Step 1 remove the wheel

Loosen the bolts while the wheel is on the ground.

Then lift the vehicle with a jack. Be sure to put a safety stand under the vehicle once jacked off the ground, so it doesn’t fall on you if the jack failed.

Remove the bolts and take off the wheel.


Step 2 disconnect the bolts holding the brake line and sensor lines from the strut

*Tip: I don’t have an impact wrench, so what I do is spray nuts with WD40 and hammer a wrench using a 5 pound rubber mallet. This breaks the nuts loose without damaging them.


Step 3 remove the bolts and nuts holding the strut to the vehicle’s hub.

Note: The top bolt is used for adjusting camber. There’s a washer on the top camber bolt. Make note of the position of the camber bolt if you want to retain the original height. (I didn’t do this as I had an alignment booked at a shop, but would have been easier to set camber had I marked it).


Step 4 disconnect the nuts from the top strut mounts

Then with one arm on the strut drop it out

Step 5 Install the new front strut

Remove the top mount nuts from the new strut, install the front strut and screw the new nuts on top.

Step 6 Install the bolts and nuts holding the strut lower to the hub

*Note I had to disconnect the sway bar link to drop the control arm enough for it to fit.

Step 7 reconnect the brake line and sensor brackets.

Step 8* reconnect the sway bar link

Using a jack under the control arm hub, lift it up until the sway bar link lines up. Then reconnect. I found this step straight forward.

Step 9 reinstall the wheel.

Hand snug the bolts while in the air, then tighten them when on the ground.

*Once finished installing the suspension check the bolts on all the wheels use a torque wrench to tighten them all to spec

Step 10* check the height of the your wheel well

Do this step after all suspension is installed to ensure the vehicle is level. After measuring the height of your wheel well compare it to the heights you measured on step 1. Now you can make adjustments to the suspension to raise/lower it to your desired height.

To raise the suspension on the front twist the whole strut assembly, and it will unscrew. Using the locking ring as a guide, you can measure the distance you’ve raised it. You can also add preload using the lockout ring at the top if you need additional height. Again, use the lockout rings to measure the space adjusted.

Step 11. Tighten the lockout rings

Once happy with the heights of your suspension use a hammer and the lockout wrench supplied and tap all the lockout rings tight. You’ll see it tighten approximately a quarter turn.

Now do the other front wheel (repeat above steps).

Installing the rear suspension.

Step 1. Remove the wheel (see step above)

Step 2. Remove the nut and bolt holding the sway bar end link to the lower control arm


Step 3. Remove the nuts and bolts holding the shock to the lower control arm and the lower control arm to the vehicle’s hub.


Step 4. Open the trunk and remove the carpets and foam filler pieces


Step 5. Remove the clips holding the seat back carpet panel to the trunk and fold the trim forward

Step 6. Remove the plastic trim piece that covers the upper strut tower. (both sides)

Step 7. Remove the 2 nuts holding the strut mount to the strut tower and remove the strut from the vehicle


Step 8 Install the new rear strut

Remove the top mount nuts from the new rear strut, install the rear strut and tighten the new nuts on top.

Step 9 Loosely reattach the shock to the control arm

Do not tighten these bolts until the control arm is at ride height. Otherwise the rubber parts will twist and wear out sooner.

Step 10 Using a jack, raise the control arm 

The Flatout suspension is longer than stock, so raise the control arm using a jack until the sway bar end link and hub mount line up.

Step 11 Loosely reattach the sway bar end link and hub with the control arm

Step 12 Load the suspension using the jack until it is holding the vehicles weight. Then tighten all the bolts.

Tighten the sway bar, shock, and control arm with the hub.

(Now do the same to the other side).

Step 13 Clip the side panel piece back in place

Step 14 Attach the clips holding the seat back carpet panel to the trunk and fold the trim back in place

Step 15 reinstall the foam pieces and the carpet pieces.

And you’re done. Almost.

Step 16 after all suspension is installed check and adjust the heights of your suspension around the vehicle. 

With the vehicle on level ground measure the heights from the ground the centre of the wheel well.

After measuring the height of your wheel well compare it to the heights you measured on step 1. Now you can make adjustments to the suspension to raise/lower it to your desired height.

To raise the suspension on the front twist the whole strut assembly, and it will unscrew. Using the locking ring as a guide, you can measure the distance you’ve raised it. You can also add preload using the lockout ring at the top if you need additional height. Again, use the lockout rings to measure the space adjusted.

To raise the suspension on the rear simply rotate the locking ring using the locking ring wrench. Use the lower lockout ring to measure the distance raised.

Once complete reinstall the wheels and torque to specs.

Congrats, you’ve installed your new Flatout GR Lite suspension.

I also installed the Rallitek subframe spacers to help center the rear wheel. I may add another article to walkthrough how I installed those. They were somewhat straightforward to install.

The Subaru Forester build:

From the beginning

Categories
Adventure Vehicle Journal On Vehicles Resource

Do 15 inch Method 502 wheels fit a 2009-2013 Subaru Forester 2.5XT?

Yes!

The 09-13 Subaru Forester 2.5XT has bigger front brakes than the non-turbo Forester. So I was unsure if they would fit. Method’s website say they clear 300mm callipers. I checked the owners manual and the Subaru Forester’s are 300mm.

Hopeful they would clear the brakes, I nervously placed the order and waited patiently. And today they arrived so I pulled off the stock front wheel and test fitted them with success!

There’s plenty of clearance for the brakes and the gold/bronze looks like a dream with the white. Very happy.

Test fitting the 15 inch method 502 wheels on the Subaru Forester xt

The beginning of the Forester build is taking shape.

I went with 15″ wheels so that I could have more sidewall on the tire. This will allow me to deflate the tires more when needed driving over snow, sand and rocks. As well, the additional sidewall makes it less likely to hit the wheels when driving over pot holes, curbs or rocks.

Method 502 15x7 wheels on a 2009 Subaru Forester 2.5xt


Categories
Adventure Vehicle Journal On Vehicles Resource

09-13 Subaru Forester XT – The start of an adventure vehicle

I’d been considering setting up an adventure vehicle to access the backcountry roads for ski touring. A 2009 Subaru Forester 2.5XT sat stored at our property for a year. It was my folks’ and then my younger brother’s until he got married and moved to the UK. It needed some work so they offered it to us. Finally the day came. Do we insure it? Or do we sell it?

Then it hit me… what’s better on the snow than a Subaru? All it needs is clearance for driving the winter forestry roads where I go.

Subaru is world renowned for their rally racing having won 47 World Rally Championship races. In Switzerland there’s a saying, “Subaru is the farmer’s Ferrari.” Which, when translated, means Subaru’s powerful AWD has a reputation for holding up on difficult terrain.

Subaru Rally

A mostly stock Subaru Forester took on the Sunraysia Safari Rally and nearly won. It lead the race up until the last 3 miles of day 3.


In 2009 the Subaru Forester XT won MotorTrend’s Sport/Utility vehicle of the year. MotorTrend wrote that the stock 8.9” clearance bested the stock Land Rover LR2, Toyota FT Cruiser, Ford Expedition, Honda Pilot, among others. Along with that, it has a surprising 63.0/30.8 cubic feet of cargo space behind the front/rear seats. And the AWD system impressed MotorTrend with its capability.

2009 MotorTrend SUV of the year

There are a few other things that make the 4 speed Subaru Forester XT an interesting vehicle for enthusiasts. For one, the WRX/STI parts swap right in to the Forester XT. And even without modifying anything the vehicle can be tuned to increase gas mileage, horse power and torque. But… given the opportunity with a new exhaust and a couple of mods it can easily make 300hp. Why stop there? With the WRX/STI parts you can tune it for 400hp. Yet mere mortals drive 400hp. So some people tune it to 500hp – all with bolt on parts.

While handy when you’re late for work – for the adventure vehicle that I require… this is well beyond my needs. And not only that… maybe the most important feature of any adventure vehicle is reliability. So while I like the idea of tuning it for more torque at the low end – I think 500 horses ripping through the forest may be a bit much.

But arguably its single best trait is its low centre of gravity. This is due to the boxer engine, which not only reduces vibration because of the horizontally opposed pistons, it spreads the weight of the engine lower in the engine bay. It’s the thing that makes a Subaru so stable at high speeds and in rally races. In fact, the Subaru Forester is the only SUV that was not required to add a “risk of rollover” warning label when it entered the market.

In an ideal world the wheels stay on the ground while cornering

There are other features that make this candidate stand out. The turning diameter is only 34.4 feet. That’s 10 feet less than the very capable four door wrangler and 2 feet more than the nimble 2 door Suzuki Jimny. That’s outstanding for a four door SUV and simply means you’ll find it easier to manoeuvre while on the trails..

It has a multi-plate transfer case that distributes power to the front and rear wheels – while non-traditional in that it is not a differential – over the years it has proven faithful. What’s most interesting is how it splits the power. Is sends power from 60/40 to 50/50 front to rear. In other words, the front and rear will always be fully engaged with a 10% variation depending on the terrain. For example, while driving uphill 50% of the power will be sent to the rear wheels and while going downhill 60% will be sent to the front. And what’s incredible with this model year is that no matter the situation both the front and rear wheels will have a minimum of 50% or 40% power. That’s essentially the same as what a locked centre diff does and along with the VDC explains why it handles so well in loose gravel hill tests.

Gravel hill test

Feel free to watch the climb on Youtube here.

The Subaru has a unibody. Manufacturers are moving towards unibody chassis – think Hummer EV and new Land Rover Defender. The Subaru frame has been thoroughly tested in rally races and by enthusiasts alike. It’s torsionally stiff and lighter than a body on frame chassis. But if plan to add recovery points or a winch, it’s best to first mount a solid steel front or rear plate to distribute the load evenly across both sides of the frame.

Reinforced Steel Plate on the front bumper

Now you’re good to add a winch and build something fun like this.

Having owned the 2010 Subaru Impreza I know first hand how it drives in the snow. It’s incredible. I’ve also owned the 1999 Nissan Pathfinder R50 and the Mercedes GLK350. Between these three the Subaru is by far the best on the snow. It would spring to life in the winter taking on a personality all of its own. This is really what they’re known for.


Then the question for my purposes is… will it lift?

The stock 8.9″ of ground clearance on the Subaru Forester 2.5XT is fine. But ideally I would like more ground clearance for driving logging roads in the winter. The last thing I’d want is to find myself high centered out in the back country.

Well fortunately the answer is yes. There are suspension spacers and suspension lifts available giving you anywhere from 0.5″ to 4″ of additional clearance.

Flatout Suspension makes an adjustable set with spacers for the Forester that will give it an additional 2 to 3 inches of suspension lift. Not only will this give you more clearance, it will also increase the articulation of your wheels. Excellent.

To put this in perspective check out the RTI score, which is a measure of wheel articulation for a given wheelbase length. These are articulation scores a few vehicles get:

Gladiator Rubicon: 623
TRD Pro: 492
Colorado ZR2: 489
TRD Off-Road: 468
Colorado Z71: 410

With a 2” suspension lift the Forester gets a score of 535. That’s pretty impressive. The higher the score the more your wheel can lift vertically while the others stay on the ground. Helpful as you navigate obstacles as you’ll have more traction to roll over lumpy terrain.

There’s another area for improved clearance. Increased wheel size. I’ve seen people fit 31″ tires on a Subaru Forester with a lift and some finagling.

31″ wheels with a lift and some finagling

I’ve chosen to go with 29″ wheels as that will give me an additional 1 inch of ground clearance and it fits without any modifications required. The stock wheels on my Subaru Forester are 27″

All-in-all together with the suspension lift this should give our Forester a combined ground clearance of between 11.9 inches to 12.9 inches. Plenty for my needs.

But speaking of needs there is a world of options that allow you to modify this vehicle as your needs require. This is where the community supporting Subaru stands out.

To list a few of the more notable mods.

  1. A rear automatic diff lock by Torq Masters is available
  2. Lo/Hi dual range conversion is available by All Drive Subaru
  3. Cobb tuning kit to increase the stock mileage and power

The list goes on…

In conclusion the 2009 Subaru Forester 2.5XT may be just the adventure vehicle I’ve been looking for – and the funny thing is that it was right in my own backyard, figuratively speaking (it was actually parked on the side). It’s affordable, capable, easy to work on, comfortable, reliable, light weight, decent fuel mileage, and fun. While I’ve taken it on gravel roads locally I’m most looking forward to exploring the backcountry this winter.


Categories
Resource

How to train for a Granfondo in 2 months

The Penticton Granfondo is two months away. So how do you train for a 160 kilometer event in just 8 weeks?

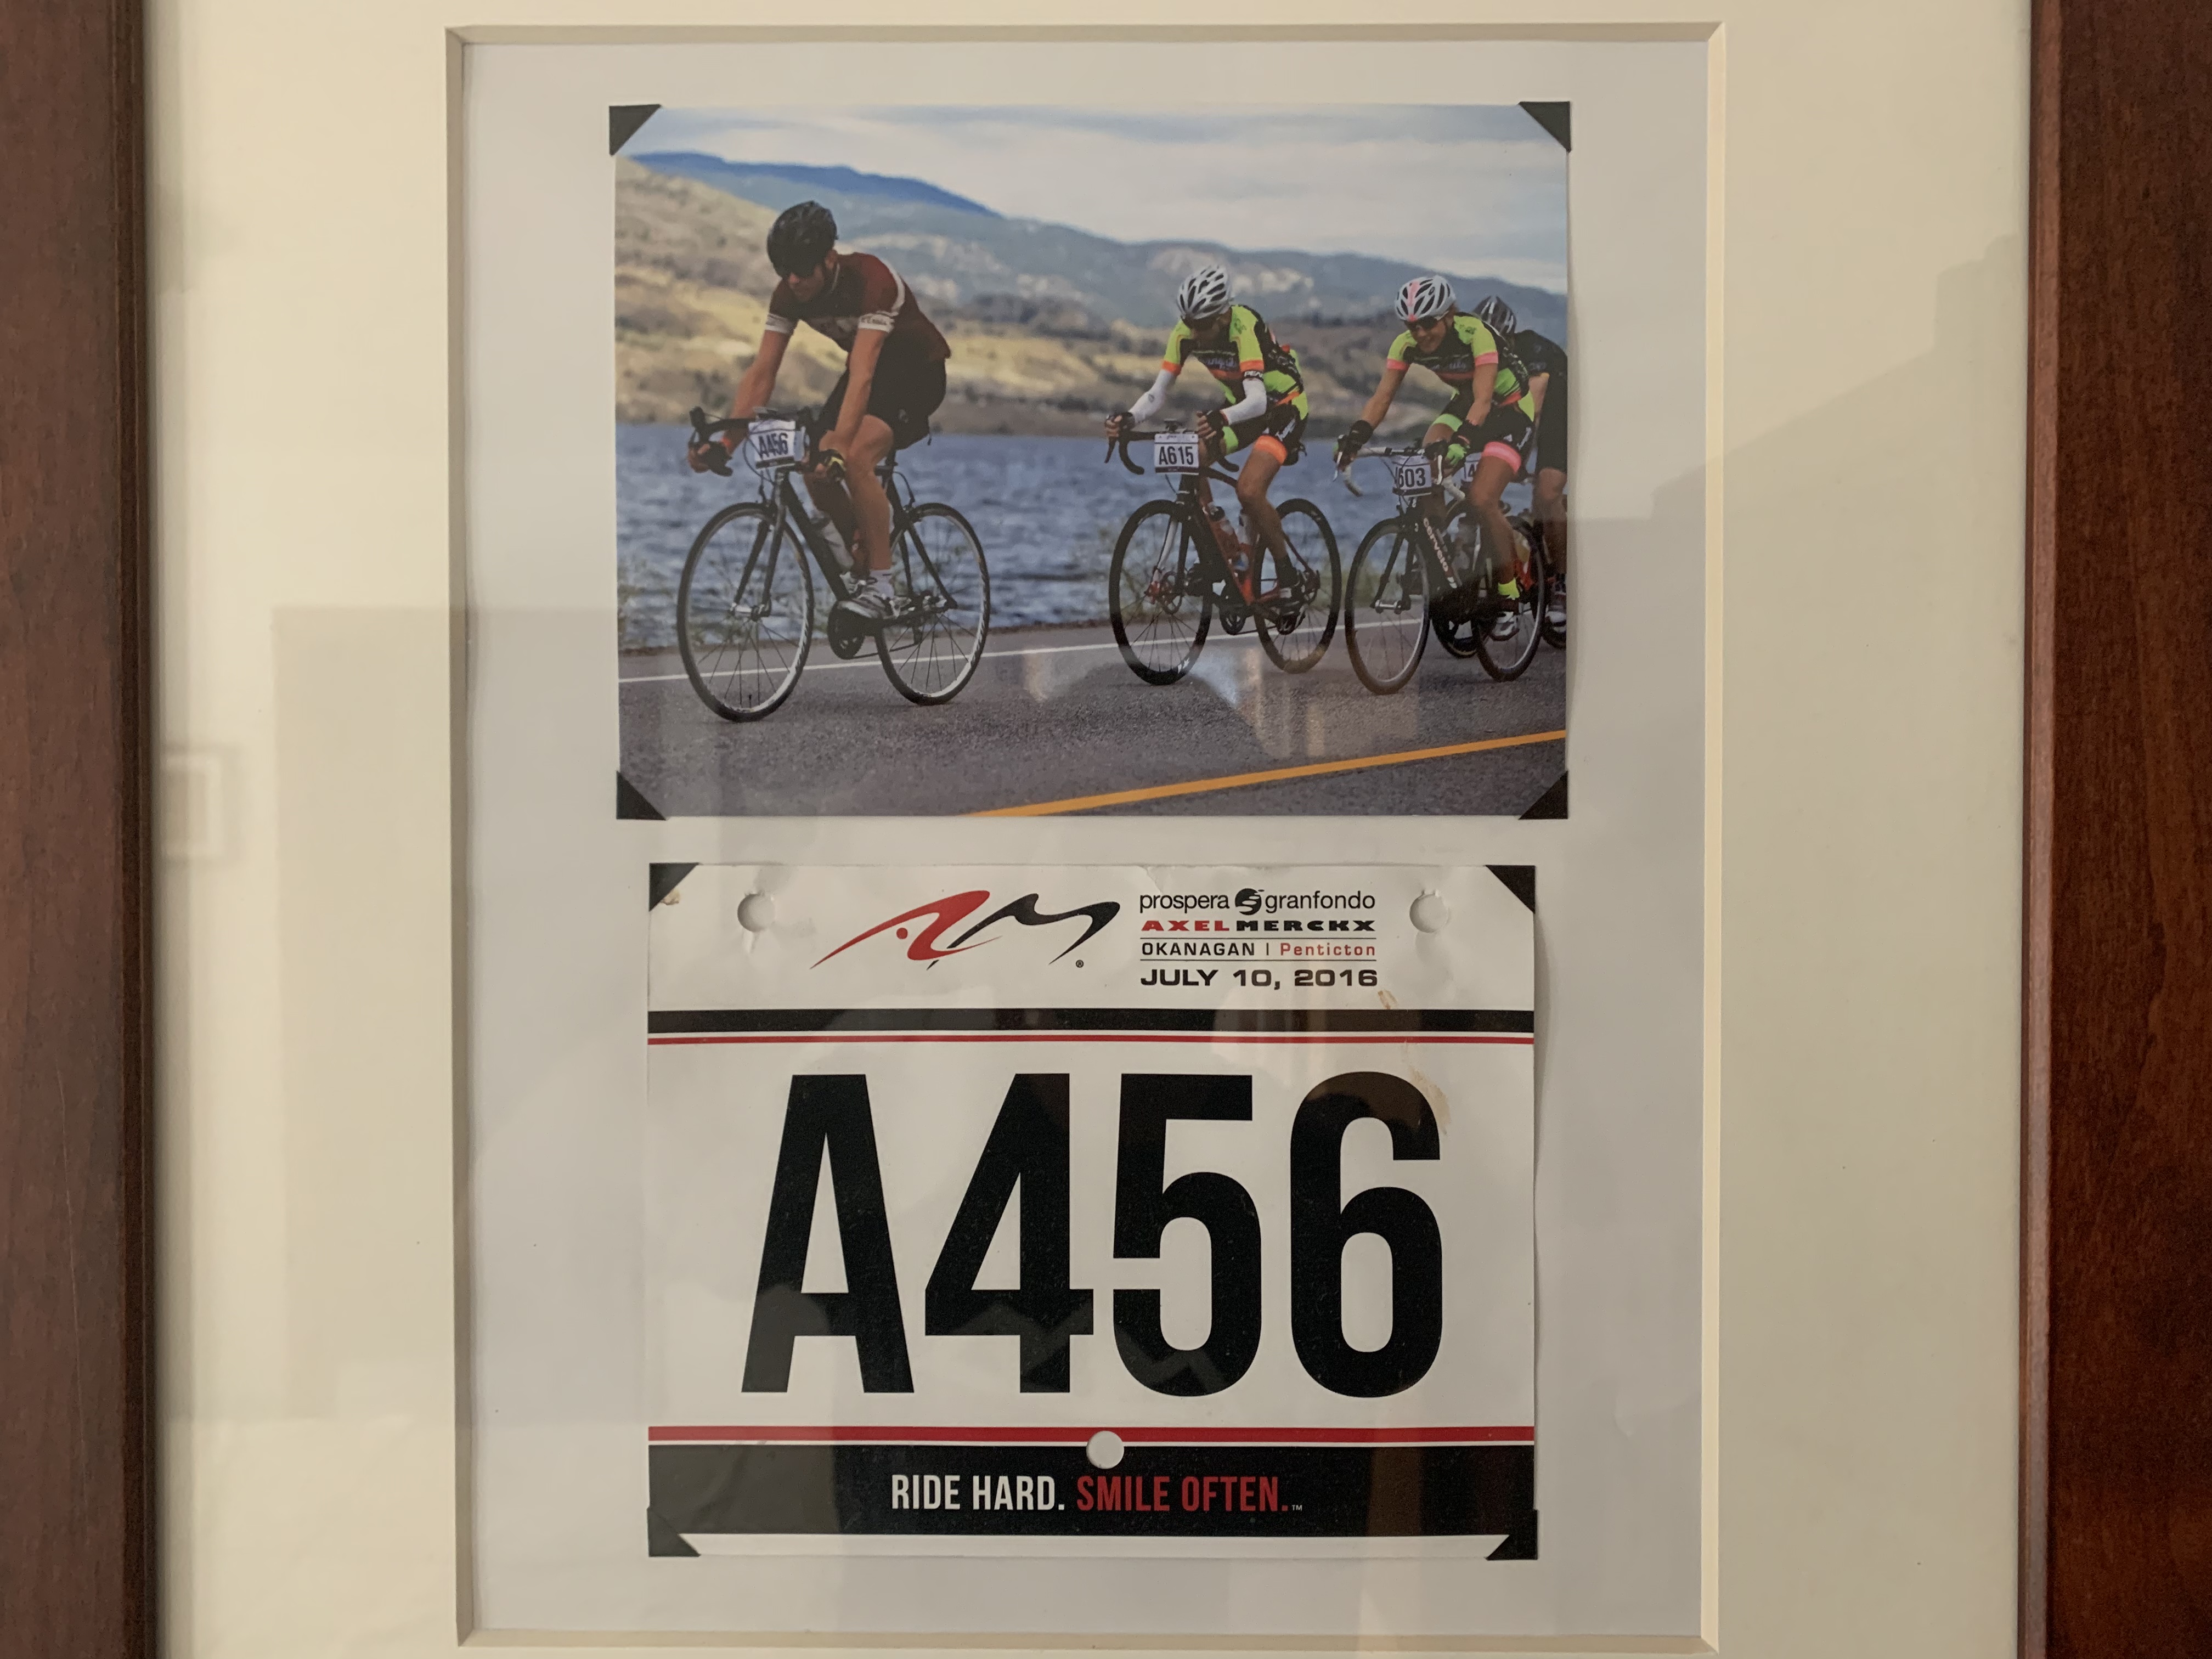
Having ridden Dave’s Ride Granfondo, Penticton Axel Merckx Granfondo, and Whatshan Granfondo here’s my strategy to prepare in just 8 weeks.

This will help anyone who’s able to ride about 30km’s on the bike – but hasn’t trained much beyond that.

A Granfondo is 160 kilometers in length and will take most riders anywhere from 4 to 8 hours to complete.

You need to train your body for endurance rides. If you’re not used to sitting on a bike for that length of time the body can begin to become sore. We usually think of training our legs for bike rides. But it’s the shoulders, back, arms, hands and core muscles that need to become accustomed to the duration.

So the best and simplest way to train for that is simply going for long, easy endurance rides.

Don’t worry about strength training. Your legs will get stronger simply by riding longer. Every time you encounter a hill, another rider, or wind you’ll be recruiting more muscle. Also, if you’re like me, as soon as the gun fires and you’re off – you’ll find you have plenty of strength.

Month 1

So, instead of focusing on short, high-intensity, muscle building rides. We’re going to focus on one long endurance ride per week. With consistent 1hr to 2hr endurance rides between.

Week 1: Start easy

You’ll be surprised how fast your body will gain momentum. So there’s no need to rush into long rides, doing that will just put you into the hurt house and push back your training progress.

Ride every other day. Doing 20km to 40km rides – easy to moderate intensity depending on how your legs feel.

Complete the week with 1 longer ride. Roughly 60kms.

Stay hydrated. My other tip is to not fuel during rides. Why? Because you want your body to learn how to burn fat for fuel, which is essential for long rides. Drink water with electrolytes, but avoid the sugar.

Week 2: Endurance Repeats

Continue riding every other day – again doing 20km to 40km rides. Join group rides. Have fun. There’s no right or wrong when developing endurance. You’re simply training your body to get accustomed to sitting on the bike and your heart to get used to less recovery.

Complete the week with 1 longer ride. Roughly 70-80kms.

Week 3: Endurance Repeats

Because you’re focusing on endurance rides you’ll find your body isn’t crazy fatigued. You can keep building.

Ride every other day. Doing 20-60km rides.

Complete the week with 1 longer ride. Roughly 80-100kms.

Week 4: Endurance + variety

You’re doing great now. You’re building confidence. The longer rides feel a bit uncomfortable. And that’s a good thing. Your body is getting stronger.

Ride 3 days in a row. This week we want to train the body to switch it up. On the 3rd day where you are riding 30km’s do mini hill sprints on every hill you face. If it’s wind sprints, that is good too.

1st ride medium 30-40km.

2nd ride easy 30km.

3rd ride include sprints 30km.

Take a day off.

4th ride do an endurance 100km endurance ride. (Fuel during the ride)

5th ride 20km easy recovery ride.

Month 1 is done!

Amazing work. You’re picking up steam. Your body is probably feeling really healthy. A bit tired, but any pain you feel now are the muscles getting stronger. Take two days off the bike. It seems like a lot, but recovery is how your body gets stronger.

If you’re not improving fast enough, it’s because you’re not recovering enough. When you take a couple days off you’re not just giving your legs a break – you’re giving your a heart a break too.

Month 2 begins

You may be feeling concerned that you won’t be ready in time. You’ve trained for a century but need to get used to riding a granfondo. Have no fear.

Aerobic sports work in the rule of 3. If you can ride 30kms 3 times per week. You can do a 100km ride on the weekend. It’s 3 times as long, but your body is actually able to do it. If you can ride 60kms 3 times per week you are ready for a 120+ km ride. The body just works this way.

You already built up to a 100km distance in your first month’s training. So your body is capable of 160km ride – it just will be uncomfortable. We’re going to keep training so it’s fun.

Week 1: Endurance + variety

Your body is capable of more now. So do more. It will benefit you.

You’ll want to do 3 rides in a row every week. Between 30-70kms in length. Do what feels right. If they are all 30km you will still be good. Make sure to include hill sprints in your 3rd ride. If you have a friendly and competitive group ride, make that your third ride. You want to put the body in a training situation where it is learning to adapt.

4th ride easy.

5th ride 120km (fuel during the ride)

Week 2: Endurance + variety

1st ride recovery

2nd ride 30-40km

3rd ride 30-70km include hill sprints

Take a day off

4th ride 140km (fuel during the ride)

Week 3: Endurance + variety

You’ve ridden 140kms and you’re ready for a granfondo. Your body is used to the distance. At this point you may be feeling strong and ready or the opposite and tired. Either way we’re going to take 3 days off the bike. You read that correctly. Recovery is your friend. You’ve done the hard work – this is how you will improve faster.

3 days recovery.

1st ride recovery

2nd ride easy 30-60km

3rd ride easy 30-60km

4th ride 160km (fuel during the ride)

Well done! You’ve officially ridden 160km. I bet you feel tired but amazing. You know you have the legs. Your body is getting used to this. Now hydrate, drink a beer and refuel.

Week 4: Recovery

Your event is in 7 days – so you may be tempted to keep riding to stay in peak shape until the day of. Or you may want to show your friends how strong your new legs are at a group ride. Don’t do it.

Pros stress their body in a way to keep peak fitness. But they are starting from a baseline of being able to ride 160km. You’ve just built up a lot of fatigue. Which is incredible. So you’re actually already where their bodies will need to get. Now it’s time to allow your body to recover so that it is at its peak strength for the event.

1st ride recovery (easy) – we’re simply clearing lactate

2nd ride recovery (30km easy) – we’re still clearing lactate so take this easy

Now get off the bike. You’re going to rest for 3 days off the bike.

3rd ride – the day before your event do a really easy 1hr ride – and I mean easy. Your body is still recovering. It may even feel stiff after a few days off the bike. You’re simply clearing that stiffness out while ensuring you have as much of your glycogen stores available – as possible.

Your body knows what is coming next. A long endurance ride. It’s storing the fuel it needs. Hydrate well before the event. Starting an event hydrated can make the difference of 30 minutes (or more) over a long ride.

Day of Your Event

Pack everything in advance. Make a list, check it twice. Have it all ready at the door. Fill your water bottles with water, electrolytes and Gatorade. Bring a banana, a few gel packs, and something that’s easy to swallow with substance like banana bread.

You’re ready!

Congrats – you just had the ride of your life. You trained in only 8 weeks and set a PR. Amazing!

Couple notes:

Hydration – I cannot stress enough the importance of hydration and recovery. Drink lots of water, get salt in as well, this will make your training much more effective and your recovery faster.

Nutrition – You know what food your body runs best on. Eat that. The cleaner you choose to eat the faster your body will train to burn fat as fuel – the faster you will be ready for a long endurance ride.

Rest – Rest is really important. Take it seriously. When you are riding your muscles are tearing and breaking down – this is signalling to your body that they need to get stronger. It’s the rest that makes them heal fastest and get stronger.

Fuel – Eat the same foods on your long training rides that you will on the event. While you will want to train without fuel on your short rides (it simulates riding longer as you have to burn fat as fuel), it’s important to train your body with fuel on your long rides to maximize the gains you get from them. And by using the same fuel as you take on race day you know how your body will react to it.

Weather – Some events are in the wet and cold. Others are in the heat. It’s hard to plan for this, but if you know that an event is typically in the heat or typically in the cold, do some rides in conditions that you will best replicate your event. This will better prepare your body for these conditions.

Final thoughts:

This is the training program I am following as I train for my upcoming event. I am starting week 2 of this plan. Yesterday I road 80kms (I misjudged the length of the route so I got a bonus 20km ride). Your body will get better a lot faster than you expect. And be sure to listen to it. If it needs an extra recovery ride in a week, take it.

If for some reason you weren’t able to train for the full 160km prior to the event… have no fear. Granfondos tend to be group rides. Riding in a big group is a lot of fun and time flies quickly. But it also is easier than riding solo. You save upwards of 20% of your energy riding in a group. So you’re actually more prepared for than you realize.

All the best out there.

Categories
Adventure Vehicle Journal

From the backyard to the backcountry – the start of an adventure vehicle

For the past year a 2009 Subaru Forester 2.5XT has sat stored at our property. It was my folks and then my younger brother drove it until he got married last year and moved to the UK. It needed some work so they offered it to us. I had other things I’ve been working on… and there it sat largely forgotten.

Categories
On Vehicles Resource

Off-roading terms and definitions

Often confused and misused – Here is a list of the most common off-road terms and definitions for your reading pleasure.

Off-road
\ ˈȯf-ˈrōd \

A vehicle being designed to operate away from public roads. First known use of the word off-road was in 1954. [Merriam Webster]


Off-roading
\ ˈȯf-ˈrōd′iŋ \

Off-roading is the activity of driving or riding a vehicle on unsurfaced roads or tracks, made of materials such as sand, gravel, riverbeds, mud, snow, rocks, and other natural terrain. Types of off-roading range in intensity, from leisure drives with unmodified vehicles to competitions with customized vehicles and professional drivers. [Wikipedia]

Let’s dive into common types of off-roading

Overlanding
\ ō′vər-lănd′iŋ \

Overlanding is self-reliant overland travel to remote destinations where the journey is the principal goal. [Wikipedia]

Overlanding


Trail Driving
\ ˈtrāl ˈdrī-viŋ \

Off-pavement driving on a track or thorough-fare across land or snow. These travel-ways are established routes through the wilderness and are either constructed or created over time through use. Trails can be maintained or unmaintained and have varying degrees of difficulty. Some trails may be so remote they haven’t been used in years. Yield right of way to hikers, cyclists, horses and non-motorized vehicles. [Americantrails.org, Driving Line]

Trail Driving


Green Laning
\ ˈgrēn lān \

Green laning (or two-tracking) is a leisure pursuit, generally suitable for any four-wheel-drive vehicle, even those without modifications or additional equipment. The term green lane refers to the fact that the routes are predominantly along unsurfaced tracks, forest tracks, or older roadways that may have fallen into disuse. [Wikipedia]

Green Laning


Car Camping
\ ˈgrēn lān \

Day trips or weekend trips where the goal is camping where you park – whether in a tent or in the vehicle. Often confused with Overlanding. With Car Camping the destination is the goal. With Overlanding the journey is the goal. Car Camping is a single trip. Overlanding is a longer journey traversing a route. [4xoverland]

Car Camping


Rock Crawling
\ rŏk krɔːl \

Rock crawling is an extreme form of off-road driving using specialized vehicles ranging from stock to highly modified to overcome obstacles. [Wikipedia]

Rock Crawling


Mud Bogging
\ mŭd ˈbɒɡɪŋ \

Mud bogging (also known as mud racing, mud running, mud drags, or mudding) is a form of off-road motorsport popular in Canada and the United States in which the goal is to drive a vehicle through a pit of mud or a track of a set length. [Wikipedia]

Mud Bogging

Dune Bashing

Dune bashing is a form of off-roading on sand dunes. [Wikipedia]

Dune Bashing

Gravel road
\ ˈgra-vəl ˈrōd \

A gravel road is a type of unpaved road surfaced with gravel that has been brought to the site from a quarry or stream bed. They are common in less-developed nations, and also in the rural areas of developed nations such as Canada and the United States. [Wikipedia]

Related types of roads include Forest Service Roads and Logging Roads.

Gravel Road

Wheeling
\ ˈ(h)wē-liŋ \

Slang term for off-roading.

Four-Wheeling
\ ˈ(h)wē-liŋ \

Traveling in a vehicle using four-wheel drive.


All-Wheel Drive Vehicle (AWD vehicle)
\ ˈȯl-ˈwēl- \

An all-wheel drive vehicle (AWD vehicle) is one with a powertrain capable of providing power to all its wheels, whether full-time or on-demand. [Wikipedia]

The most common forms of all-wheel drive are:

4×4 (also, four-wheel drive and 4WD)
Reflecting two axles with both wheels on each capable of being powered.

6×6
(also, six-wheel drive and 6WD)
Reflecting three axles with both wheels on each capable of being powered.

8×8
(also, eight-wheel drive and 8WD)
Reflecting four axles with both wheels on each capable of being powered.

Vehicles may be either part-time all-wheel drive or full-time: [Wikipedia]

On-Demand AWD (also, part-time)
\ ˈȯn di-ˈmand \

One axle is permanently connected to the drive, the other is being connected as needed.

Full-Time AWD (also, permanent)
\ ˈfu̇l-ˈtīm \

All axles are permanently connected, with or without a differential.

Independent AWD
\ ˌin-də-ˈpen-dənt \

The wheels are driven, but not dependent on a central mechanical power coupling.

SUV – Sports Utility Vehicle
\ ˌes-(ˌ)yü-ˈvē \

A rugged automotive vehicle similar to a station wagon but uses the body-on-frame chassis. [Wikipedia]

SUV

Crossover SUV
/ ˈkrôsˌōvər ˌes-(ˌ)yü-ˈvē /

A crossover, crossover SUV, or crossover utility vehicle (CUV) is a type of sport utility vehicle-like vehicle built with unibody frame construction. [Wikipedia]

Crossover SUV

Truck
\ ˈtrək \

A wheeled vehicle for moving heavy articles. [Merriam Webster]

Truck

Rock Crawler
\ rŏk krɔːlr \

Purpose-built 4×4 vehicle to crawl over rocks and boulders. [Quadratec]

Categories
Essays On motorcycles

Honda CB500/550 and the soul of Honda 1971-1978

Recently I’ve become fascinated by the story of Honda’s CB500 and CB550, having recently acquired one. Read reviews and road tests of either bike and you see a statements like Motorcycle Mechanics “one of the ‘show stealers'”, or Motorcyclist magazine’s “possibly the best all-around street bike on the market.”

CB500 four superbike

1975 Honda CB550 Four

Yet, while the story of the CB750 is well known, Honda’s 500cc series remains largely unassuming, almost exotic, except to motorcycling enthusiasts and those that remember it from the days of their youth.

Wipe away the dust and an intriguing past emerges.

The saga of this bike starts in the 1940s. An era whilst European motorcycles were leading the world when it came to performance. British and Italian bikes like Norton and Moto Guzzi were dominating The Isle of Man TT race, the most prestigious motorcycle race in the world [1]. The two American brands of the time, Indian and Harley Davidson, meanwhile were building the now iconic big engined and slow revving steads.

Then came the seventies. Marked by the quintessential sports cars, classic sport bikes, fast-living rock stars and legendary guitar solos. While rock’n roll was moving motorcycle innovation wasn’t. Fast forward half a century to modern days and it’s hard to imagine a time when companies weren’t innovating products at a relentless speed. We’re surrounded by tech centric companies. In the pre-personal computing age however, this was far from common.

When the young company Honda emerged in 1946 with the long and official name of Honda Technical Research Institute it was clear that engineering would be its DNA. Japan has a deep-rooted history of excellence in craftsmanship. Samurai swords like the fabled Katana blades were folded up to 10 times by smith workers removing impurities and forming thousands of layers of metal bonded together. In Japan there exists a culture that looks for perfection in the harmony of the parts that make up the whole. In other words, a machine must be designed to work in harmony with itself to perform most efficiently. And founder Soichiro Honda was gripped by this and desired to engineer the perfect machine.

And a Honda 500 series motorcycle engine seems to exemplify this.

“First, there was its bloodline. If you were a racing fan of – and particularly a fan of Mike Hailwood and his screaming red-and-silver Honda GP bikes – there was a certain amount of magic in that half-litre displacement. Real GPs were 500s, and the displacement had a lean competition ring to it.”

~ Cycle World

Cycle World


Honda released the 500 in the early 1970s, “Injecting a massive dose of technical class and good motorcycling into a rather ordinary collection of mid­sized street bikes.” Exclaimed Cycle Magazine.

Almost as quickly as they left the factory floor in Japan the CB500s and 550s were being modified as cafe racers or gentleman’s expresses. Cycle World recorded that the, “Good looks and good handling made the 500s and 550s the darling of the cafe-racer crowd.” As if their real purpose, their calling, was competition. Fortunately, the engine was more than capable. The CB550 is easily modified to rev at 11000 plus RPM. “Several CB500 machines were entered in the Production TT races on the Isle of Man in the early 1970s.” Bill Smith road the CB500 to victory in 1973 – 8.2 seconds ahead of his rival. [1]

In 1974, Cycle World Senior Editor D. Randy Riggs prepares to launch the Honda CB550 at the now defunct Orange County International Speedway

When the young company Honda emerged, the Isle of Man was clearly on everybody’s mind. Founded by Soichiro Honda and Takeo Fujisawa in the late 40s. Honda made its first appearance at the Isle of Man in 1959. Then in 1961, just over a decade since their formation, they won the first 5 positions in each of the 125cc and 250cc categories. An unprecedented rate of success and a sign of what was to come.

Soichiro Honda was inspired by racing and passionate about engineering. Honda believed racing was the springboard to technological advancements [2]. He is cited as saying, “If Honda does not race, there is no Honda.” [3] In their formative year, Takeo Fujisawa joined Soichiro Honda, handling the companies business matters. Honda was able to spend his days in the factory and research laboratory.

Honda motorcycle research analysis of the 1970s

With race engineering driving their designs and finding their way into production, their engines became better and more reliable [4]. Honda’s began upsetting the status quo. “They were built like a fine watch. Incredibly durable, fun to ride.” Selling his Norton for a Honda, Peter Egan, Editor-at-Large of Cycle World shared, “When I got the Honda all of a sudden I felt I could look at the map of the United States and go anywhere.”

Brooklyn Dodgers manager Walter “Smokey” Alston road a Honda. As did Steve McQueen – a man known for his riding abilities.

Steve McQueen and Neile Adams with their Honda motorcycle

“[Soichiro] Honda was the kind of guy where the engine was the heart of everything,” shared Thomas Elliot, then Executive Vice President of Honda U.S.

And Honda was winning races in the Grand Prix on an inline four 500cc engine. That was until the Grand Prix brought in new rules restricting all classes to six gears and most to two cylinders (four cylinders in the case of the 350 cc and 500 cc classes), Honda joined a mass walkout and didn’t enter the Grand Prix again for the next ten years.

Honda racing pre 1967Clearly, however it was Honda and they had plans of one day returning.

The 500cc engine was the king of the GP. And Honda, passionate about innovating a race machine, didn’t have a 500cc inline four engine to develop in their model range.

That was until 1971 when they released the CB500 Four and shortly after the updated CB550 Four in late 73.

Yoshimura an engineer, who lead Honda back to their return to the GP in 1979, was a staunch advocate of the four-cycle approach. “Four-stroke engines,” he said, “have distinctive mechanical processes. The (intake) valve closes tight, combustion occurs, the exhaust valve opens, and the exhaust is released. It’s a sequence of independent processes, each with a different function, working together to facilitate the engine’s entire operation. This is really fascinating, from an engineering standpoint. I believe this mechanism will be the basis of further advancement in engine technology.”

Yoshimura joined Honda in 1972 and was determined, “to create something that would represent the very best in technology. We were determined to create an engine to surprise the whole world.”

The CB500, with a top speed of 115 mph [6], was already a great bike and was well received by reviewers. Cycle Magazine called it, “The thinking man’s motorcycle.” So it was unexpected when in 1973 when Honda released the upgraded 550cc engine. It was the same frame with the same classic sport styling, same tank design, similar weight, same engine case, but with a larger displacement engine.

But the surprise was appreciated.

CB550 unquestionably the king of mid-sized superbikes

In a June ’74 road test, Cycle World praised Honda for making the best middleweight better [7].

But engine size wasn’t the only thing upgraded. Honda’s racing and engineering fingerprints were evident on the CB550. The front forks and hub were designed for bolt on dual discs, stock. Something early adopters of the CB550 made quick use of. And there were other, less evident, improvements as well. Such as an improved clutch and uprated rear suspension [5].

Peter Watson and Graham Sanderson of Bike Magazine wrote, “We believe the CB550 provides one of the finest balances between performance, economy, and handling quality in today’s motorcycling arena. That may sound like a tribute normally reserved for two-grand plus machines, but we thoroughly enjoyed the CB550 and consider it to be one of the better bikes to emerge from Honda’s design team in recent years.”

“They embraced a kind of architectural classicism that paid tribute to both British and Italian design, with just enough Honda thrown in to reassure those who hated walking”
~ Cycle World in reference to the CB500 and CB550

CB550 four
1974 CB550 four

It’s interesting when you consider that the CB500-550 series lasted between 1971 to 1978. Ending the year before Honda returned to the Grand Prix circuit.

The 500 series soul is its engine. Its beauty is its classicism. Its charm is its faithfulness. And its legacy is its timelessness.

Honda’s spirit was in engineering and advancing the engine. The 500cc was the pinnacle of Grand Prix racing. Perhaps, without the rigorous racing of the GP, Honda needed another way to test and develop their 500cc “heart” that would eventually see them return to the Grand Prix and their roots.

The CB 500/550 series represents the very soul of Honda.

“A machine that has earned a reputation for sporty performance, precision handling and virtually faultless reliability.”


Categories
Essays On motorcycles

The 1970s Honda CB-550 sport bike and the surprising parallels with the Porsche 911

In the dead of winter I purchased a 45 year old motorcycle. My neighbour helped me pull it out of my snow shovelled trailer. An older gentleman, he seemed surprisingly at ease as he guided it down over the harden ice. He shared how seeing the motorcycle brought him back.

But the bike looked in rough shape. It had been used in a movie shoot and they had wanted the appearance of a worn bike. I fired it up for him so he could hear the engine roar and the look in eyes said it all. “I didn’t expect that,” was all he said.

A 45 year old motorcycle, that looked like it was 45 years old, that ran beautifully at the first start of a button. That’s good engineering. Honda has left its mark.

When I first heard Honda’s CB 550 sports bike engine compared to that of the Porsches 911 sports car I was skeptical. Being a longtime admirer of the 911 this suggestion remained on my mind. And I wondered if a motorcycle and a car had anything in common. When considered from the engines of its day perhaps the analogy could make sense.


It was a well received engine. At 423 lbs dry weight it was lighter than the bigger engined sports bikes of the time and with a reduced wheelbase it was reviewed to handle well. Bike magazine reckoned there were several reasons for preferring the 500 series: ‘For starters the 500 is a lighter machine with a shorter wheelbase. It therefore has a better power-to-weight ratio than its bigger brother and, significantly, it handles better through the curves. In fact, the 500 is faster up to 60mph in a straight line and its 80mph only a fraction of a second behind the 750.’

The CB-550, unlike the model it was to replace, the CB-500, wasn’t widely exported until later models. Being first introduced to the US in 1973 and then later to Europe as the F version in 1975. Brazilian test rider Marcos Pasini wrote, that while the CB 550 Four was not officially exported to their market, the CB 550F was well received and that the CB 550 Four would have been as well by fans of the 500.

Honda published that the CB 550 featured “A new clutch. Smoother shifting. Free-valve front forks. Hydraulic front disc brakes … and we’ve increased the final reduction ratio for greater acceleration.” Upping the engine capacity by 10 percent, the CB 550 offered the same blend of performance and civility when it first arrived in the USA in late 1973. Making it the ideal base for a lightweight racer that could do the Ton, stock. The CB 500/550 remained a bit of a secret gem, preferred by cafe racers and used as “gentleman’s express” as featured in the 1975 edition of Cycle magazine.


Today people continue to enhance the performance of these bikes. And lately there’s been a revival of interest in the middleweight champion in large part because of the engine, the lower center of gravity, and yes its good looks.

1978 CB-550A quick glance at some of the threads on the cafe builds and you will see exactly what I mean, “I think custom 550’s have the most beautiful proportions.”

“Interesting. Different. Nicely engineered. CB550 motor. Bloody brilliant.”

“That bike is sweet! My CB 500 is nice and safe in my shed and has been for years, I first customized it as a cafe racer in ’85 as a young man, maybe it’s time to give it a birthday, after seeing this awesome bike I certainly feel inspired.”

As a 1970s sports bike, the design epitomized the look and stance of the sport bikes of its day. Further the engine was shorter than the CB 750’s which meant the center of gravity was lowered – which for handling is a good thing. So the 1970s Honda CB 550 sports bike has three elements in its favour. An handsome appearance, a well engineered engine, and balanced cornering. Like the Triumphs of the 60s and the Nortons of the 50s the Honda CB 500 and CB 550 embodied the spirit of the era. Sporty performance and charming looks.

I’ve loved Porsches long before their sudden rise of popularity lead them to be the collectable they are today. To me they are the quintessential classic styling of the 60s and 70s. Beautiful, elegant, and minimalistic.

Much like, in fact, the minimally styled Japanese and European sports bikes of the 60s and 70s.

Porsche 911

Subtle cues such as the shape of their windows, the proportion of the rear spoiler, and the round lights work together to enhance the overall design. Porsche seemed to get the balance of chrome with the 911 just right as well, using it to guide the eye along edges and curves. It’s something you see too with the CB 550. It’s a very well considered design. And both the Porsche and CB550 have a community of builders dedicated to either customizing or restoring them. Singer and Magnus Walker come to mind.

CB 550 side view


The Porsche has an incredible racing heritage. Something Honda motorcycling shares. And like Porsche, private teams raced CB 550s and people continue to modify and race them in today’s vintage editions.

Until 1998, the 911 was an air-cooled sports car, modified by private teams for racing and rallying. Then by the mid 1970s it really came into its own. Winning the Targa Florio, 24 Hours of Daytona and then the 24 Hours of Le Mans in 1979. But what really sets the 911 apart is the classic styling, beautiful silhouette, and the marmite-like polarizing love/hate relationship by car enthusiasts.

The 911 was developed as a larger more powerful replacement of the Porsche 356.

Porsche, like Honda, developed both racing and production models of their vehicles. And the 911, like the CB550, was in their sports model range. And while Porsche become iconic for the sports cars of the 1970s, Honda became iconic for the sports bikes of the same era.

The Porsche 911 and Honda CB 550 were both considered engineering marvels of their time. When compared with a Ferrari, the 911 had a smaller engine, with a 2.0L (1,991 cc) 6 cylinder flat engine, yet Porsche decided to buck the trend with their rear engined flat 6. Yet, despite all logic the rear mounted engine would continue to win races. Similarly, while others were making 2 stroke 500cc sport bikes, Honda chose to engineer a 544cc 4 cylinder. As a result both were anomalies, both were lighter with excellent handing, both generated higher than expected power to weight ratios, and both were well suited for the race track.

Yet, where the CB 550 really stands out is the displacement to power ratio (DTP). The more power an engine can generate for its size and weight the faster it can make you go. Hence, the reason engineers try to make engines with smaller DTP ratios.

The CB 550 develops 50 horse power (HP) at 8,500 RPM. In other words, it utilizes 10.88 cc to put out 1 HP. Giving it a DTP of 10.88.

The Ferrari Dino 246 GT (1968-1974) had a 2419 cc engine putting out 193 HP. A DTP of 12.5.

And the Porsche 911?

Well, that produced a DTP of 13.7 from 1973-1989.

Surprisingly it took Porsche another 40 years before they released the 911 Carrera with a DTP of 9.96.

Honda’s CB 550 engine really was an engineering marvel. Even BMWs highly desirable R90/6 with its 898 cc engine producing 67 HP didn’t come close with its DTP ratio of 13.4.

Personally, I like the 70s sporty aesthetic of the original Honda CB 550s and 500s. There’s a certain symmetry and charm to their stature. I also understand one’s desire to modify it. The CB 550 engine offers a surprising punch and with simple weight reduction and some changes to the gearing and foot positioning can be converted into a very formidable racing machine that harkens to the days gone by.

When I catch a glimpse of a Porsche 911 passing by I find I’m drawn to it. It has an appearance that sets it apart. Comparing a motorcycle of the 70s with a car that continues in production today is a far stretch to say the least. Yet, from a merely observational perspective, the parallels are undeniable. With engineering at the heart of both machines, both replacing outgoing models, both perhaps representing the best of the engineering of their times, and both classics are immediately recognizable and iconic of their era.

Categories
Essays On Intelligence

The truth about burnout

It was a bright sunny day. Sitting at my birch wood table overlooking the back yard, I could the see the light streaming in to the kitchen. I remember the time of day, it was just about 11am, as I sat coding on my laptop.

I felt a sense of urgency to push code.

But a cloud began to form in my mind as I strained to make sense of the screen. It wasn’t that it was complicated. I had experienced small moments like this numerous times before. Usually it followed long stretches of coding, often many days in a row. So assuming I needed to rest my mind for a minute I looked away to give myself a few seconds of rest. Looking back at the code the fog returned. Again I took a break. I remember waiting exactly 5 minutes. That should be plenty of time. But the fog became worse. Within minutes it was like I was looking at greek. I couldn’t make sense of it.

That was 7 years ago. And I’m pleased to say I’ve been symptom free for about 6 weeks.

If you’ve faced this type of scenario I’m happy to say that it’s completely possible to recover from burnout. Commonly referred to as Brain Fog.

There isn’t a lot of information available on burnout. When I first experienced it I didn’t know what it was. I didn’t know why I was experiencing it. In fact I felt ashamed that I was unable to perform at my usual pace and kept it secret from my business partners and colleagues. I was embarrassed, valued performance, and afraid.

I’ve since learned that burnout comes from Hyperfocus disorder. Hyperfocus is an intense form of mental concentration [1]. In my case I didn’t have ADHD, or any of the other conditions sometimes associated with hyperfocus, I simply had little problem focusing while programming. I would get into the zone even in loud, disruptive, and emotionally charged environments. I was possibly a workaholic, a habit thankfully broken because of the symptoms of burnout. Not wanting to miss the NFL Super Bowl I would sit writing our application on my computer while cheering for my team of the match. I struggled to put my tasks aside.

The brain needs rest. It’s an organ, no different to the heart or lungs. It needs time to recover from strenuous use. Something I didn’t know or understand.

Symptoms that I experienced from burnout included:

  • Difficulty with memory recall. Any new information that wasn’t being used in the moment was almost immediately forgotten. While doable, this made project management challenging.
  • Nausea when eating. At one point I’d eat a bite, wait until the feeling of nausea would pass, before choosing to eat another bite.
  • Fogginess. This one is hard to explain, the ability to see things, but difficulty in making sense of what you are seeing. My eyes worked fine, but symbols and strings of commands weren’t instantly recognizable.
  • Logical arguments became extremely strenuous. I studied philosophy at UBCO, it was effortless to string arguments together. In debate one would often think of 4 or 5 arguments simultaneously. After burnout it became difficult to think beyond a single argument.
  • Hard to perform complex short-term recall. Similar to the above symptom, programming often requires holding a few thoughts simultaneously. One assembles the functions of the code in their mind prior to writing it. Then while writing code you may need to know how a module or controller works that you are referencing, remember all that occurred in the program prior to the code you are writing, and think of the possible scenarios that could occur to ensure you write bug free code. It became very tiresome to perform even the simplest of tasks.
  • Strategic debate was challenging.
  • Mood changes – this was subtle but I definitely noticed that some days I had to be very intentional with how I communicated with others. After mentally involved tasks I would become more abrupt and critical.
  • Difficulty recalling words and thoughts. I knew I had a word or thought in my memory, but unable to access it in moments of conversations.
  • Difficulty articulating thoughts. This was likely the most frustrating of all the symptoms. While I could hide the other ones behind a computer screen, as the owner of my company I needed to be able to communicate my thoughts around strategy. Unable to string together many arguments at once, it wasn’t an easy task and I left many meetings feeling frustrated.
  • Simple tasks like answering emails, writing posts, or maintaining support became challenging – even draining.

Extended periods of acute awareness and hyperfocus result in long term elevated levels of dopamine and norepinephrine. Dopamine is released by the hypothalamus in the brain. It is provides you with the motivation, drive and focus involved with attention. Think of it like your “motivation” hormone. Norepinephrine (noardrenaline) is a neurotransmitter found in the brain which has very similar in structure to the hormone epinephrine (adrenaline). It is a chemical involves in wakefulness, memory, alertness and generally readying the brain, and therefore the body, for action when it is being challenged or threatened.

Another chemical released during concentration is acetylcholine (ACh). ACh, acting through muscarinic and nicotinic receptors, it enhances attentional focus by modulating neural activity across sensory, prefrontal, parietal regions of your brain. ACh helps you make sense of what you’re focusing on. “In sensory regions, such as your visual cortex which is activated when you are focusing in the visual domain, ACh acts to increase the signal relative to the noise. More specifically it increases the strength of the relevant neural signal in the visual “receptive field” which represents your point of focus to make sure it is greater than the surrounding neural signals. This helps you to label which areas of your visual field are the most important, and to inhibit nearby distractions which may otherwise disturb your attentional focus.” [2]

Dopamine and serotonin are neurotransmitters. Neurotransmitters are made using amino acids. The thyroid which releases thyroxine plays a vital role in the regulation and production of dopamine. “Thyroxine has been shown to play the vital role in the production of stomach acid which ultimately helps to increase the level of dopamine in brain” [3]. Stomach acids are used to release amino acids from protein. These amino acids are then used to create the neurotransmitters.

Also, extended periods of increased levels of norepinephrine can lead to stress. “A significant part of the damage is due to the effects of sustained norepinephrine release, because of norepinephrine’s general function of directing resources away from maintenance, regeneration, and reproduction, and toward systems that are required for active movement. The consequences can include slowing of growth (in children), sleeplessness, loss of libido, gastrointestinal problems, impaired disease resistance, slower rates of injury healing, depression, and increased vulnerability to addiction.” [4][5]  Essentially too much norepinephrine puts you body into a stressed state.

Cordisol, a hormone released during anxiety and stress, in turns makes it difficult to focus and recall things.

Berkley scientists published a study showing the effects of stress on the white matter in brains.[6] In it they found that chronic stress triggers long-term changes in brain structure and function.

Sustained hyperfocus can lead parts of the brain to go dormant. Similar to tearing a muscle at the gym, a strong body can be over stressed and require months to heal. Also elevated levels of hormones associated with “fight or flight” cause the body to neglect import recovery and healing functions [7][8]. The body doesn’t like extended stress. It’s designed to survive and will do what it can to eliminate threats.

In my case a combination of extended hyperfocus, lack of exercise and an irregular sleep pattern created a threat to my body’s survival. The tragedy of errors resulted in increased anxiety, nausea, and parts of the brain being damaged.

I’ve got good news. The brain can and does recover.

One key to recovering from brain fog, burnout, and the symptoms that I described is to know there is no set time. I’ve read stories of people who have light symptoms recovering in months. Others, like myself, took many years. But I’ve remained optimistic, understanding that my mind was creating new pathways as I continued to perform my work.

In 2012 I began exercising consistently. Cycling was the first sport that seemed to mirror from a physical aspect the fatigue I experienced from a mental one. Cresting a mountain on a bicycle turned the physical pain of the climb into instant euphoria and accomplishment, which is usually followed by gratitude and awe. Today, I enjoy racing in cycling competitions. [9]

I’ve since read some fascinating studies on how endurance sports that stress the cardiovascular system actually release chemicals that not only promote recovering in the muscles but also in the brain.

Finally, I highly recommend being intentionally optimistic and grateful. It not only makes the recovery process significantly more enjoyable, but the brain is hardwired to respond to positive stimuli. Possibly there is a connection between gratitude and building a strong, healthy and resilient mind.

If you are going through the experience that I described, know that it will get better.