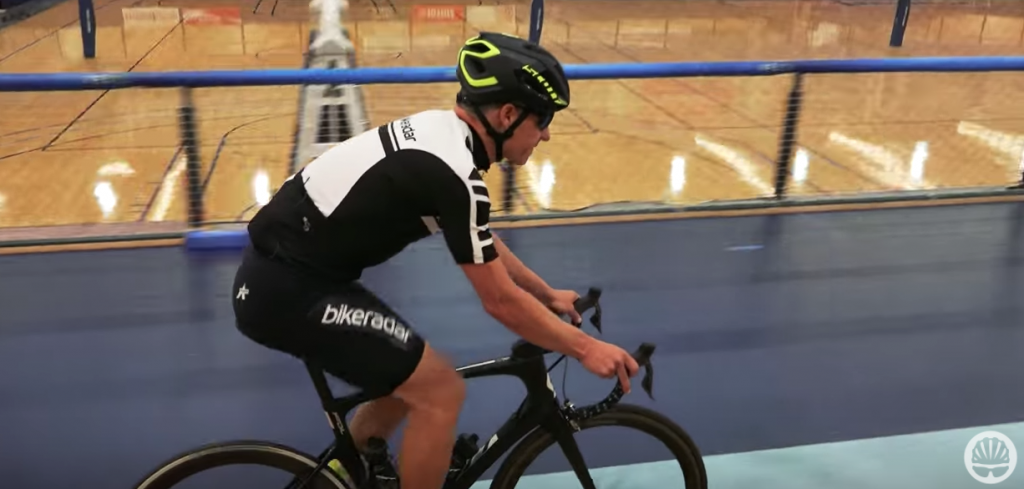
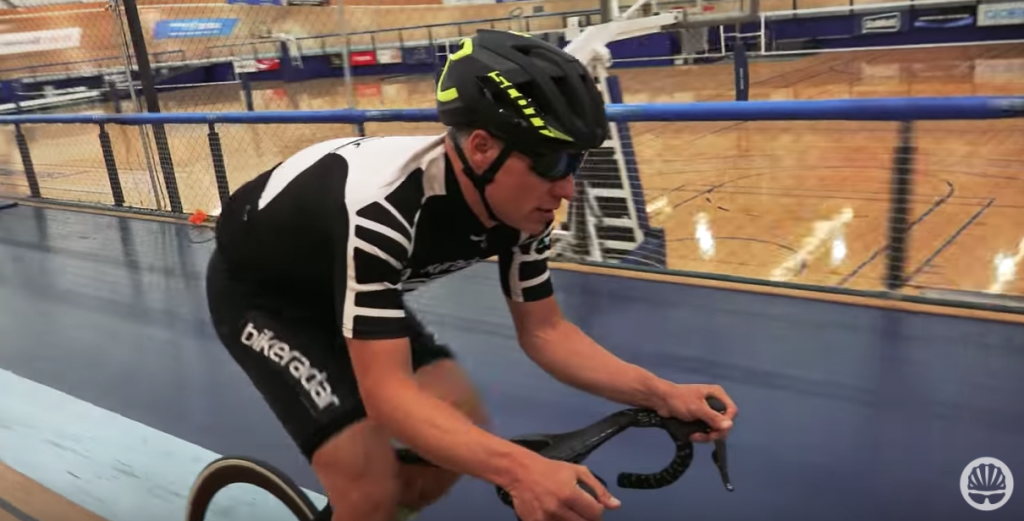
People love to point out that I’m riding Zwift Power – which simply means that Zwift is estimating the watts that I’m generating by comparing my speedometer sensor, cadence sensor and type of trainer. Zwift is multiplayer game for cyclists. It works by displaying an Avatar of you cycling as you pedal away on your home trainer. It’s great because not only does it make training at home fun, you can ride with people all around the world. However, to make the experience somewhat fair and realistic Zwift uses a rider’s power, weight and height to accurately determine their speed. Now, with all that data, you can suddenly race against any rider in the world on Zwift. And, as you’re likely realizing, hence the deal about Zwift Power.
A lot of cyclists get frustrated when they see other riders using Zwift Power in the races. They are working hard, their watts are showing an accurate number, but how do you know if Zwift is any good at estimating the claimed watts of the riders you’re competing against.
Now Zwift claims that they are pretty good. They say they’ve tested every trainer approved for Zwift Power and at worst it’s 10% off, depending on the condition or tolerance of your home trainer. Eric Schlange from Zwift Insider shared, “The good folks at ZwiftHQ put many hours into testing an entire room full of classic trainers back in Zwift’s early days (trust me, I’ve seen the room!)” However, from experience, they may need to test them again – which I’ll get into shortly.
Quick caveat: I have used both the CycleOps Hammer and Tacx Neo smart trainers with Zwift and can only compare power data with my classic trainer anecdotally using FTP efforts, Heart Rate and feel.
But, first another Eric, this one over at Zwift posted that perhaps it’s not simply Virtual Zwift Power that is inaccurate. “As for Smart Trainers vs Power Meters – it’s all on what they report. They tell us the wattage that is being generated, we use that data. Some power meters are more accurate than others and some smart trainers are more accurate than others.”
So, even if they have tested every smart trainer and classic trainer, there is still a lot of room for error. Which brings me to my experience.
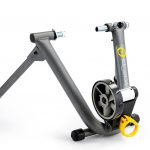
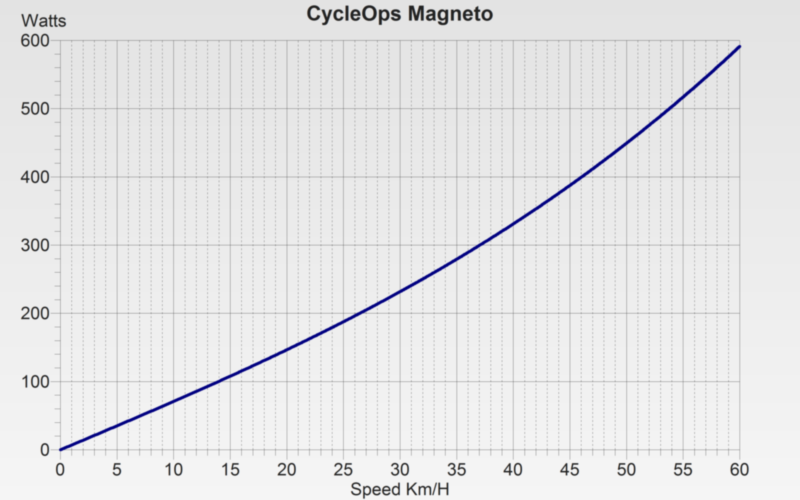
I use the CycleOps Magneto Trainer. It’s a simple lightweight magnetic turbo trainer. CycleOps posted power data of their trainer, which I then used to create a power curve graph with good ol’ pencil and paper.
Power Graph – Power verse Speed (KMs) (don’t laugh)
As you can see, according to CycleOps, it starts off with a curve and then becomes a very linear graph as the speed increases. This is something you can feel as well. So how does Zwift estimates compare with CycleOps?
Classic – CycleOps Magnetic Turbo Trainer (Update, here’s the power graph from the manufacturer)
So how does Zwift estimates compare with CycleOps data?
Well this was somewhat surprising. *Each speed interval was recorded on a Garmin 520 device and on 0 degree gradients in the Zwift world with ample time to compensate for acceleration/deceleration.
Kms/hr
Zwift Estimated Power
CycleOps Estimated Power
% Difference
23
195w
140w
+32.8%
34
320w
290w
+9.8%
40
412w
350w
+16.3%
48
490w
450w
+8.5%
64
550w
620w
-12%
Back to the caveat above. Before recording this data, I did notice when switching from smart trainers to the CycleOps Magneto trainer that Zwift seemed to be over estimating power when riding at 200w. I would recover much faster after efforts (HR) and it also felt too easy. However, on the other end of the spectrum, during hard efforts, they seemed to be more challenging on the classic trainer.
For example, on the Hammer and Neo power trainers it’s possible to spin above 1000w’s. However, on the CycleOps Magneto trainer Zwift caps power at 550w.
So my conclusion from this data is that Zwift overestimates power at the lower end by much more than their claimed 10%. For a rider with an average weight, they will have an advantage in the B, C, or D classes. Based on this test, riders using zPower have a disadvantage when it comes to efforts over 550 watts. Such as when sprinting, attacking or during spurts on hill climbs.
I hope you enjoyed this analysis. Please let me know if you have experience comparing a classic trainer with actual power data. What do you think? Is Zwift Power going to be an important factor to the future of Zwift races?
With riders publishing their stats to Strava and Garmin Connect, among other places, it’s becoming easier than ever to understand the gains available to cyclists. And more importantly to this post, it affords us the ability to compare real world aerodynamic performance with the claims made via wind tunnel testing.
According to data released by FastFitness (who compile the publicly available stats) the following image is a breakdown of factors that cause aerodynamic drag and frictional resistance on the bike. Let’s take a look a the top four.
Body mass drag accounts for 18.8% of overall losses and Specialized claims it is 80% of the total drag. Which makes sense. Next up, the handlebars and stem accounts for a whopping 14% of cycling losses. Did you expect that? Finally, third runner up is clothing friction at 8.5% followed closely by frame drag at 8%.
So what is all this talk of drag?
Drag, or resistance, is created when an object “breaks” the wind or has voids that create turbulence. This is why aerodynamic designs are so sleek looking. Recent improvements in cycling technology have largely been about reducing the amount of drag created by the bicycle.
So, the single biggest culprit of bicycle drag isn’t the wheels or the frame. No it’s the handlebars and stem. Any aerodynamic improvements made to ones handlebars and stem setup will therefore have the greatest proportional impact. Which brings us to todays post.
How many watts can you save with an aero Handlebar/stem setup?
Today we’ll take a look at the Handlebar and Stem. And there are two options given to modern road cyclists to improve their aerodynamic performance.
Slamming their stem.
Aero drop bars
As it’s probably the most considered option, let’s begin with number 1.
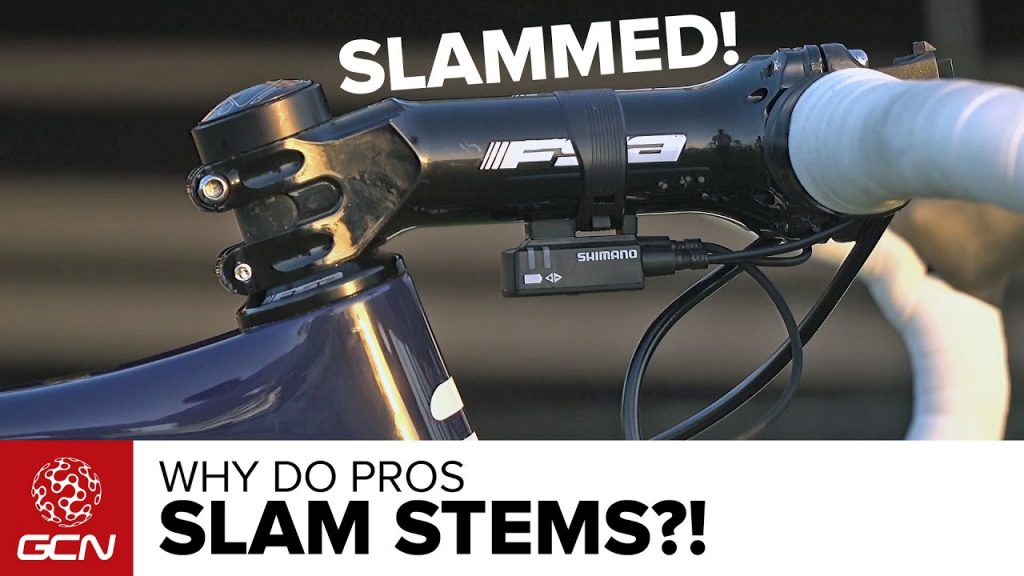
To slam or not to slam?
Riders everywhere are slamming their front ends. It’s gone global and it started with the pros switching to more aggressive frame setups. But is it the best option for you (or the pros)?
The reason, is that it makes a rider uncomfortable. You may not notice it over a 5 minute test, but as the ride progresses so does ones fatigues. And there turns out to be perfectly simple explanation for this. We make micro movements to adjust our body when riding in an aggressively aero position. This movement creates drag. The results show it makes a surprisingly lot of it. And as we become increasingly fatigued in a position the number of adjustments we make also increases.
This doesn’t look comfortable
These minor movements are so inefficient that they do more to slow us down than the aero dynamic position would otherwise give. From my own testing, riding a slammed stem for more than a year, I’ve learned that the body does adjust. But there is a point where the reward is less than the effort given. And I have noticed the effect of fatigue that BikeRadar highlighted in their test. So I’ve relaxed my position slightly.
You will need to play around with the position of your stem to find what works best for you. Also, to increase your flexibility (and the position you can ride) try to hold a lower-than-normal position for 10 minutes. Simon, from GCN, was recommended to do this as well by a pro cyclist.
Conclusion: unless you are comfortable riding with a slammed stem, slamming it may actually slow you down. Instead marginally reduce the height of your stem until it’s just still comfortable.
Next up: Should I invest in drop handlebars or should I save my pennies for aero wheels instead?
I don’t know how it is for you, but a lot of the shop talk at my local club rides revolve around aero wheels. “Ron’s pulling strong. It’s gotta be those wheels.”
Is it possible to save more watts with an aero bar setup? Let’s be clear, I’m referring to aero drop bars, not the skinny aero bars used by triathletes or time-trialists.
Interestingly, I’ve never once spoken to anyone about aero drop bars. It just hasn’t come up. But this winter while bike shopping I’ve become increasingly convinced by the data that aero bars may be the key to unlocking the greatest aero improvements we’re seeing. And best of all… aero drop handlebars are available to every cyclist on every bike.
The world’s leading aero bikes such as the S-Works Venge, S-Works Tarmac, Cervelo S5, or Pinerallo Dogma F10 all come with aero drop bars (stock). In fact you can’t order any other kind of bar for the S-Works. They also all claim incredible watt saving statistics. Yet their frames haven’t changed that much in the past 3 years. So where are they getting their extra savings? Maybe it’s the wheels and bars.
In 2014 Bike Rumour published that the Cervelo aero bar saved 4.4watts over the rounded bar. Since then Zipp have released even better bars that report 7.5 watt savings at 40km/hr. Their research showed that a traditional round bar creates 0.74 Newtons of drag, whereas their SL-70 aero bar creates just 0.11 Newtons of drag.
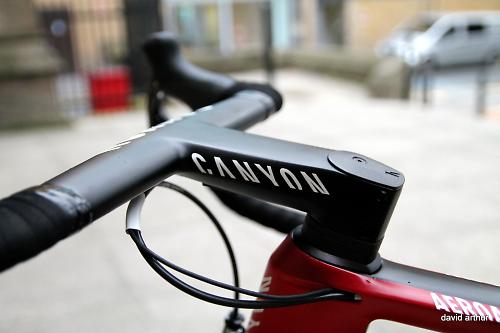
If one were to combine an aero bar with an aero stem, similar to the canyon Aeroad in the picture below, the aerodynamic improvements would likely increase further.
Canyon Aeroad CF SLX-014
“For reference, a bike [creates] 70–100w [of resistance] at 45kph using the same weighted yaw sweep. And, of course, you, the rider, contribute about 75 percent of the total drag.” [BikeRadar] Therefore, a savings of 7.5 watts is a significant amount. Also, unlike aero wheels where the amount of drag created by the wheel can increase depending on the direction of the wind, aero bars are more uni-directional as they are the first part of the bike to cut directly into the wind and do not create the “sail effect” as wheels do.
Given mild wind conditions, however, wheels will save you more watts. In comparison, Elite Custom did a test comparing Enve aero wheels with standard Mavic “training” wheels. They found that Enve SES 4.5 aero wheels saved 14.4 watts compared with standard Mavic Ksyrium Elite wheels at 40km/hr [Elite Custom].
Conclusion
So should you go for an aerodynamic wheel that could save you 14+ watts or an aerodynamic handlebar/stem combo that could also save you 7+ watts?
The handlebar and stem may be the next aerodynamic frontier. It creates the most drag on the bicycle, so clearly there is a big opportunity to improve it. That said, wheel designs are further ahead than aero drop bars.
A new set of aero wheels start at around $2000 and go up from there. Whereas a new handlebar may only cost a few hundred dollars. If you’re in the market for aero components consider starting with the bar. You may be pleasantly surprised at the outcome.
P.S. Have you done any watt testing of your own? I would love to hear about it and publish it here. Please let me know in the comments.
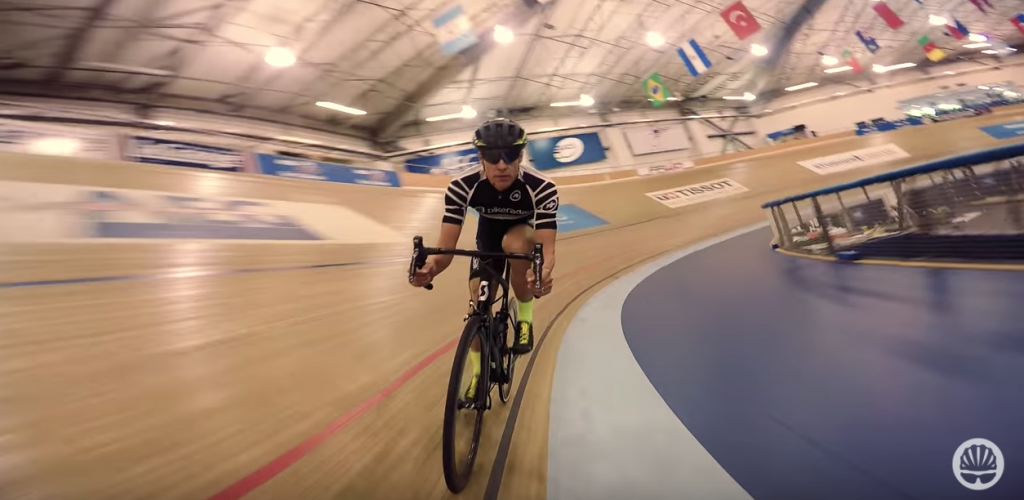
Welcome to part 2 of how cycling aerodynamics effects the real world. This article will look at body position, training and most importantly how these translate into real results for you.
Let’s begin. The Perfect Body Position for Aero Savings
Aerodynamic savings on bicycles can cost a small fortune. What I love about getting gains from body position is that it is 100% free.
It seems pretty intuitive that lowering your body will reduce drag as you are making yourself a smaller object. But, which position is really the most efficient? And does fatigue impact aerodynamics? And when does vascular restriction outweigh the benefits from an aero position?
It turns out these all play important factors, and it’s not as simple as slamming a stem or using the drop bars to get gains. (I’ve tried both of these options).
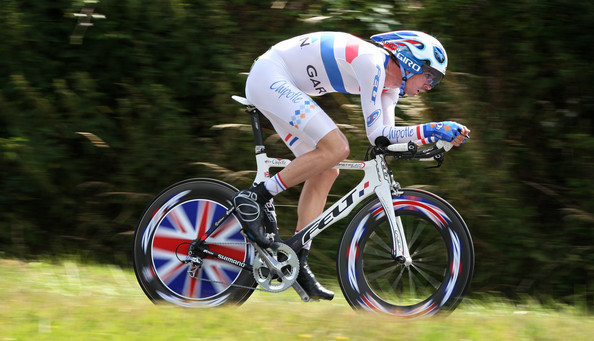
What does David Miller have to say?
David Millar is a Scottish former professional road racing cyclist. He’s no saint, having admitted to using EPO, but he was the first British rider to have won the leaders jersey in all three Grand Tours. He was also the British Time Trial and Nation champion and has worn of all Tour de France Jerseys.
And, most importantly, he’s the most winningest time trialist that I know of who has shared his training techniques.
David Miller Time Trialist
A1 coaching did a series of videos with David Miller. And he’s surprising forthright of his experiences with aero testing. He shared that he’s learned, that, “You can acquire as much data as you would like, be it from a home trainer or a wind tunnel, but when it comes down to it, it’s that course on a road where you will be able to gauge [the benefits of position] most consistently.”
He tells a story of working on his aero position with coach Peter Keen who did a lot of research and testing using wind tunnels and science. David thought that he also needed to do a lot of science to get his position right. But Keen said, “You look fast David, pretty much that’s what we’ve learnt. If you look fast, generally you are fast, and you can’t do much more about it.”
BikeRadar’s testing confirmed this line of reasoning. They showed that even though Ben Delaney could ride for a short time in a more aero position, he was actually losing aero performance (from lateral movement and constant adjustments) because his body wasn’t relaxed in that position.
So before we get into which position is most efficient. Here’s what David says are the five things he focused on to improve his position and performance.
Number 1: Get a course, so that tests are repeatable outdoors.
Number 2: Focus on your current position on your current equipment to get a benchmark.
Number 3: Apply training around the course you are trying to improve your time on.
Number 4: Make sure you have all the equipment that suites the course and temperature you are riding in.
Number 5: Race strategy. Your pre-race should be the same for every race.
Using David’s system in the real world
As a result of David’s interview I focused my training around my position. I dropped my stem to a position where I was just comfortable and began adding drop-position sessions into my weekly training.
Here’s what I learned. It’s hard to sustain the same effort in a more compact position. The reason was that my heart rate was higher at the same effort/pace with my body in a more compact aero position. With training I was able to increase high effort segments from 1 minute to 8 minutes on the handle bar drops. 12 minutes short of my 20 minute goal at my desired effort.
Was the training worth it?
Yes … and no.
Yes it was worth it for position training. One year on and I am much more comfortable in that new position. However, the performance gains I did experience from this kind of training did not translate into performance gains for century type rides. My original goal was to improve my functional threshold power FTP as well as my aero position. Instead I improved my anaerobic lactate threshold and my aero position.
As you will see below, it may have made more sense to focus on a less aggressive position.
Both GCN and BikeRadar have posted interesting studies on which body position on the bike is the most aero. However they took different approaches.
GCN did a test where they held the same watts over time and then tested for time savings. Whereas BikeRadar tested various positions and tested for watt savings. I think they are both equally interesting.
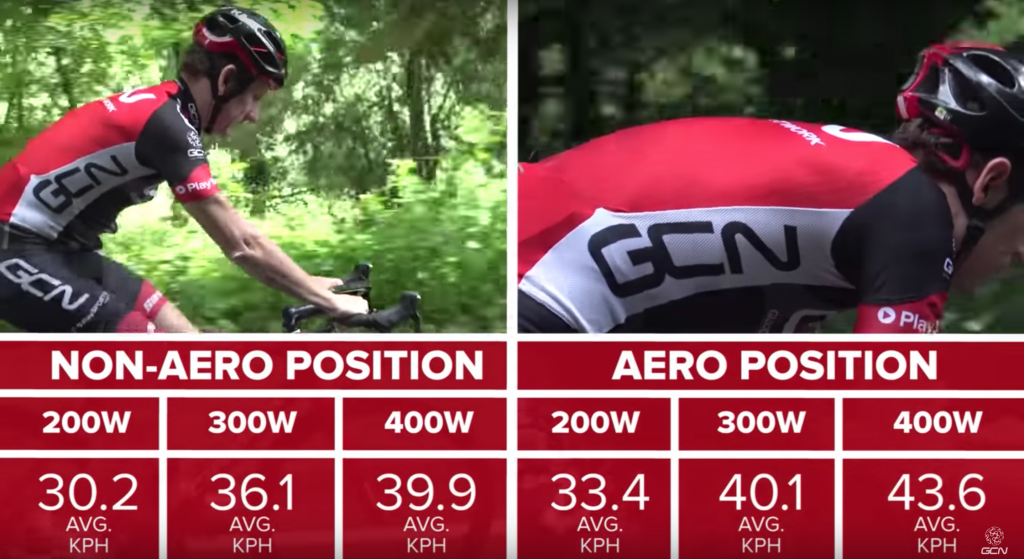
GCN’s Body Position Test & Results
GCN tested riding with straight arms on the tops of the bars (non-aero position) versus riding with bent arms with hands on the drops. They saw a significant savings between the two.
Non-Aero Position:
200W – 30.2KPH
300W – 36.1KPH
400W – 39.9KPH
Aero Position
200W – 33.4KPH
300W – 40.1KPH
400W – 43.6KPH
Clearly, riding with your hands on the drops is much faster than riding with your hands on the top bars. But is it the most efficient position? BikeRadar helps answer that question below.
GCN non-aero position vs aero position test results
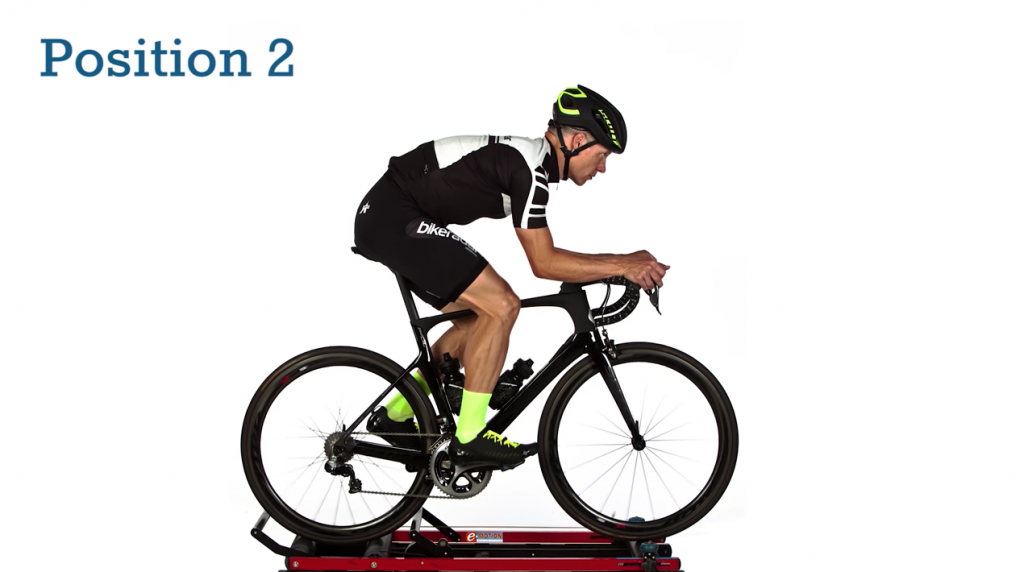
BikeRadar did another test in which they tested 4 positions.
Position 1: Straight arms with hands on the tops.
Baseline
Position 2: Bent arms with hands on the tops.
It lowered his back angle significantly and took his arm angle out of the wind.
Saved an average of 94 Watts which translates to 362 seconds over 40KM at 250 Watt average.
Position 3: Straight arms with hands on drops.
Saved an average of 67 Watts which translates to 214.85 seconds over 40KM at 250 Watt average.
Position 4: Bent arms with hands on the drops.
Saved an average of 112 Watts which translates to 442 seconds over 40KM at 250 Watt average.
However, even though it saved him wattage, he was moving around a lot and it was clear he wasn’t going to be able to stay in that position over 40KMs.
The overall winner?
It turns out that the most efficient position for Ben was Position 2. It saved him slightly less time than position 4, but because it was more sustainable and comfortable, overall his body would be significantly less fatigued holding it over the course of 40 km’s and would give him the greatest gain.
The study of aerodynamics is a science, but when it comes to cycling it can be a bit of a black art. Go to any bike shop and you will see options from aero frames, aero helmets, aero bars, aero wheels, aero clothes, and the list goes on. But it’s unclear which of these offers the greatest benefit to the modern cyclist – and how much of an impact they will have in real world settings.
For example, Specialized claim that their latest Venge bike can save you a whopping 5 minutes over 40km’s. But what is that primarily due to? The frame, the bars, the wheels, or the riders body position? And what are they comparing it to? It’s hard to know and Specialized doesn’t release that information.
Furthermore, most cycling conditions are anything but what are offered in wind tunnels. Terrain is often undulating and intermixed with steep hills, rolling descents, rain, crosswinds, potholes, traffic lights, rough surfaces, and bare tarmac.
It it faster riding a lighter bike? Or is it better to invest in a more aero one?
Throw in group rides, drafting and tight cornering in crits… and one wonders if all the “science” is truly relevant to the real world.
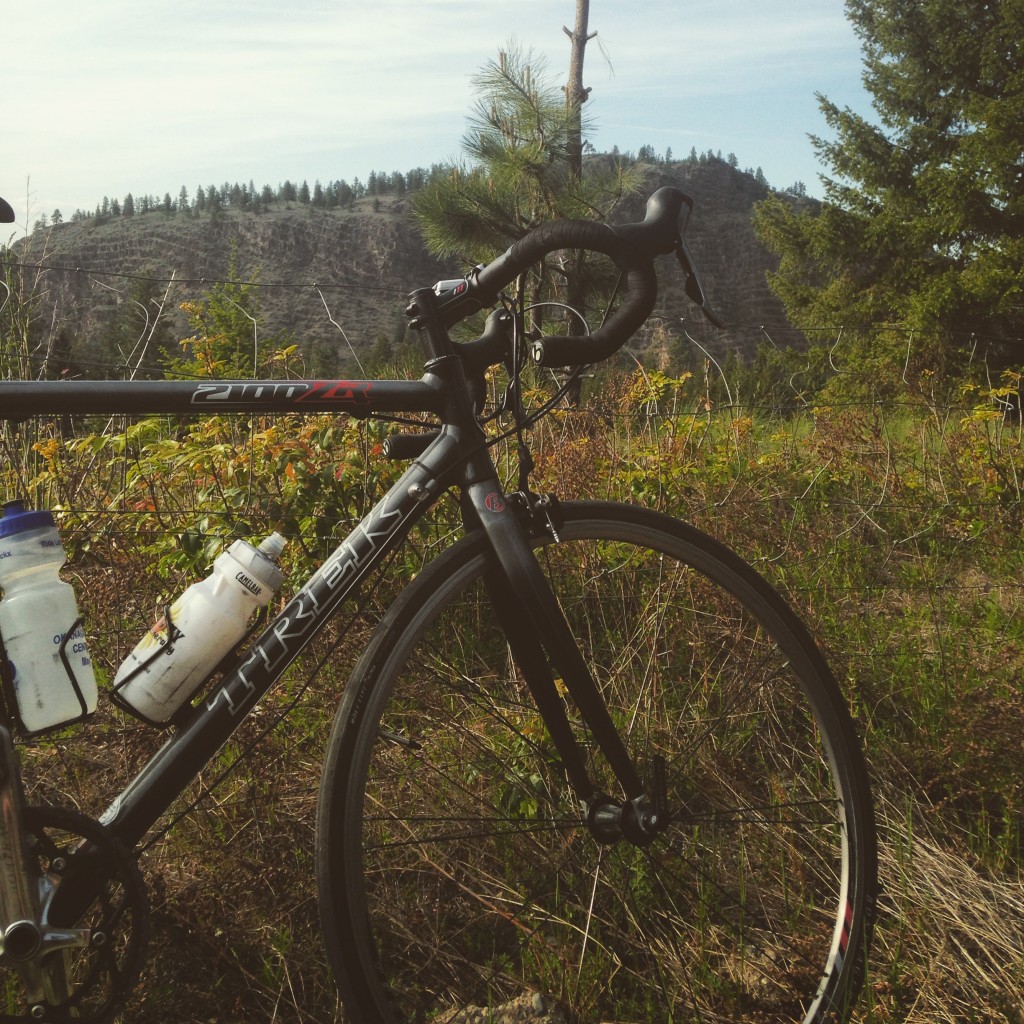
I’ve ridden a 2005 Trek 2100 for the past 12 years. It lacks a lot of the features found in modern bike design. Yet, during group and solo rides alike, my times are very similar to riders with much more aero setups. Which has got me wondering, what are the real advantages to aero? And is there a clear cost/aero equation one could use to ensure they really are getting the best bang for their buck?
See that sweet lookin’ classic Trek ride on the far left
Intro
Welcome to part 1 of a multi-part series on aero dynamics where I will be sharing what I’m learning through the tests of others and personal experiences. This will be an attempt to reconcile industry tests/results with the real world.
I will be starting with the cheapest options for aero savings (clothing and body position) and working my way eventually to what I’ve learned about aero frames.
Specialized and recently GCN (Global Cycling Network) have released tests on loose fitting cycling apparel versus form fitting ones. And the results… are interesting.
Using a wind tunnel Mark Cote and Chris Yu of Specialized ran their tests at 50k/hr. And tested both winter gear and warm weather kits. According to their findings, there was a difference of 83 seconds over 40 kms for the cold weather clothing. For the warm weather gear the difference was 91 seconds between a size M club fit jersey and a size S form fit jersey.
“We’re talking about a difference that’s more than race wheels.” Chris Yu. Specialized R&D
But how does it compare to the real world? Well that’s where GCN’s test comes in.
Watch World Tour cycling and it’s perfectly obvious why aerodynamics is important when race leaders are separated by seconds and time trials can split the field.
But what about the recreational racer?
In 2016 I road what was to be my second last event of the year. The morning started as many epic autumn rides do; with light sprinkles of rain and the threat of more to come. I put on a blue Sugoi cycling jacket gifted by my parents. It’s a great design (or so I thought). The arms and back are held together by magnets and literally peal away if needed to reveal a vest. It’s perfect for layering.
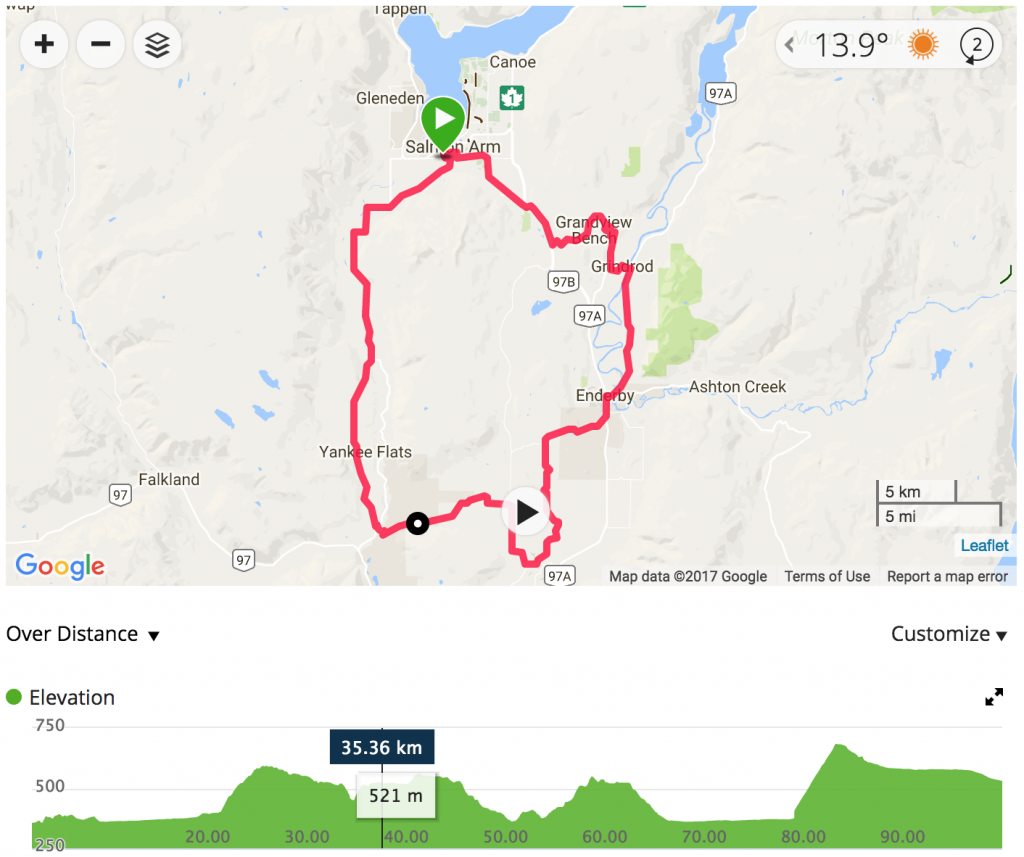
A Wet Salmon Arm Bike For Your Life Century Ride
The peloton split early. I joined the front group as we attacked the first climb. I’m a climber, I don’t have a specialty per se, but if I did it would be climbing. I noticed immediately that the ride was feeling tougher than usual. I took note that my legs weren’t as recovered as I thought they would be. Slowly I lost touch of the riders. Dropping back about 200ft.
We hit the flats and I felt confident that I would find my rhythm and catch them. It was an out of town event, but a strong rider that I knew had also lost the front group, so I intended to catch his wheel and then catch the front group again.
Salmon Arm Bike For Your Life Century Ride Route
Unfortunately neither of those scenarios panned out. Riding on a relatively flat section I was easily 3km/hr slower than I would normally ride and was feeling frustrated at my apparently tired legs.
The leading pack was long gone and soon I was caught by a strong chasing group. To make matters worse my father was in it (he’s a very fit father *cough). By now the rain was beginning to open up and soon it was pouring down. I joined the second group. And by the latter leg of the race my pace was closer to normal.
Looking at the times at the end of the day it turned out that my father and I finished just 4 minutes behind the race leaders. How could this be? I thought, clearly the front group had been riding much stronger.
The reason should have been obvious, but I didn’t know what I didn’t know. Later some of the riders came up to me and joked about my parachute. Unbeknownst to me, the clever 2 part design of my jacket had caught the wind and converted the top layer into a perfect parachute.
It wasn’t until the rain started pouring that the jacket was soaked enough to stay compact.
I thought long and hard about the results of that ride and have since learned that clothes can make a significant difference to aero performance. As we’ve learned from Specialized’s wind tunnel test.
Real world aero apparel test by GCN
GCN also posted an excellent video evaluating the speed difference between a loose fitting cycling jersey (say 1 size too big) versus a snug one at the same watts. The results were equally surprising.
This was a real world test held at 3 different intervals of power.
GCN results on aero clothing for cycling
As you can see by this picture. At just 200W average a rider has a 0.8km/hr advantage with a tight shirt versus one with a relaxed fitting shirt. This goes up to 1.8km/hr at 400W.
When one considers the times they are pulling at the front of a group, closing down on a leading peloton or attacking solo, these numbers suddenly become much more important.
“The bottom line is whether it’s summer or winter if you just pay a little attention to how well the stuff fits your looking at a couple minutes over a medium to a long ride. So it really does matter.”
Chris Yu, Specialized
What have your experiences been with aero? Have you noticed a major performance advantage or disadvantage? Cycling is as much about science as it about personal stories, please share yours in the comments below.
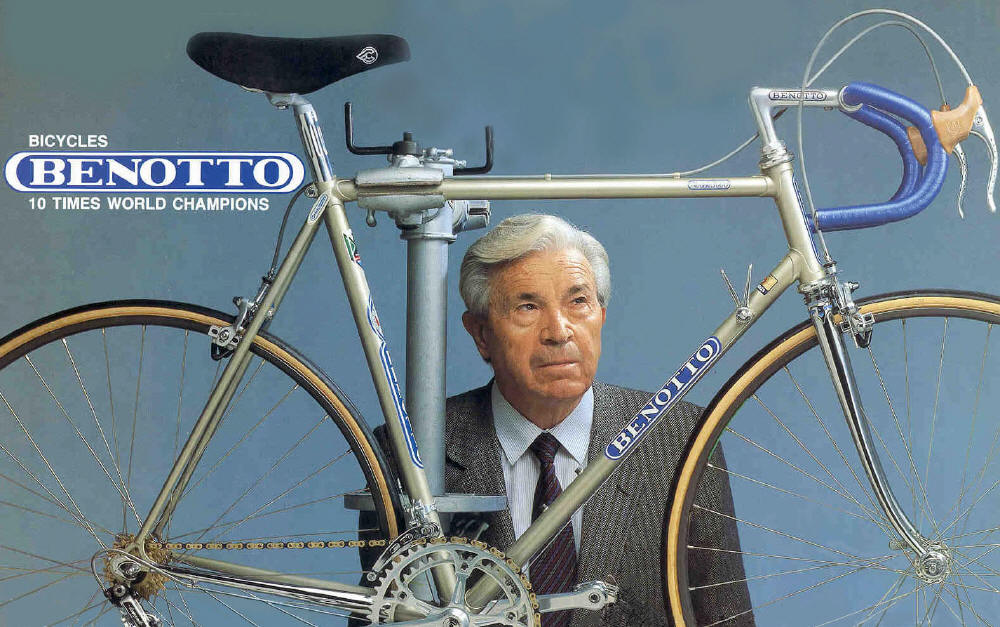
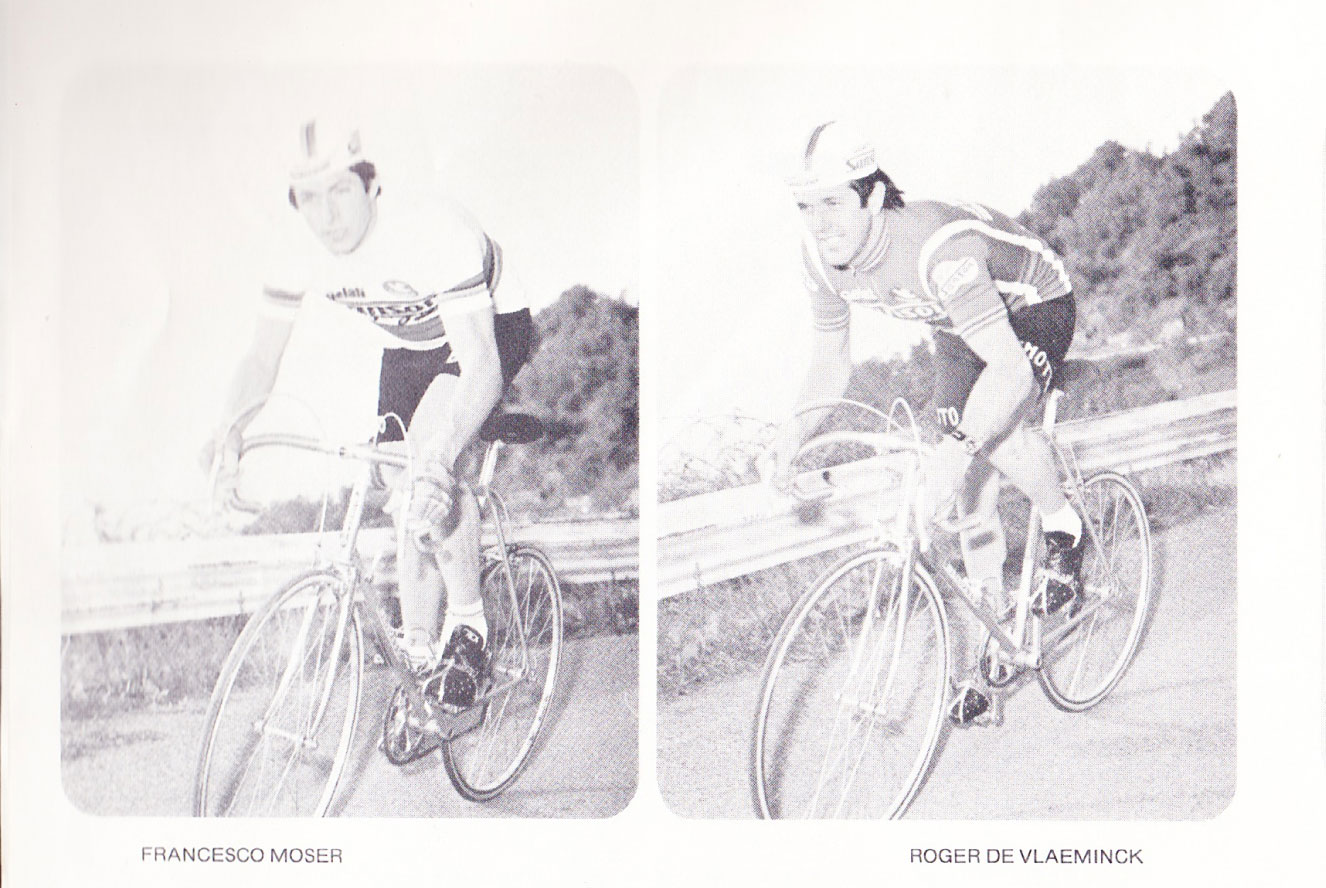
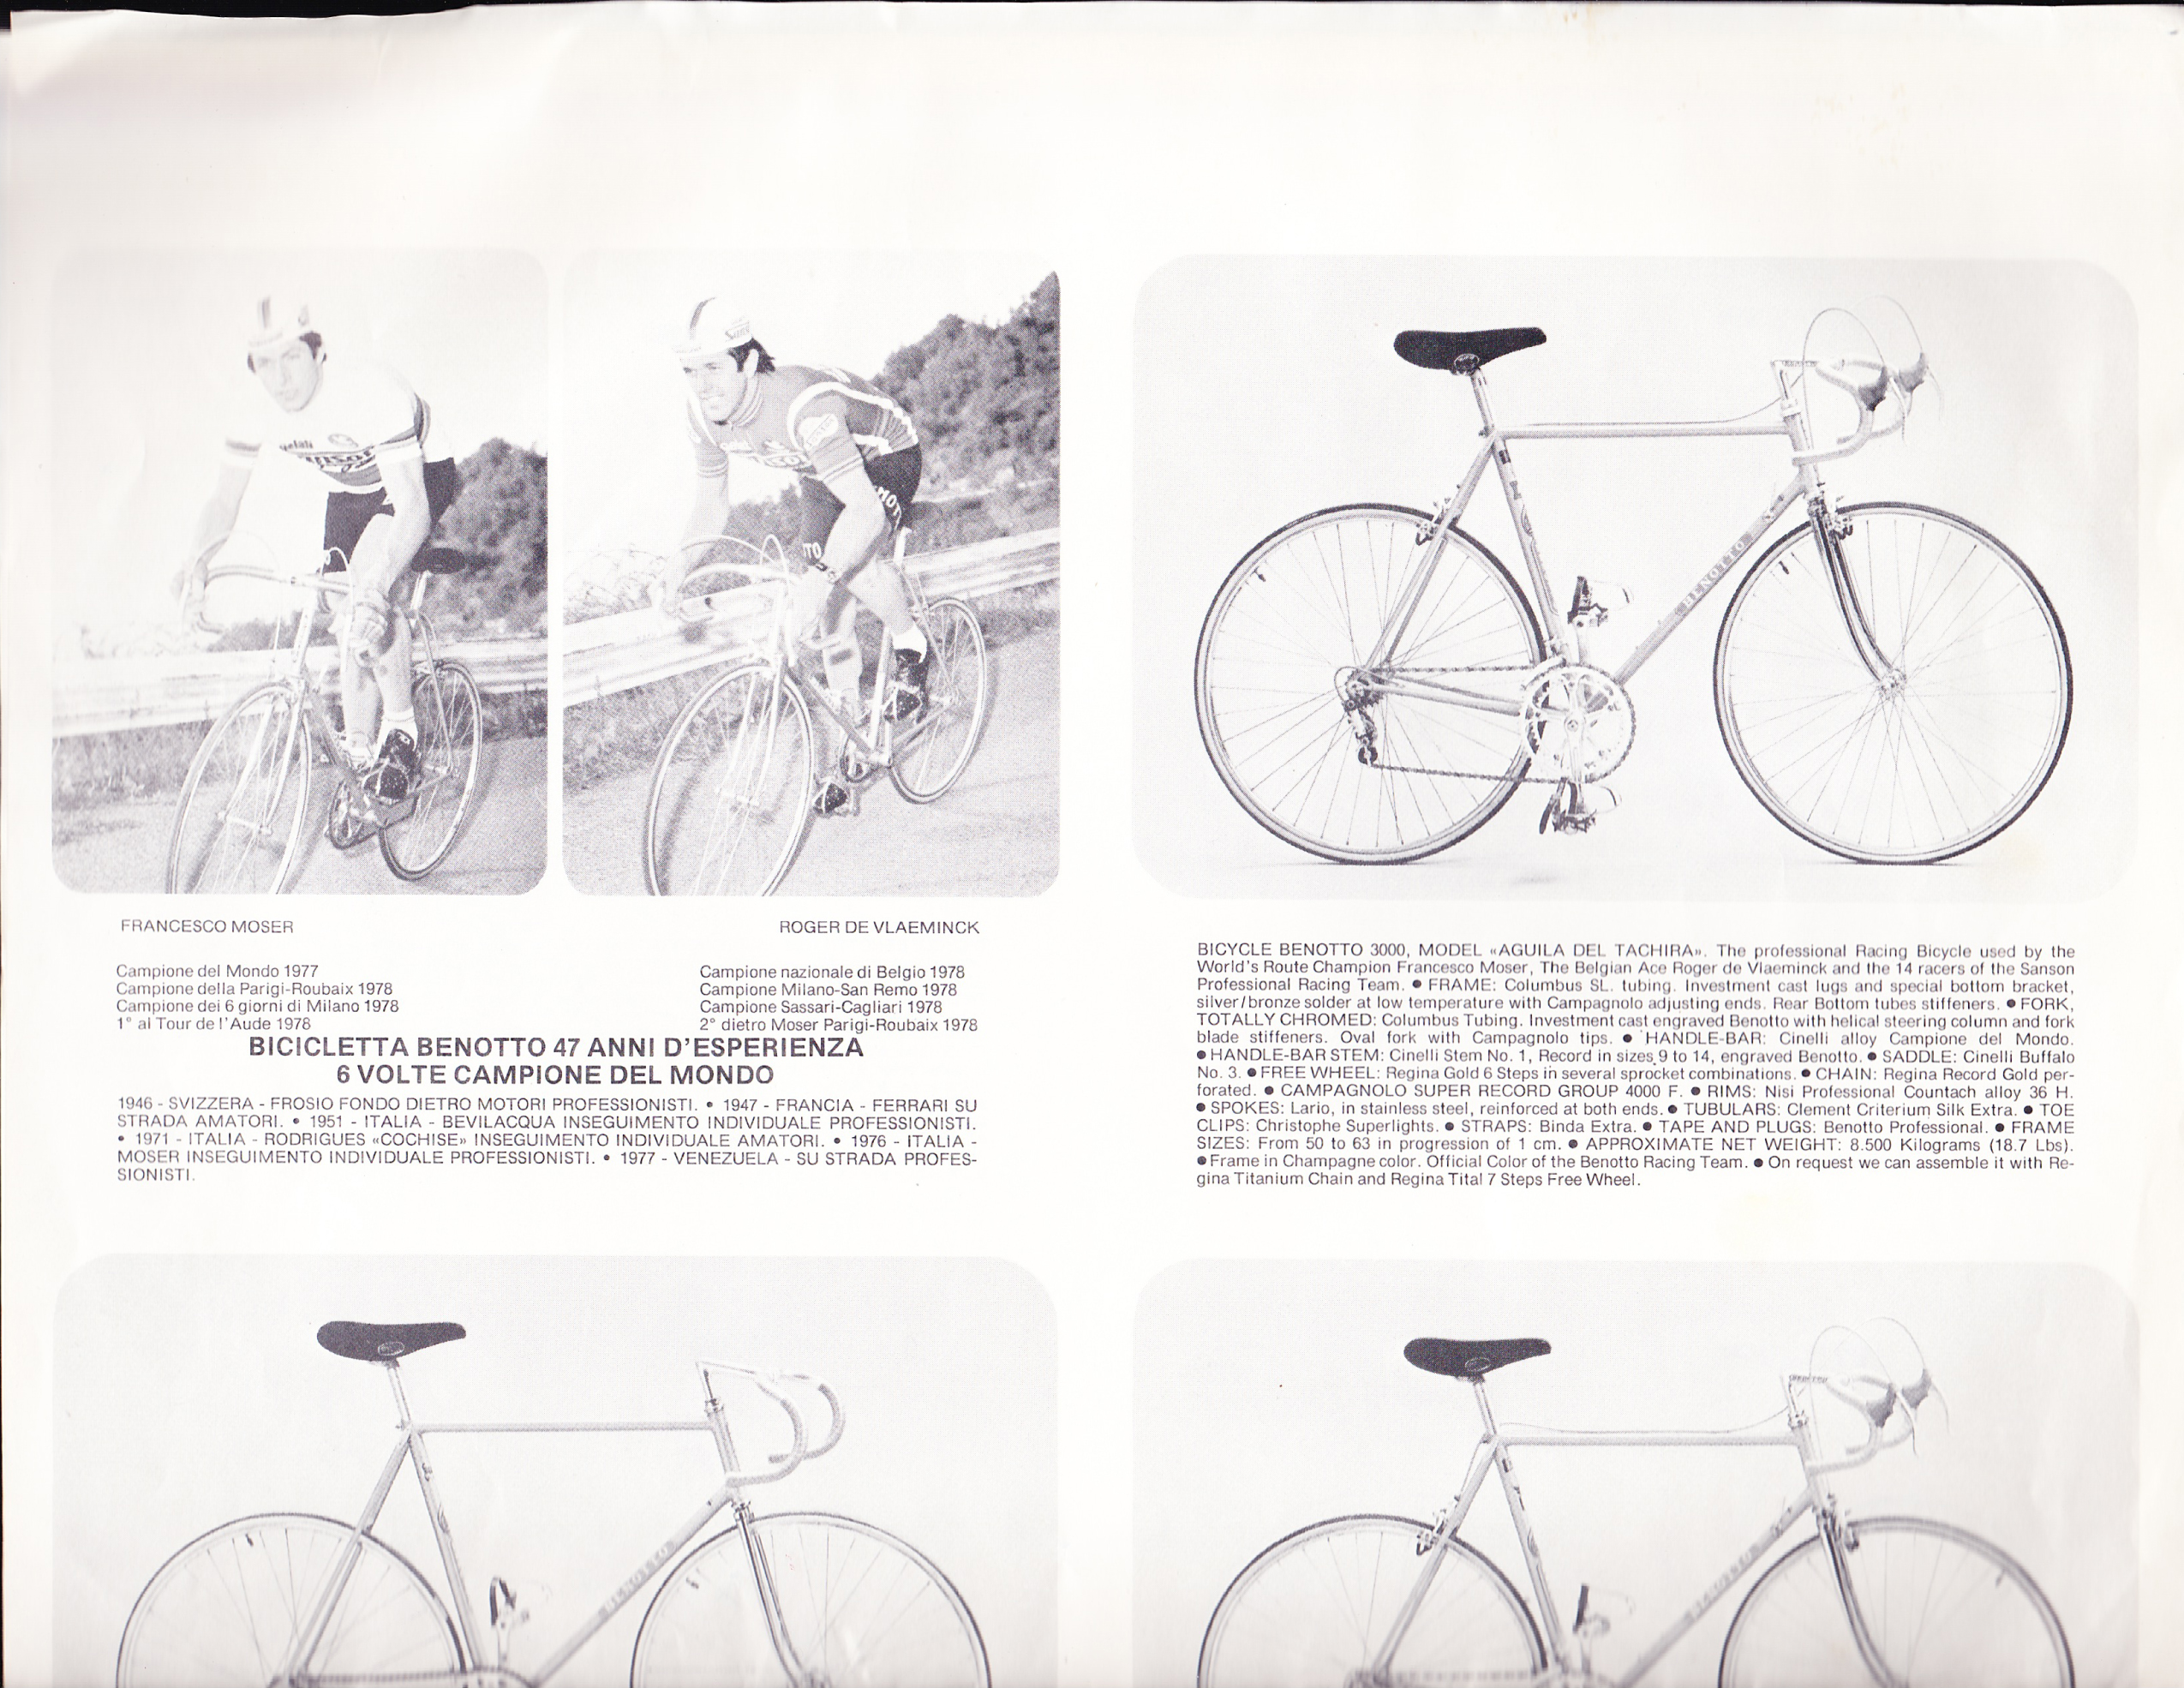
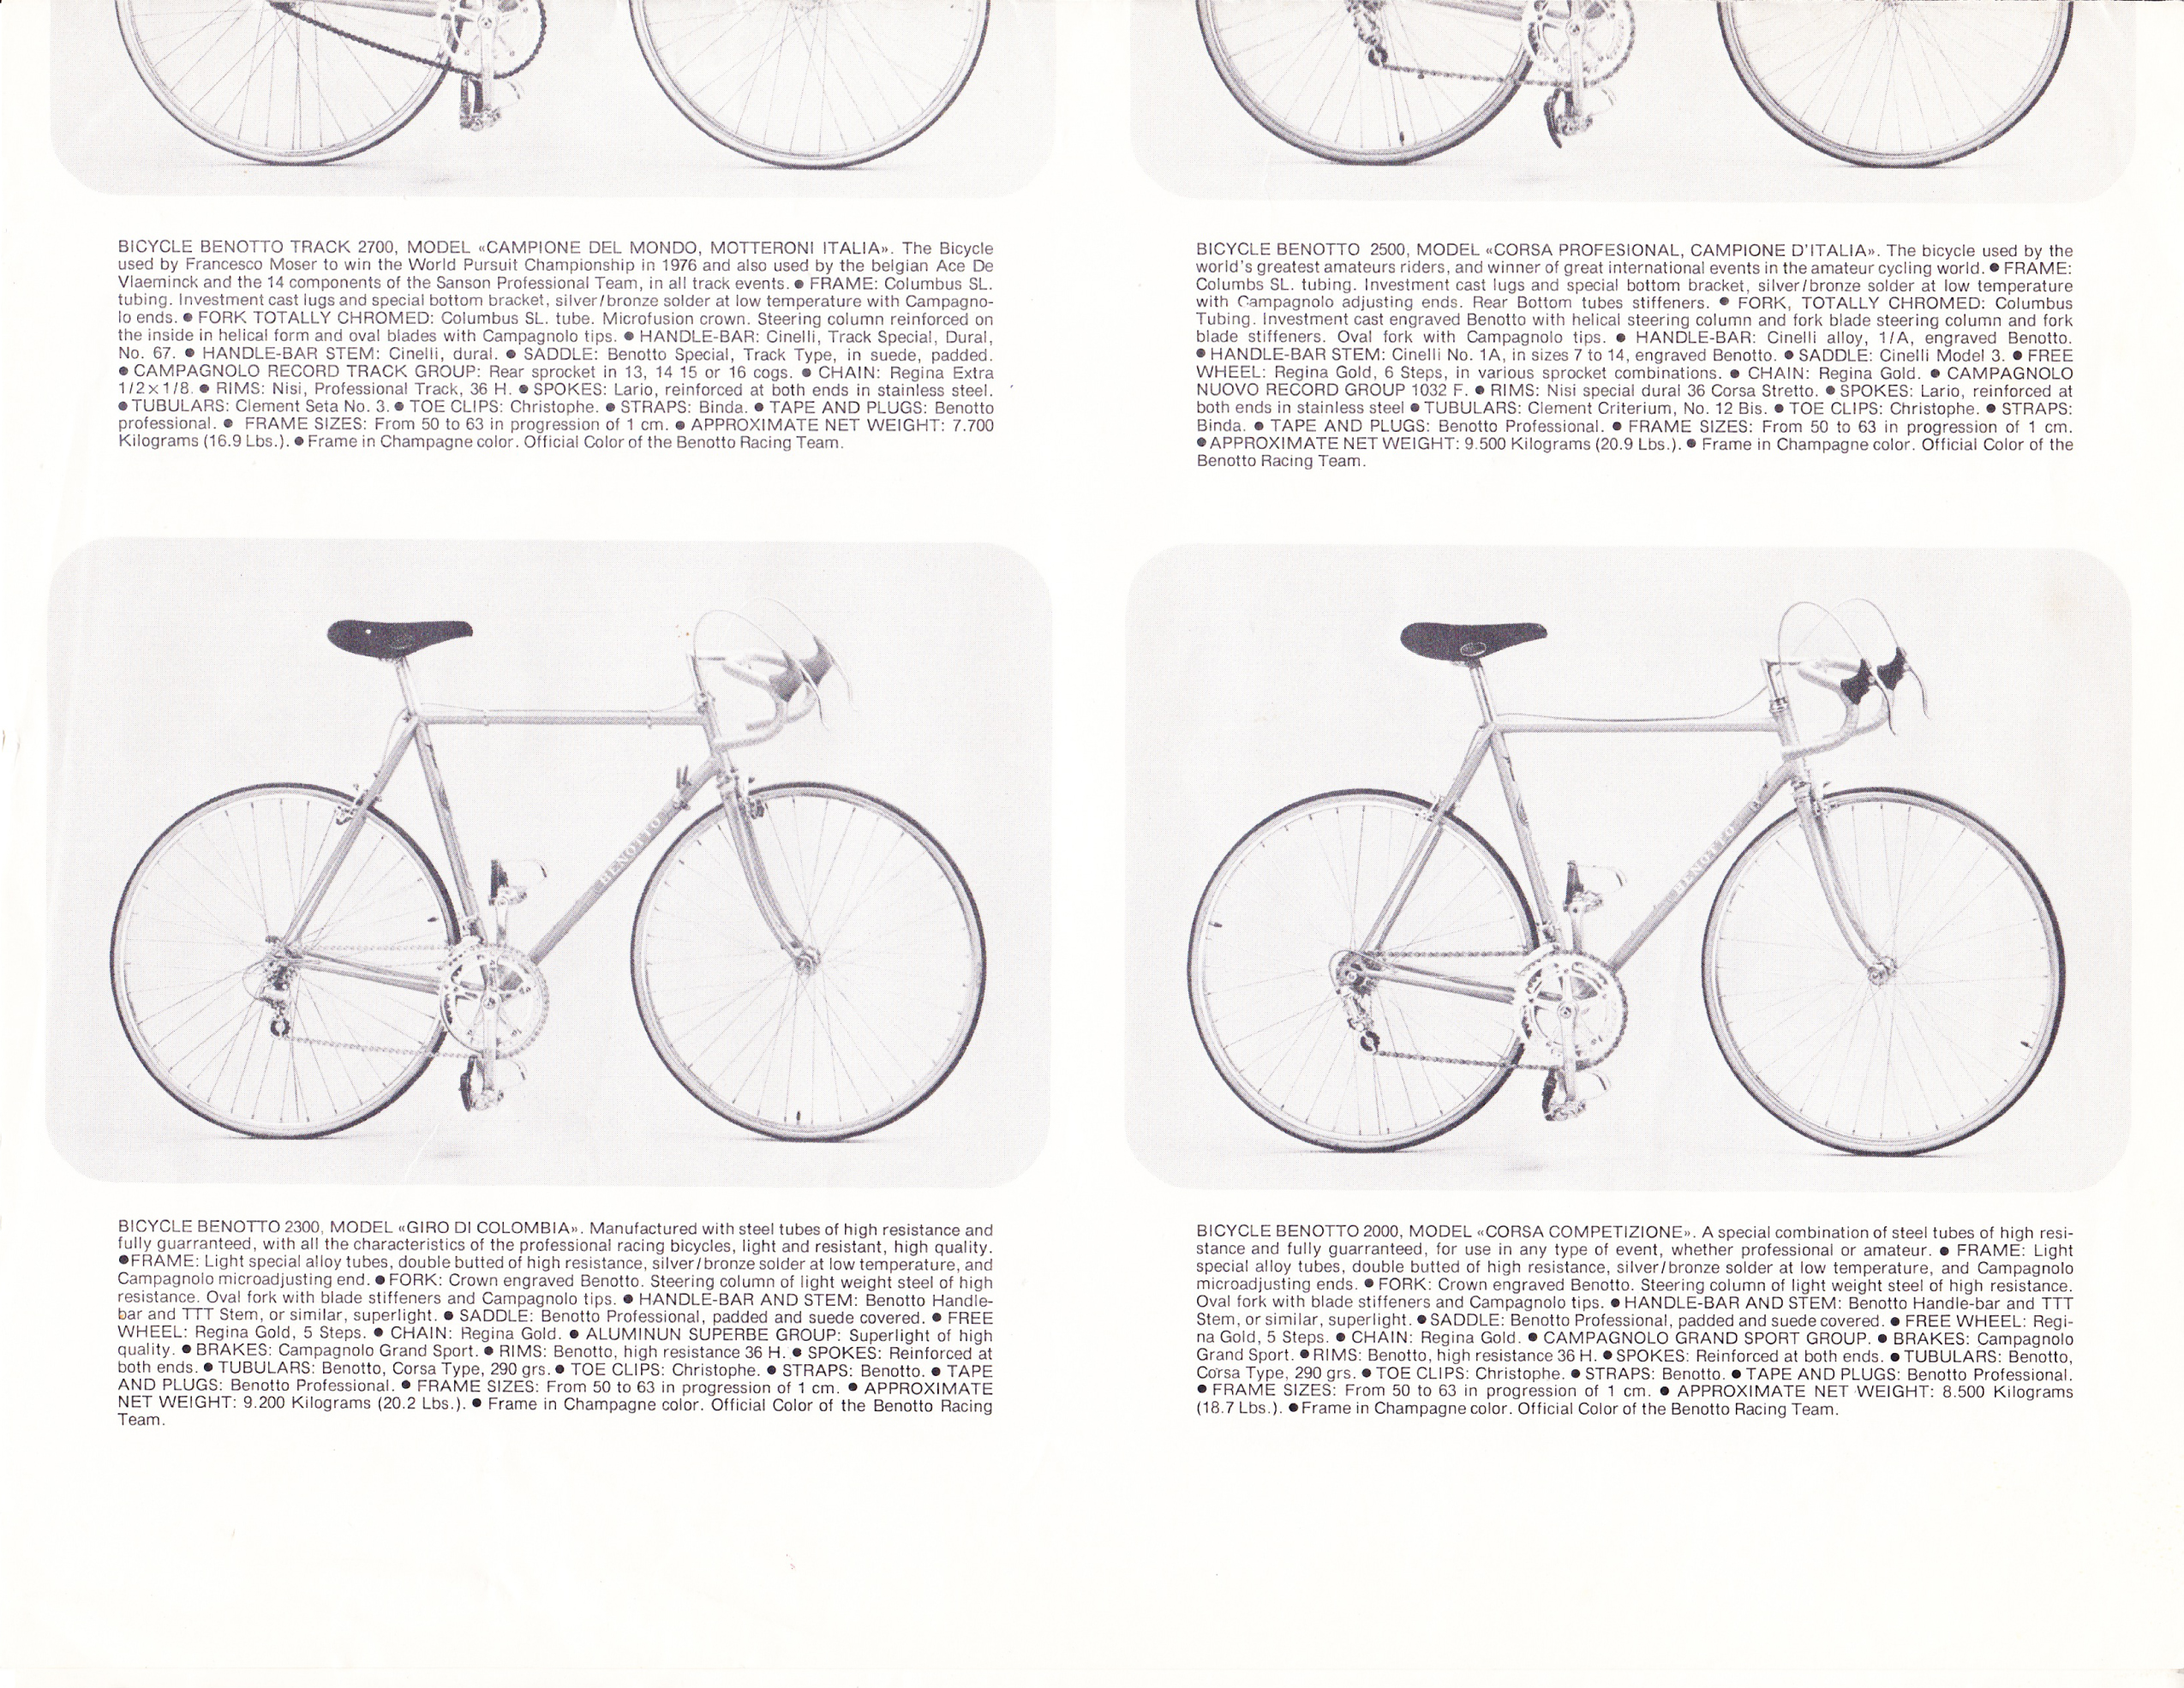
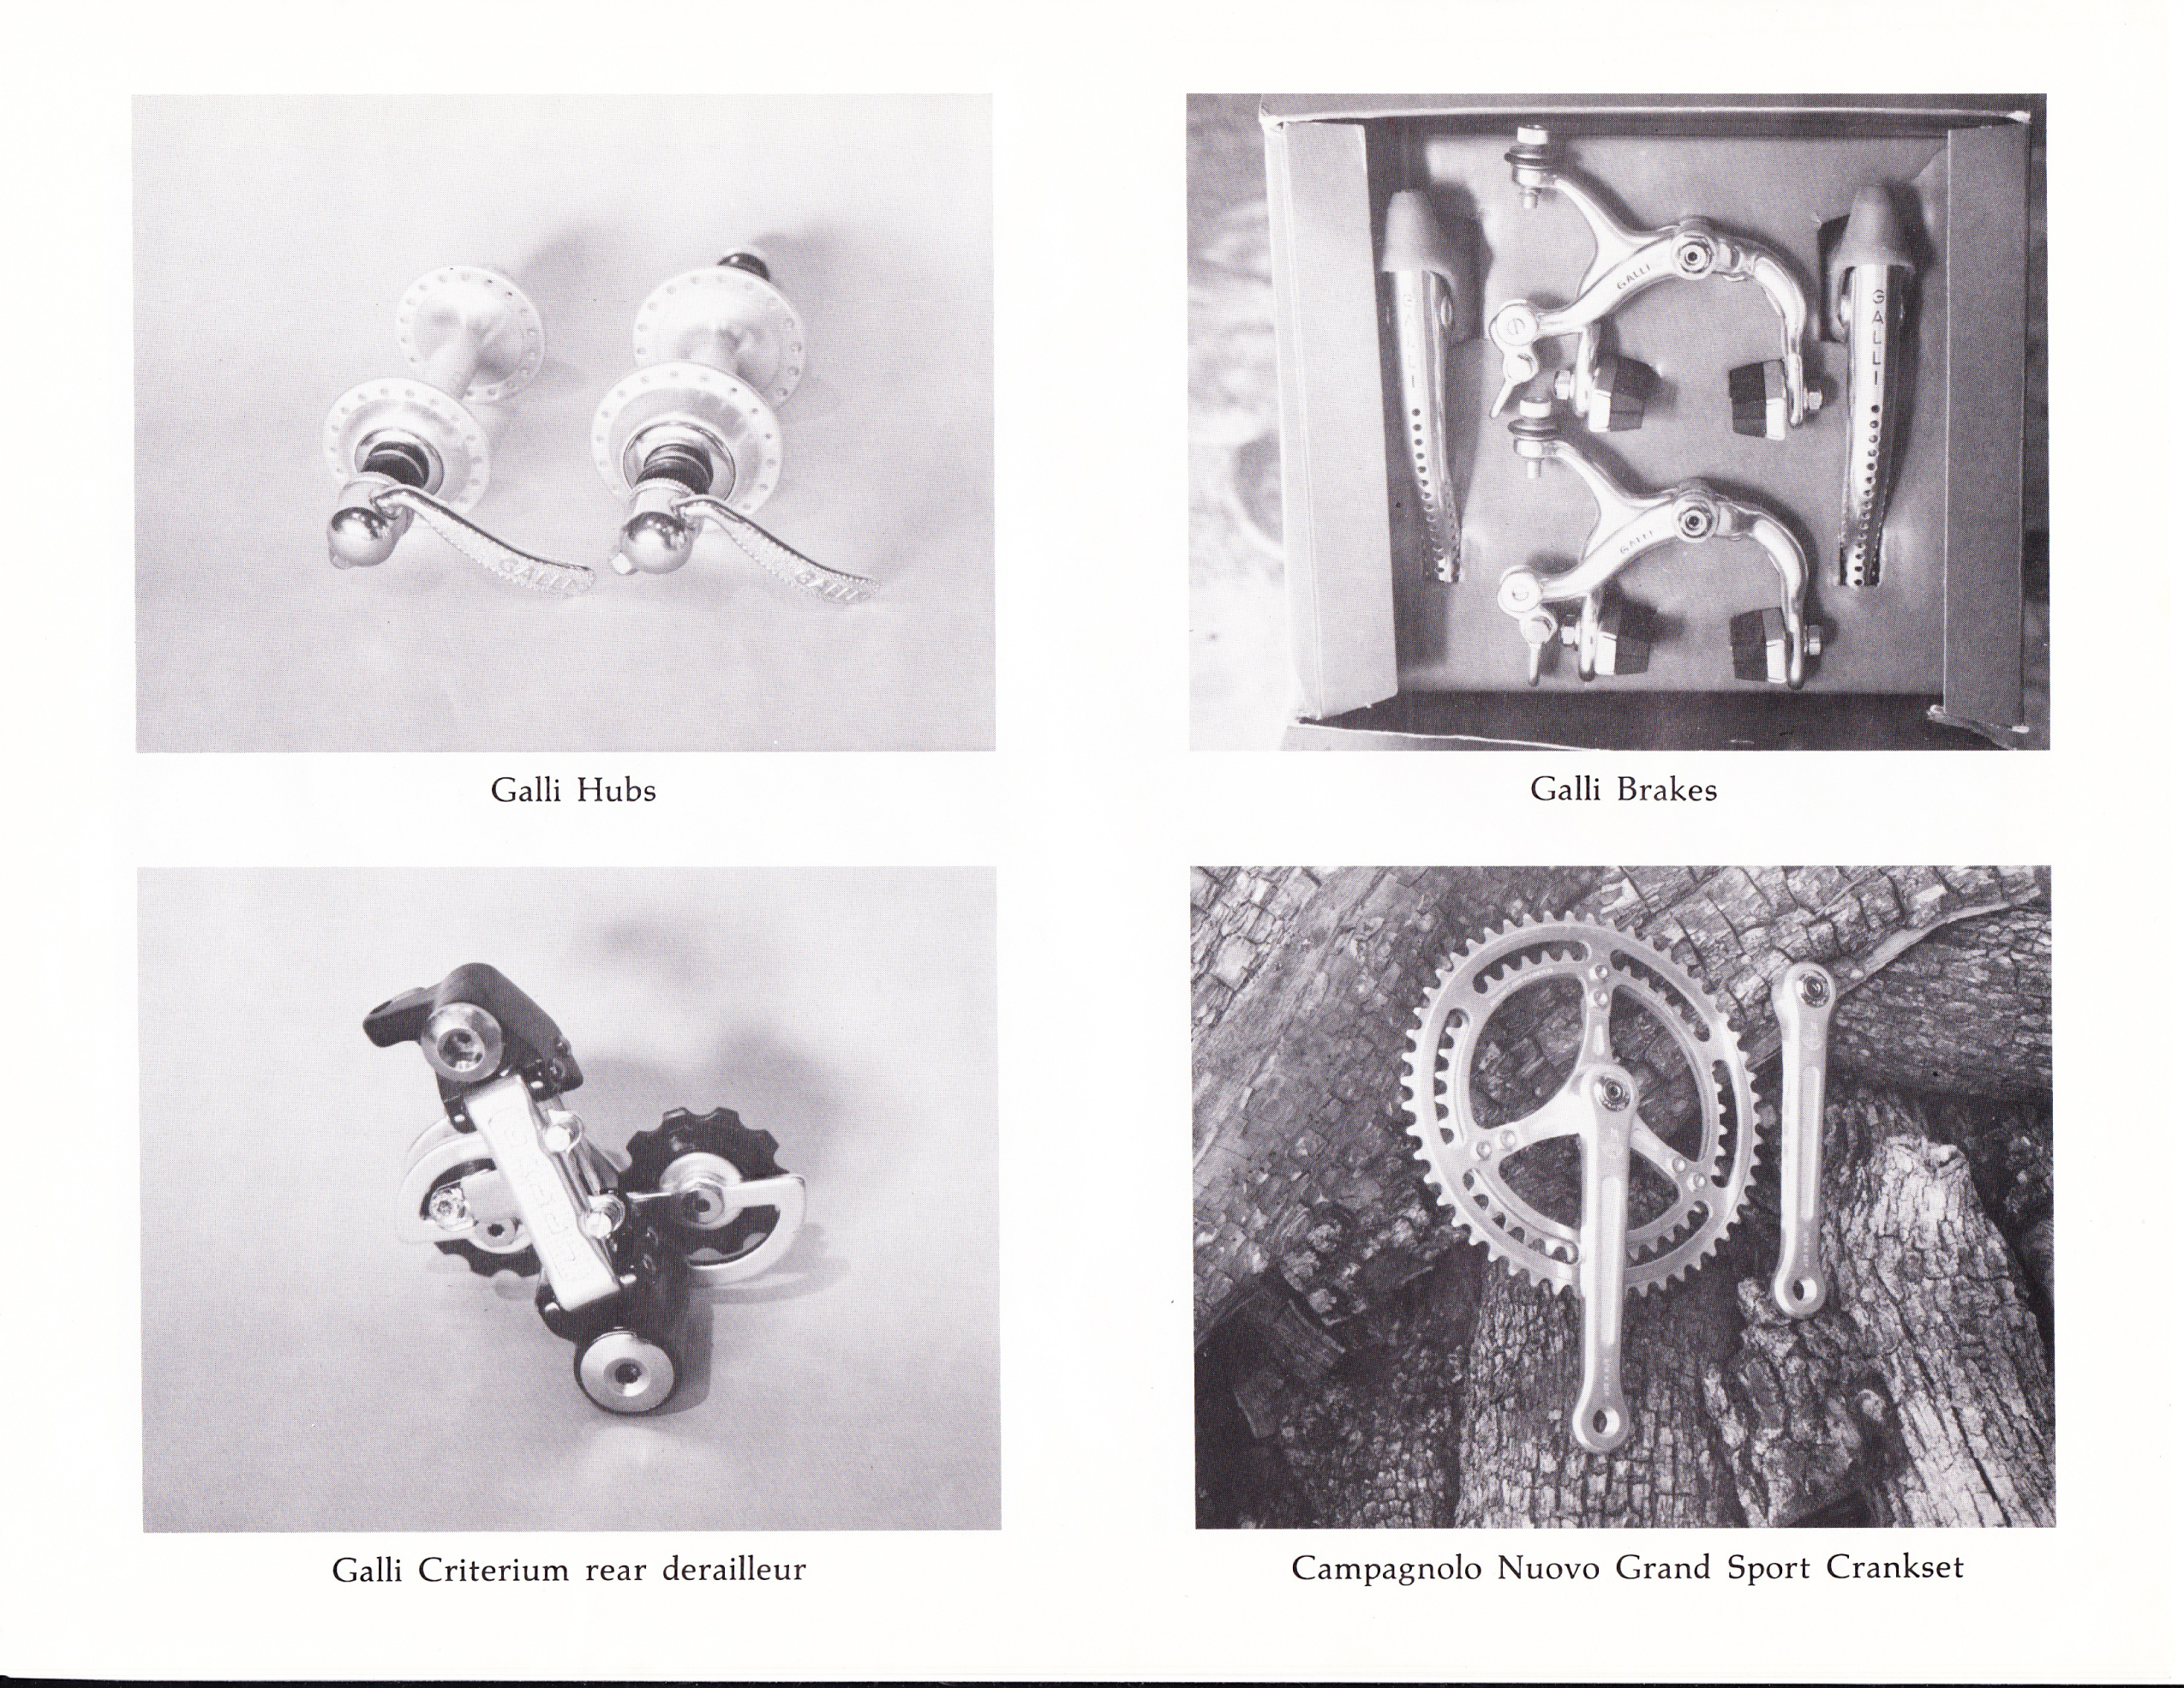
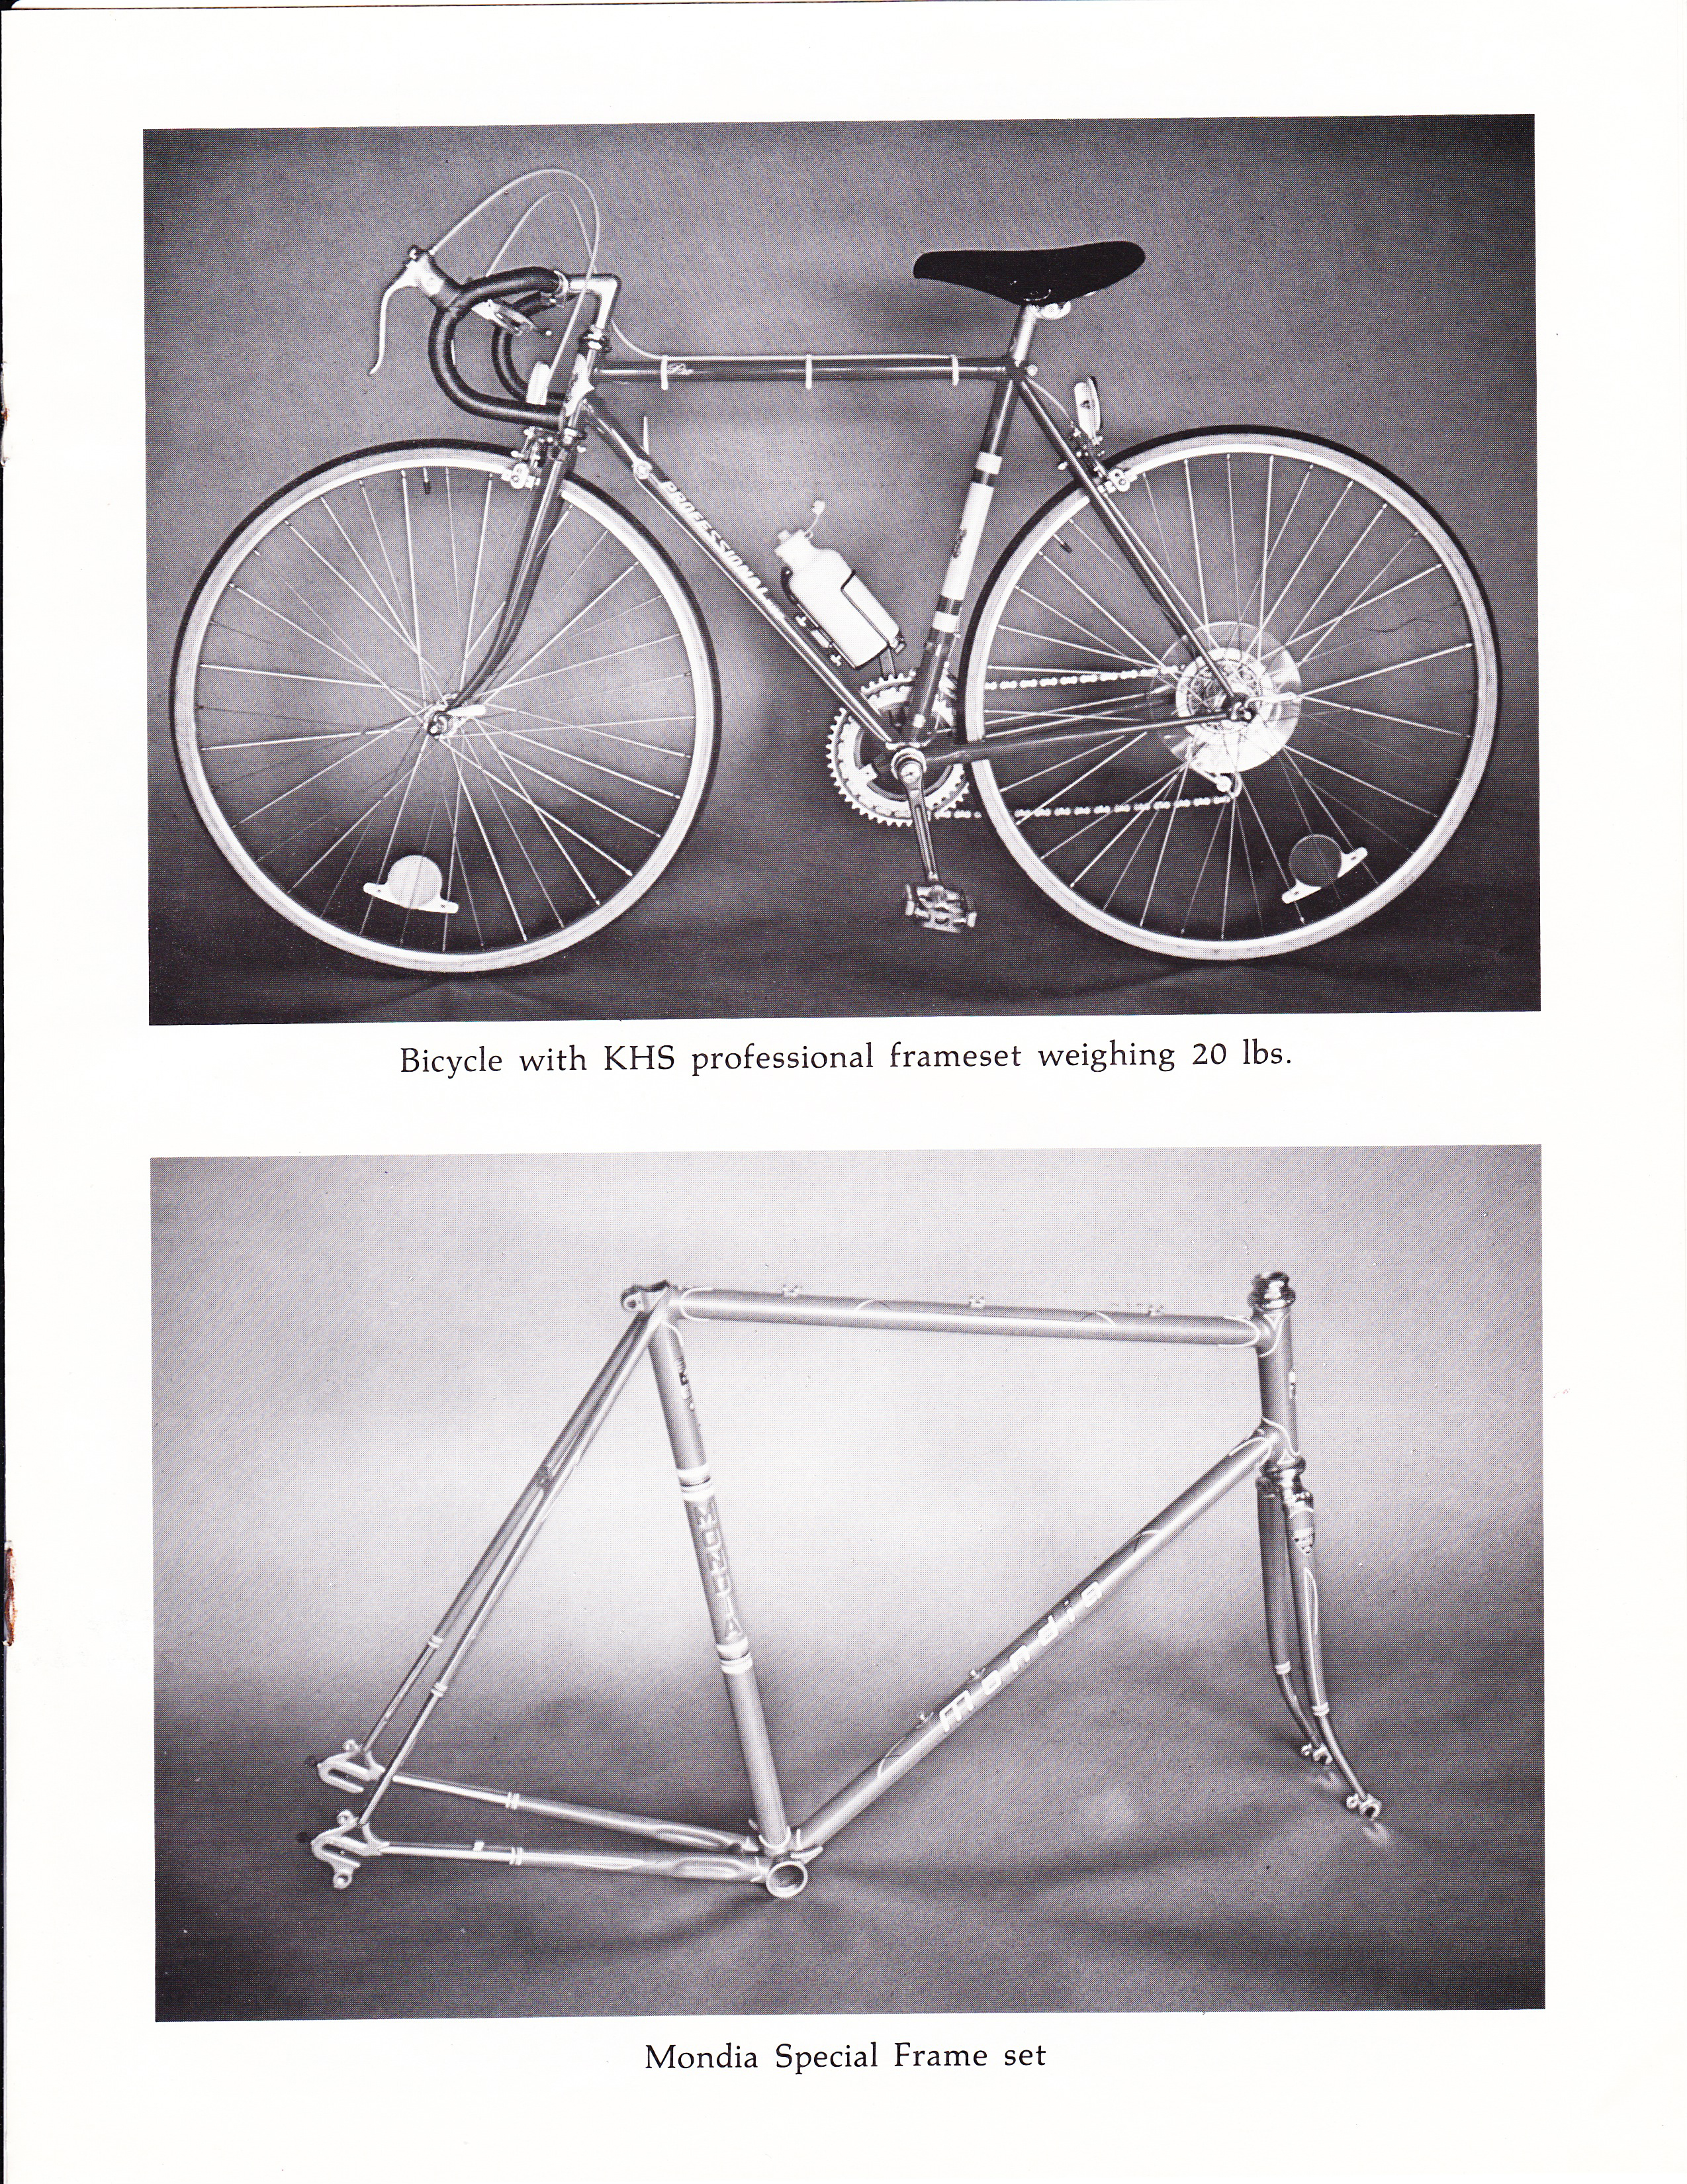
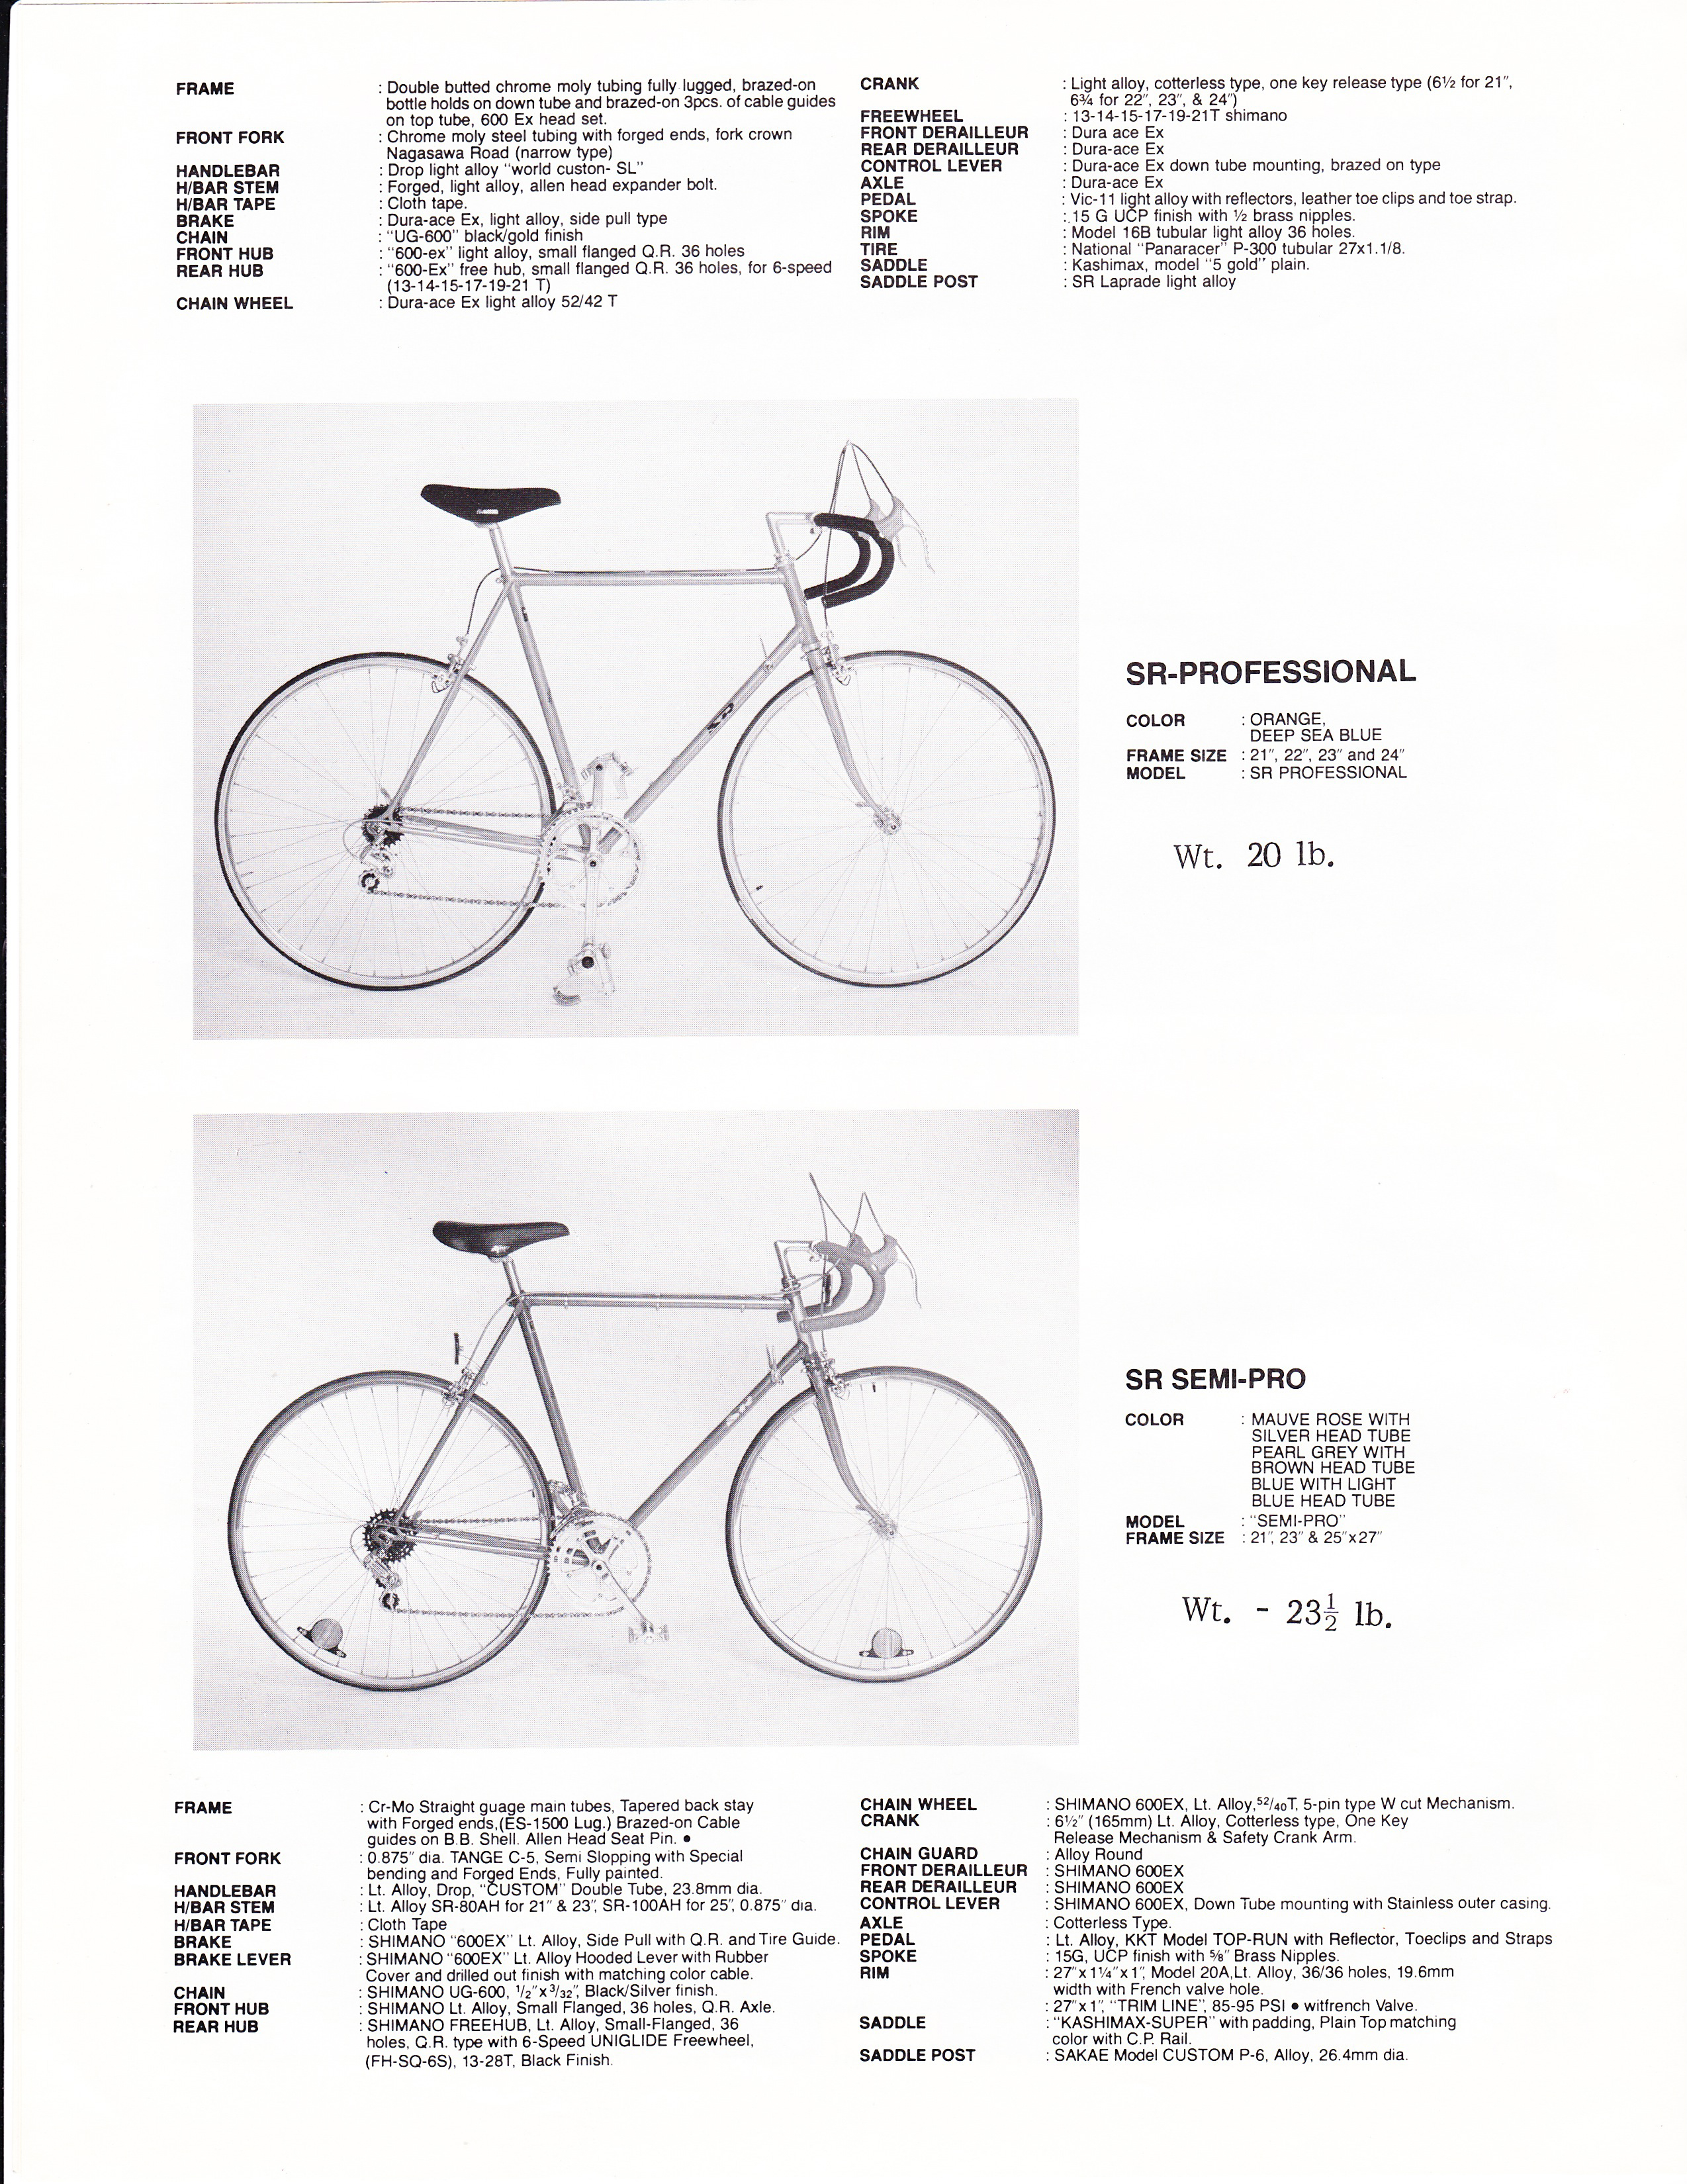
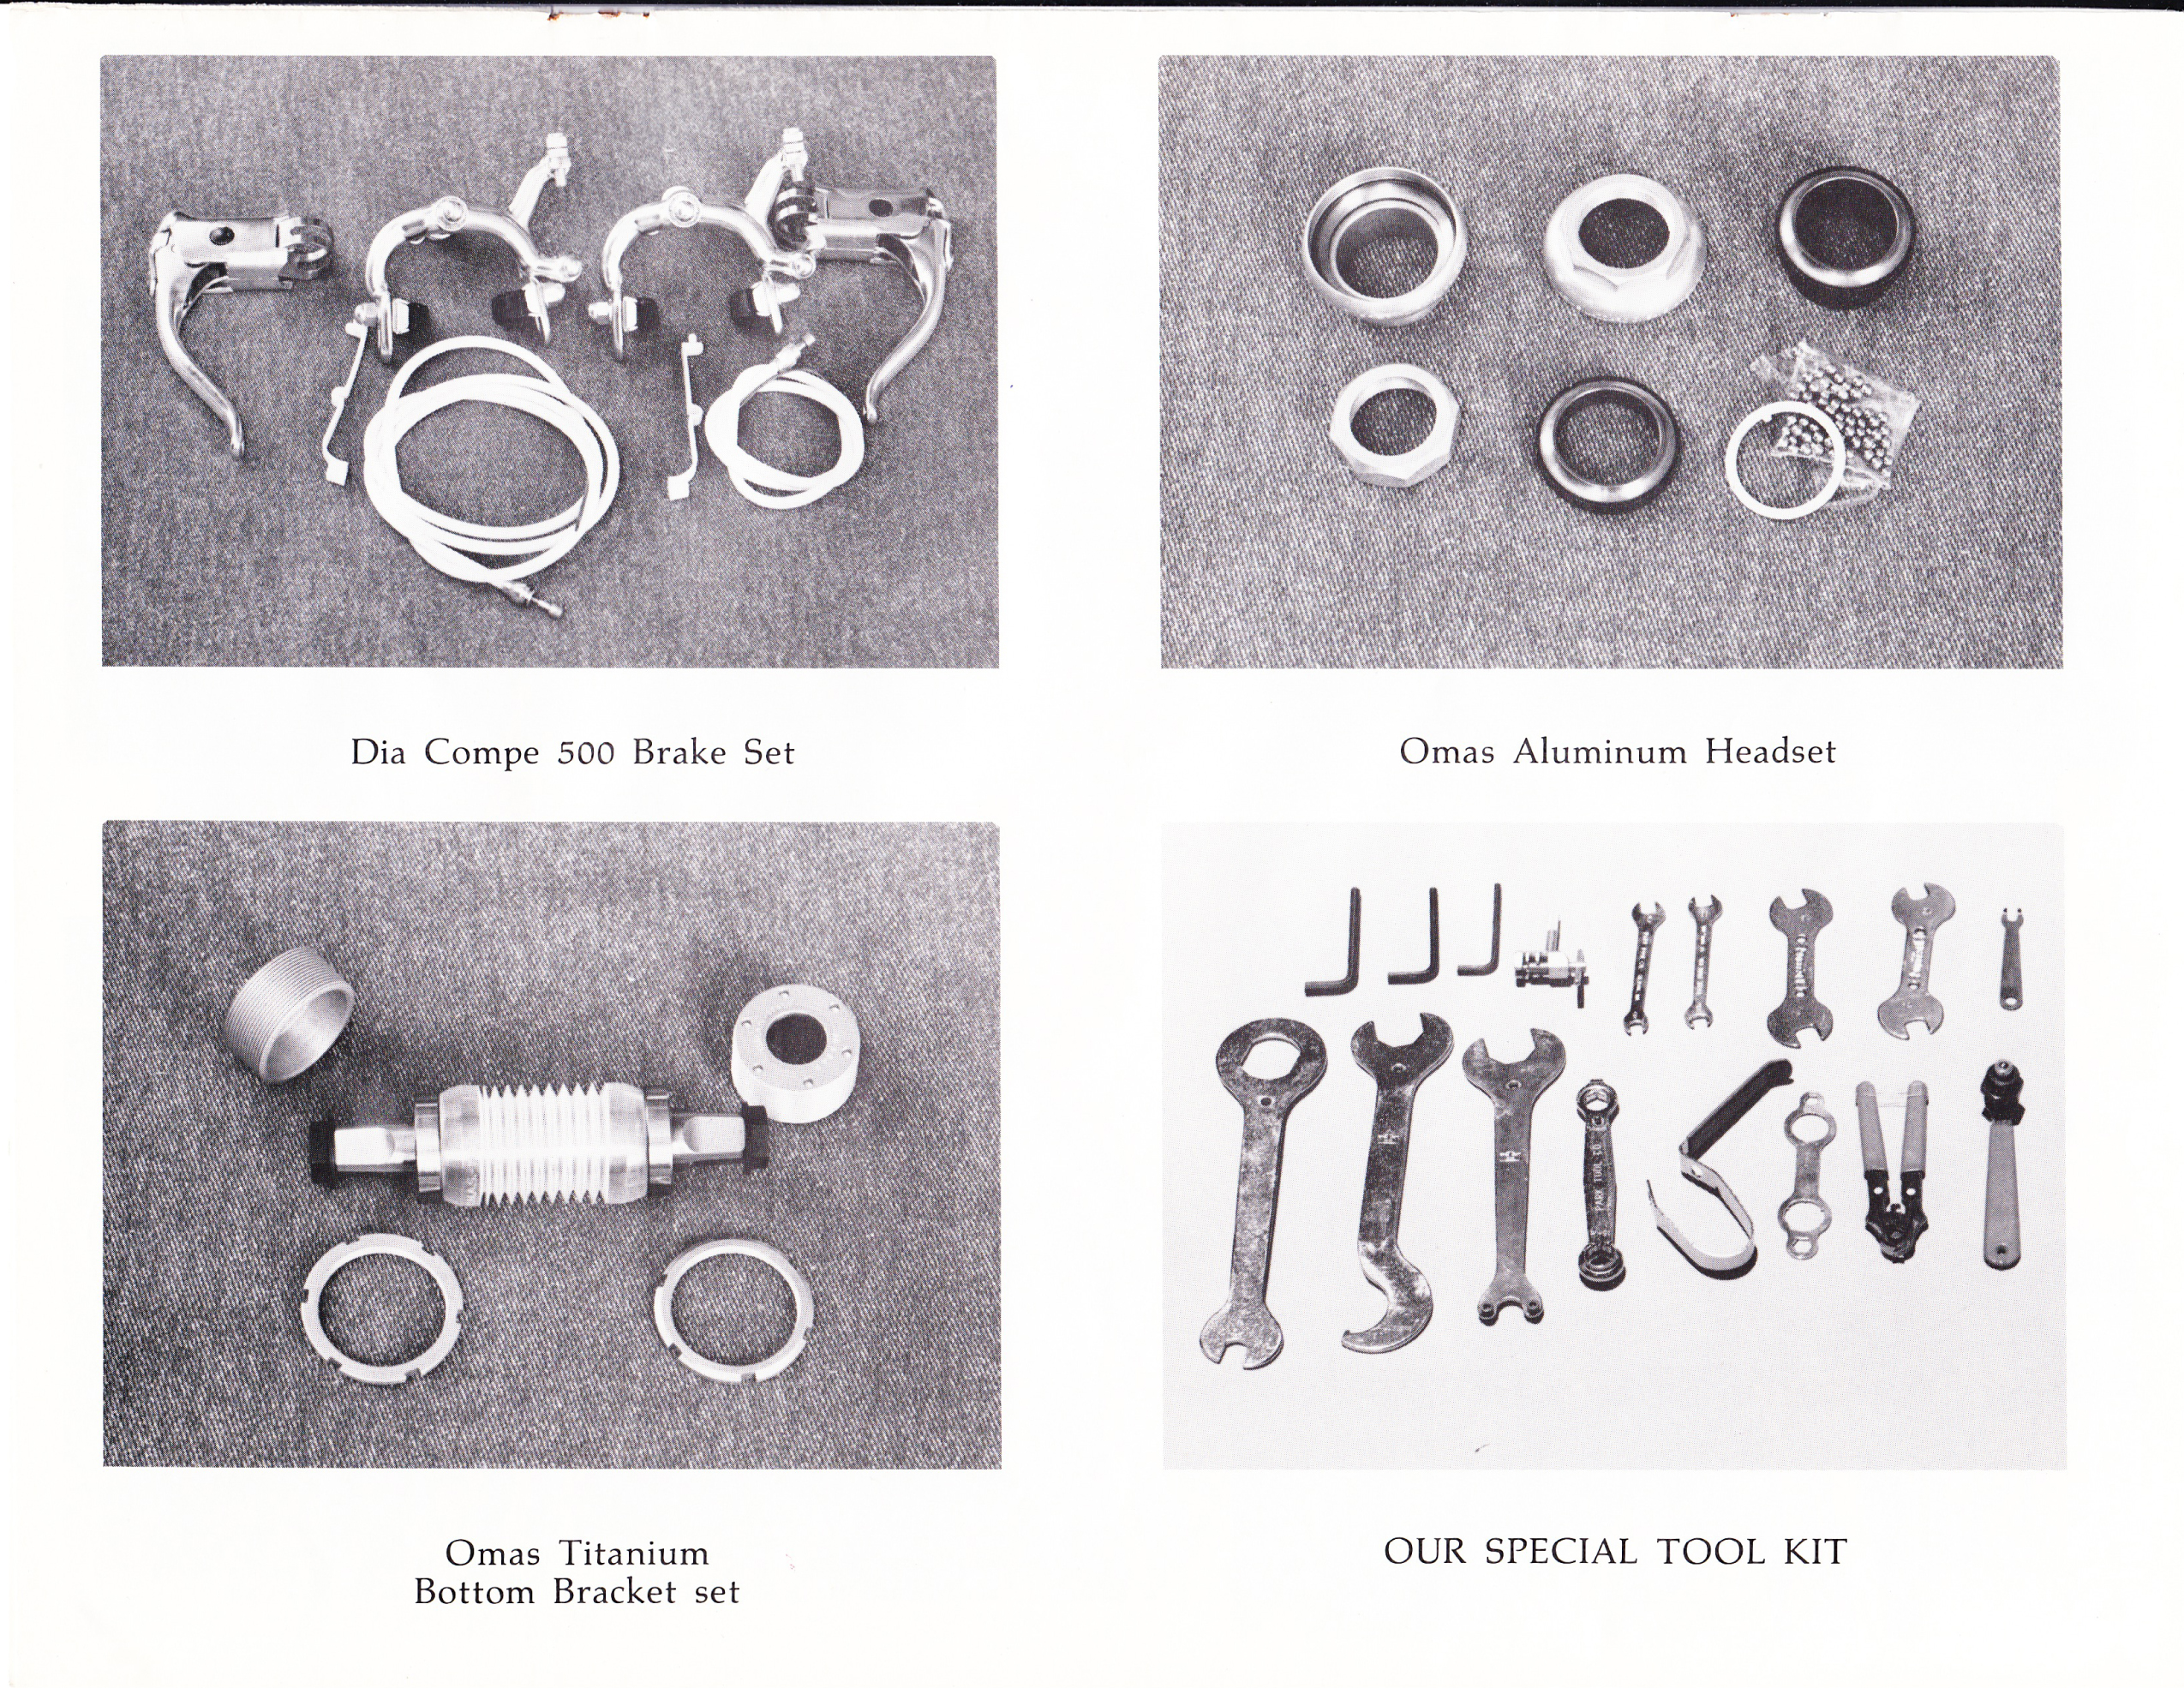
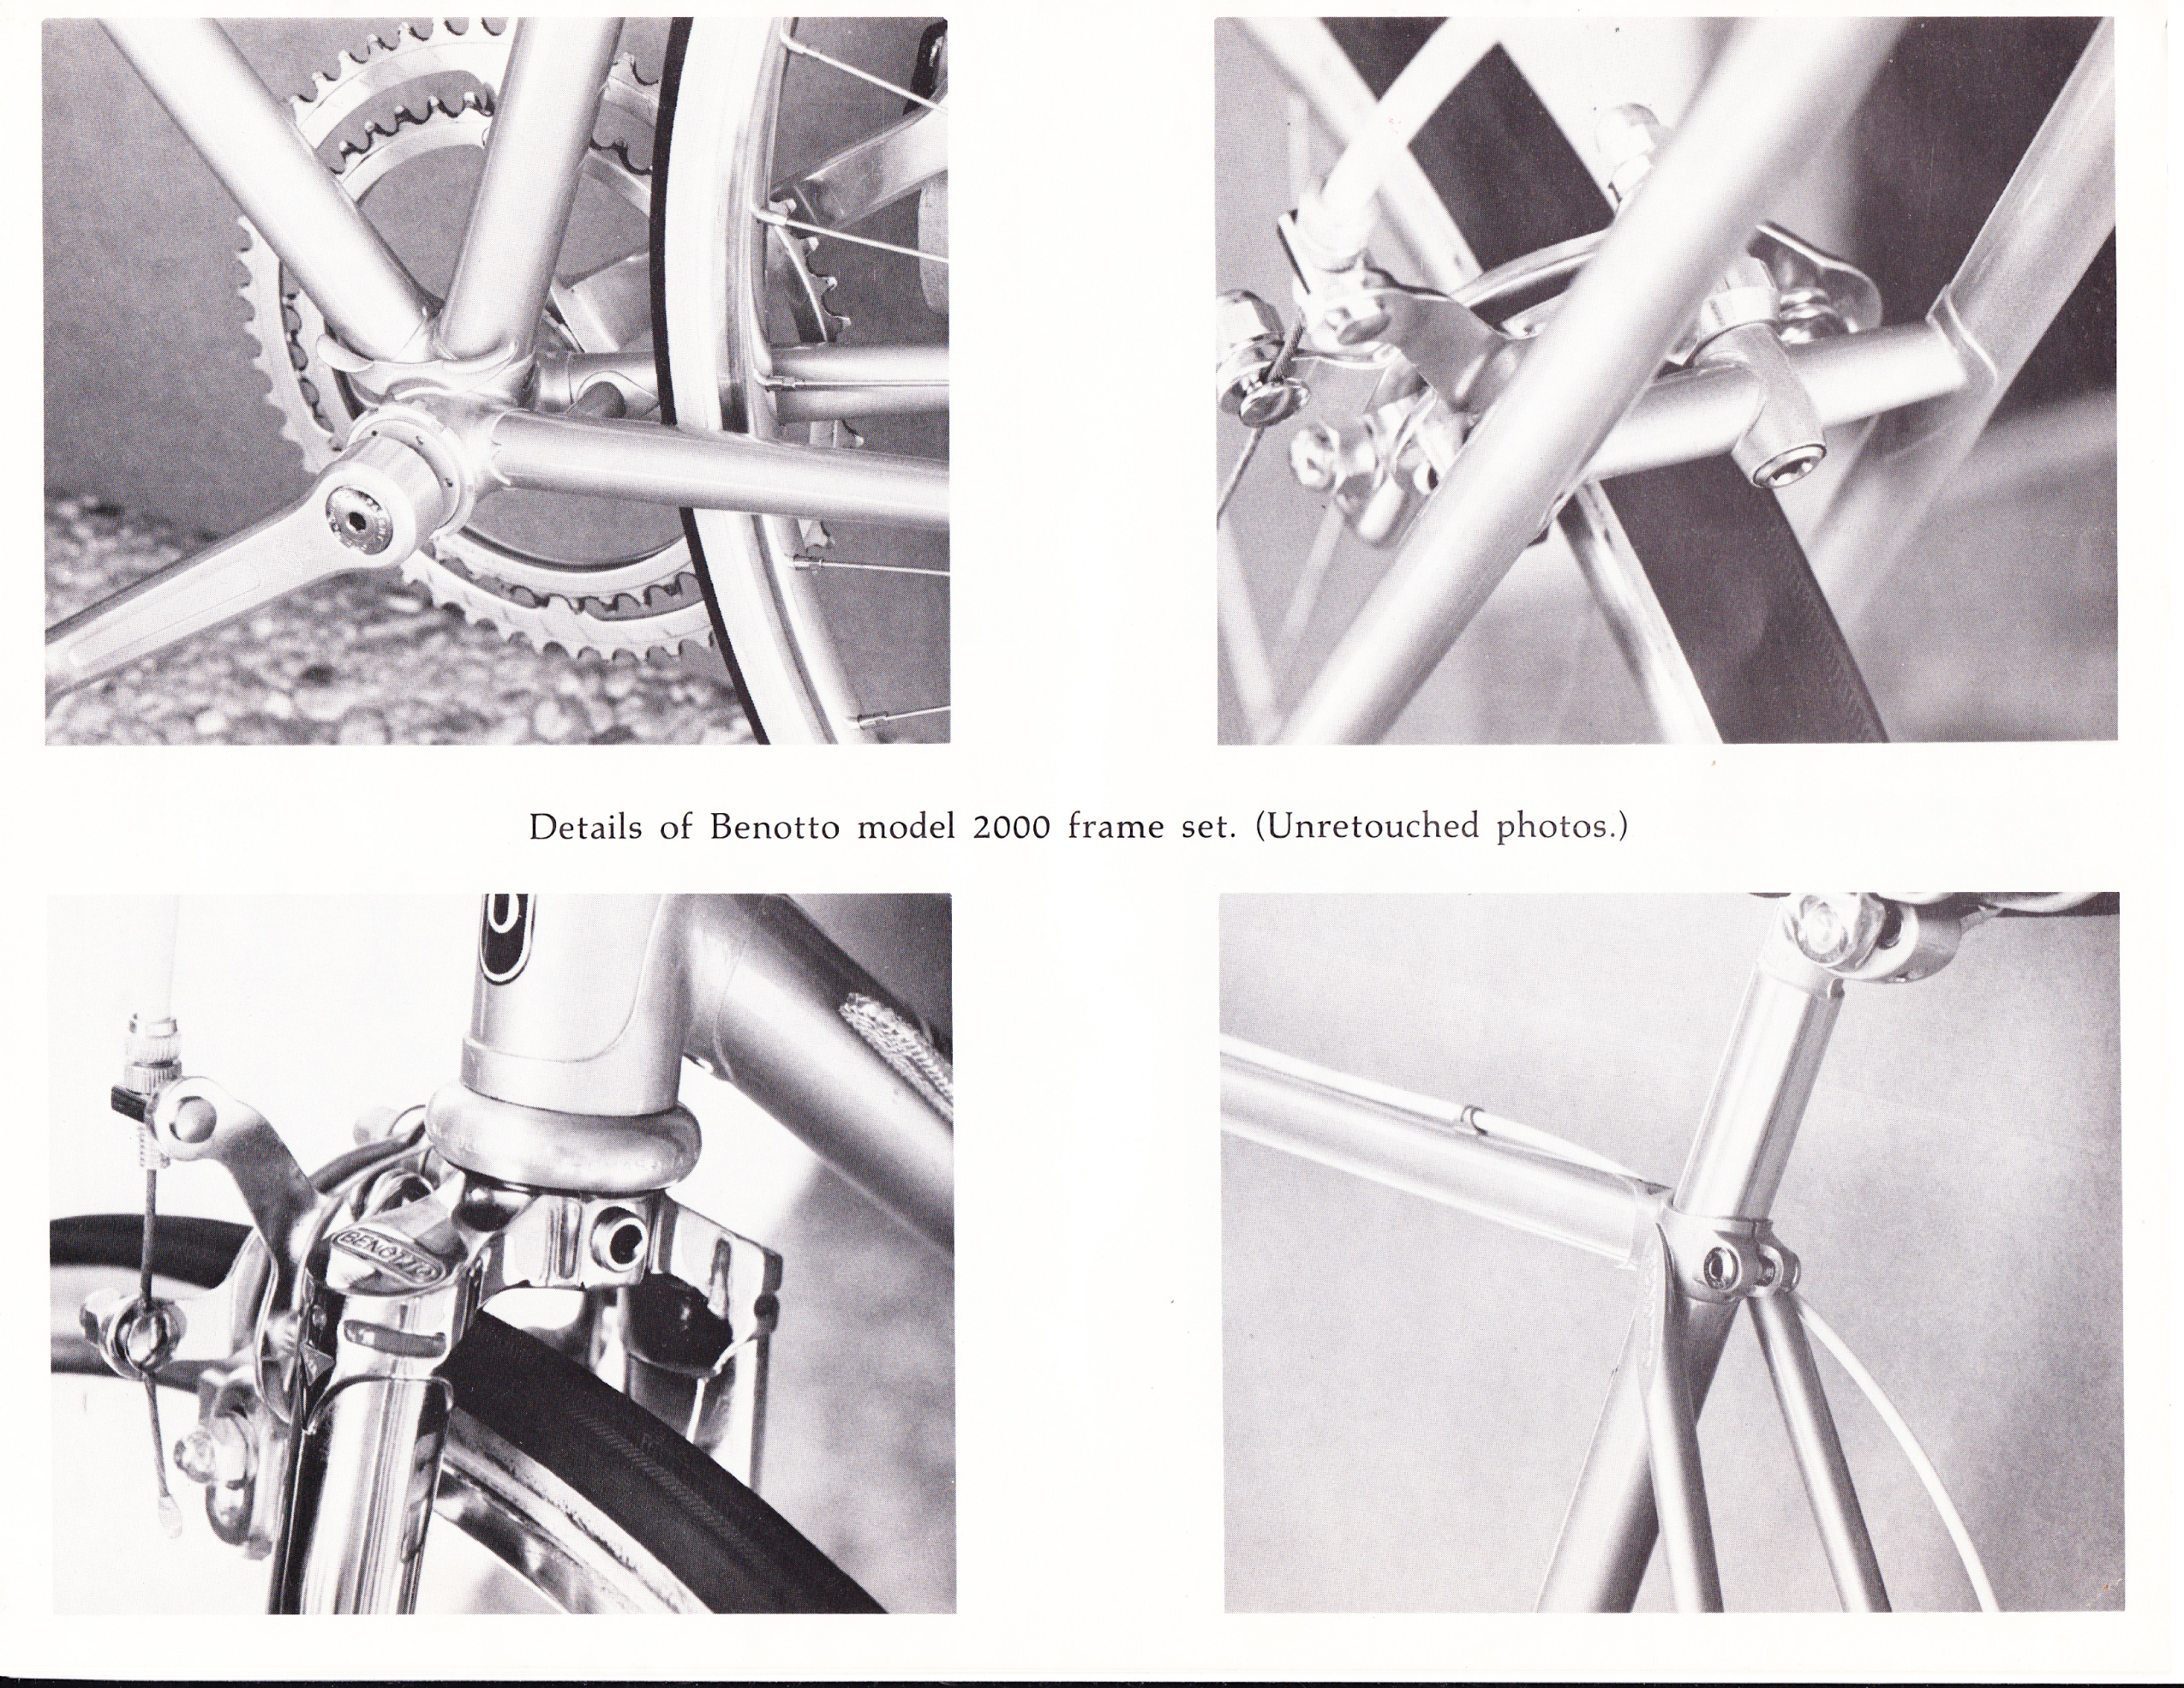
Thank you to Steve Whitmore for sharing this Benotto catalogue from 1979. This is part of the attempt to document all pre 1985 Benotto models. Hopefully this will help others identify or restore their 1979 models.
Here are links to the PDF versions of these files:
The restoration is coming along nicely. Ordered some NOS Benotto forks and they arrived safely today. The forks are made of Columbus SL tubing, the kind found on Benotto modelo 2500 and 3000. Part 1 and Part 2 of the restoration are here.
Step 1: Sanding (3-4 hrs)
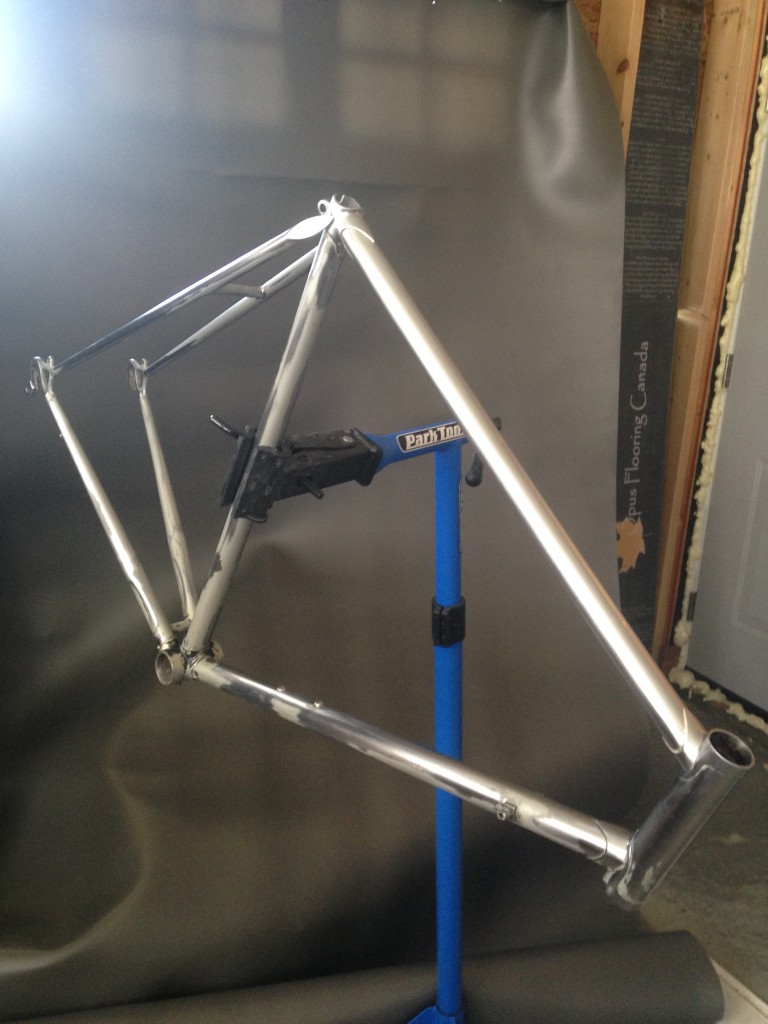
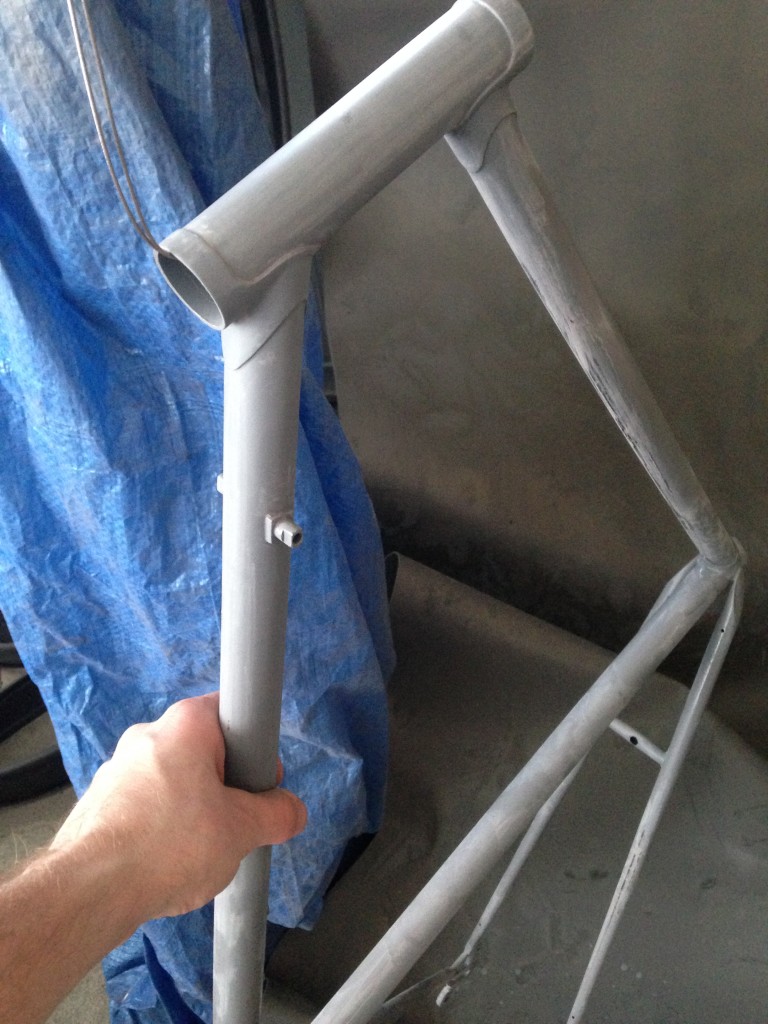
I started with 180 grit sandpaper. Because I had previously sprayed the bike black, I wanted to make sure I got all the old layers of paint off to bare metal.
Next I switched to 200 and then 400 grit sandpaper.
Sanding the bicycle’s frame reveals metal in great condition.
I used 400 grit sandpaper on a drill wheel to clean the brazed areas.
Sanding revealed a really nice metal frame. Almost made me want to clear coat the whole frame.
Step 2: Cleaning (20 min)
I don’t like using water on freshly sanded metal as it creates rust. So I started off with a cotton clothe and wax and grease remover. Went over the frame about 3 or 4 times until the rag came out clean. I wore gloves while doing this to prevent the oil from my hands getting on the bike frame.
Step 3: Taping (5-10 min)
Once the frame was clean I taped the bottom bracket area as I didn’t want the threading painted. I also taped part of the rear dropout.
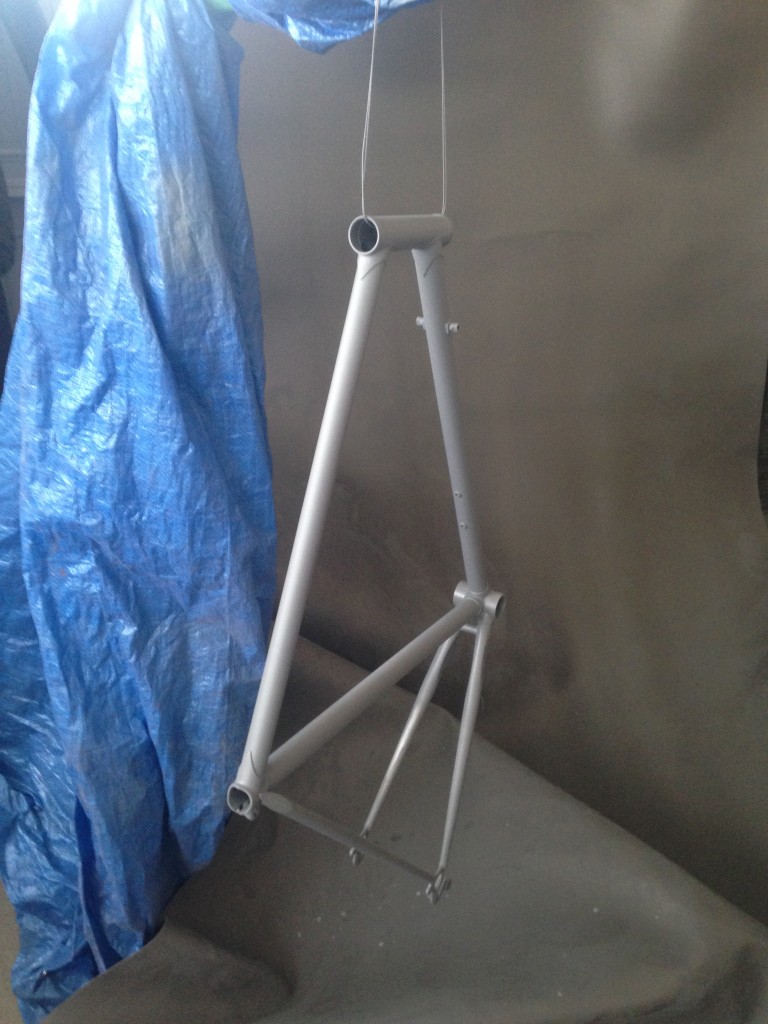
Step 4: Metal Adhesion and Primer (10 min)
To help the bare metal areas that I will be clear coating I sprayed some metal adhesion promoter first. I will be sanding this again prior to clear coating.
Next I did 2 coats of primer over the frame. When using spray paint shake the spray can really well for about 60-120 seconds.
When spraying hold the can about 8inches away from the area and use smooth sweeping movements. Start the spray before you move over the part to paint and release the spray after completing the pass.
Start with the intricate areas first. I sprayed the bottom bracket, lugs, and dropouts first.
Next I did the frame by sections, spraying with the length of the tubes.
Step 5: Wait 10-15 minutes for the primer to dry (15 min)
Step 6: Second coat (10 min)
Spray the sections of the frame a second time.
Bike frame primed, doesn’t look like the same bike
Step 8: Go for a long ride (4-8hrs)
I wanted the primer to set well before sanding to get the best finish, so I left it overnight and went for a ride on my Trek.
This was mid way through the afternoon bike ride
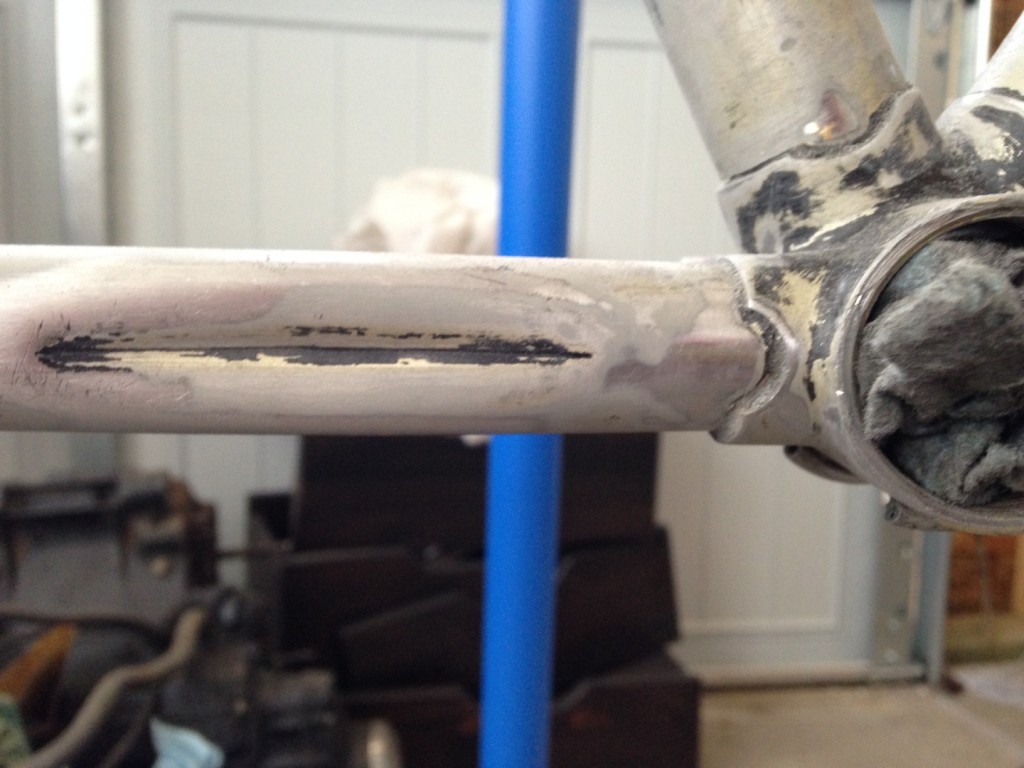
Step 9: Wet sanding (10 min)
1 day later (tonight) I prepped the frame for the second coat of primer. Once your primer is set, you will want to wet sand the frame. I used 400 grit sandpaper, a bowl of water and a cotton cloth. Keep the sand paper wet at all times while working over the paint. Primer is easy to sand and you don’t need to press too hard.
I used a rounded block to keep the sanding as even as possible.
After wet sanding all the tubes I then sanded the lugs and more detailed areas.
Once everything is smooth and your hand glides easily over the paint, it’s time to prep for the next coat of paint.
Wet sanding the benotto frame
Step 9: Clean and prep (5-10 min)
A cotton rag with wax and grease remover works well to clean sanded areas. You want to use a lint free rag. It took about 3 passes for the frame to come clean.
Step 10: Final coat of primer (10 min)
I did one more coat of primer, the same way I did the first one. Starting with the bottom bracket, dropouts and lugs. Next I used smooth sweeping motions to paint the frame tubes as evenly as possible.
Step 11:
Next you are ready for the base coat, I haven’t got the paint yet, so I will need to wait for the next step. I plan on sanding one more time prior to the base coat. It’s not necessary… but hey it’s a classic.
I made the mistake of painting my Benotto black after first getting it about a decade ago. Today I’m restoring it back to something fitting of the Benotto name. But first I wanted to research and find out the model of my bike. It’s proving really difficult so I’m documenting what I’m learning about Benotto’s and hopefully it will help others identify their bikes in the future. Also, thanks to Kris for commenting on part 1 of the restoration, that encouraged me to document in more detail about the frame.
This bicycle restoration is turning out to be a bit addictive. Here’s a quick recap thus far. At first things were going pretty well, stripping the frame for sanding went quickly. Then, tragically while sanding the frame to prepare for paint the centre cable guide snapped off. I rotated the frame in my bike stand unfortunately catching the cable guide.
As a kid I learned to play the violin. My violin was the least expensive model from our local music store, but for my parents it was a big purchase. It was the middle of the day, a few years after first getting it, and I sat down on the edge of my bed, not noticing my violin behind me. I snapped the bridge. I was devastated. At that time of my life my violin was hugely important to me.
I remember my mom walking into the room, looked at the violin, looked at me, and said the last thing I could have expected, “Jon, you need to look at this as a positive thing. Be thankful that you broke your violin.” None of those words made any sense to me in that moment, yet I chose to follow her advice.
We went back to the local music store. The owner was standing behind the counter, he took a look at my violin, and calmly told us, “I may be able to fix this.” He rummaged around the supplies in the back corner and came back with a new bridge. “Ahh, I’ve got one, perfect.”
Taking my violin, the new bridge, and a small file he immediately went to work. About 15 minutes later my violin was back together, tuned and ready to play. I played a chord, it had never sounded so rich. A year or so later my instructor would marvel at the violin, she would go on to ask me how much I paid for it. After telling her, she responded that I must have gotten very lucky as it had a better sound than many violins thousands of dollars more expensive.
My mother’s comment now made sense.
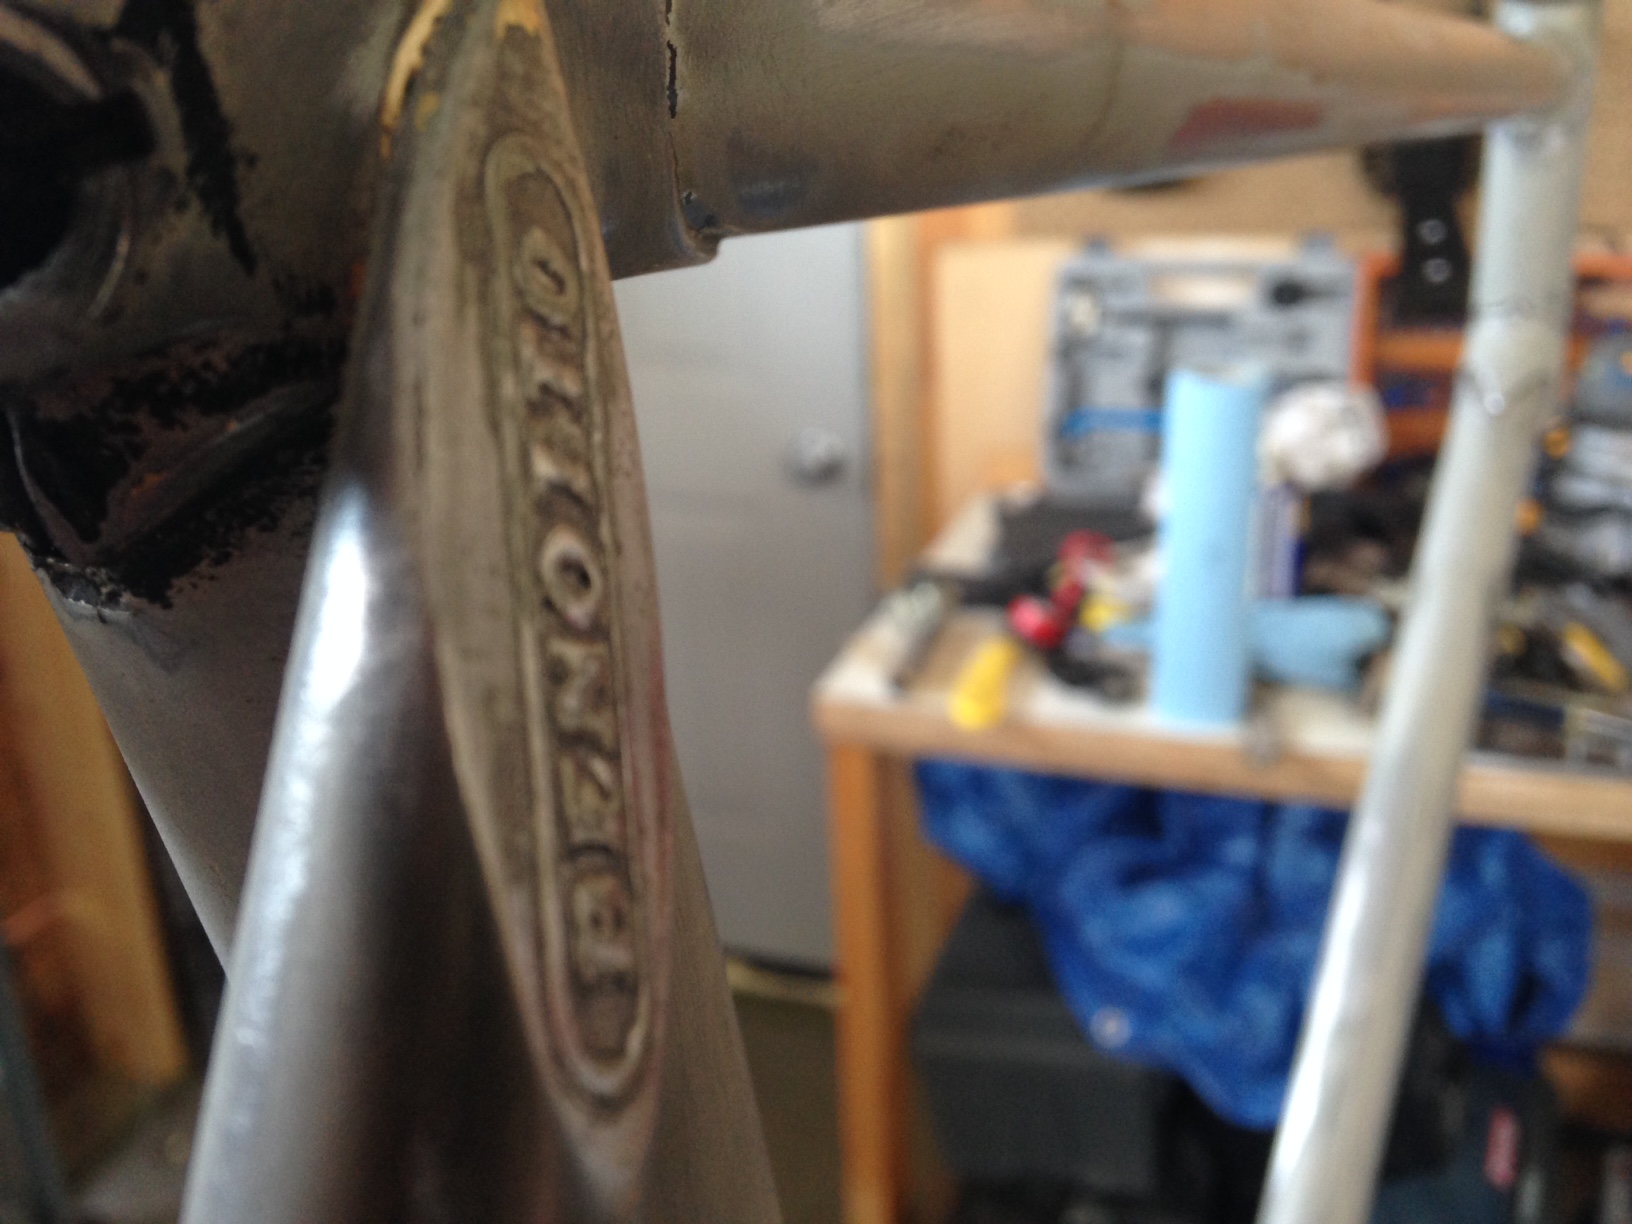
So last week I took a deep breath and ground off the last 2 remaining cable guides from my Benotto. I looked online, found some new braze-on cable guides that I could purchase, but they would be different to the originals. Later, while watching the classic Paris-Roubaix documentary “A Sunday In Hell” a new idea formed.
Benotto used cable guide clamps until 1976-77. After which they moved to braze-on cable guides. Because I had already removed the cable guides, why not use the vintage cable guide clamps and restore the bike to be like the one used by Francesco Moser in the 1976 Paris Roubaix race.
With that decision made, it’s back on the restoration train.
Identifying 1979-1980s Benotto’s by the frame and fork:
In part 1 I explained why the original model and year is unknown. Also, some of the components are original, and some are not… all of which makes identifying the bike just that much more challenging.
Step 1: Benotto Chainstays
Benotto 3000 chain stays are diamond shape. All other models had the “eye” indents. Quick look at history, the Benotto 2500 was the highest model until the early 1970s, then by the late 1970s Modelo 3000 was the top model.
Benotto 3000 diamond shaped chain stay
My Benotto’s chain stay definitely would indicate a model 2500 or lower.
Step 2: Seat post opening.
Benotto frames have the same outside diameter. However, the inside diameter changes depending on the metal used. For example, Columbus SL has a seat post diameter of 27.2mm as the metal is 0.6mm thick. Columbus SP has a seat post diameter of 27.0mm as the steel is 0.7mm thick. Columbus Aelle has a seat post diameter of 26.8mm, the steel is 0.8mm thick. Columbus Zeta has a seat post of diameter of 26.6mm, the steel is 0.9mm thick. Finally, Columbus double butted steel and plain gauge steel is 1.0mm thick with a seat opening of 26.4mm.
Benotto racing road bikes are listed from highest model to lowest by numbers. Benotto Model0 100-800 are entry level bikes. The Modelo 850 is the first of the amateur series bikes.
Modelo 3000 used Columbus SL
Modelo 2500 used Columbus SL
Modelo 2000 used Columbus SP
Modelo 1600 used Columbus Zeta or Aelle
Modelo 1500 used Columbus Zeta or Aelle
Modelo 1000 used Columbus Zeta
Modelo 850 used Columbus Zeta
Modelo 800 used Columbus double-butted steel, or straight gauge moly steel.
Model 700 (unknown)
Model 500 (unknown)
Model 100 (unknown, but 1976 catalog says it uses light-weight steel.)
Measured my seat post and it was 26.6mm. That would put it somewhere between a Modelo 850-1600.
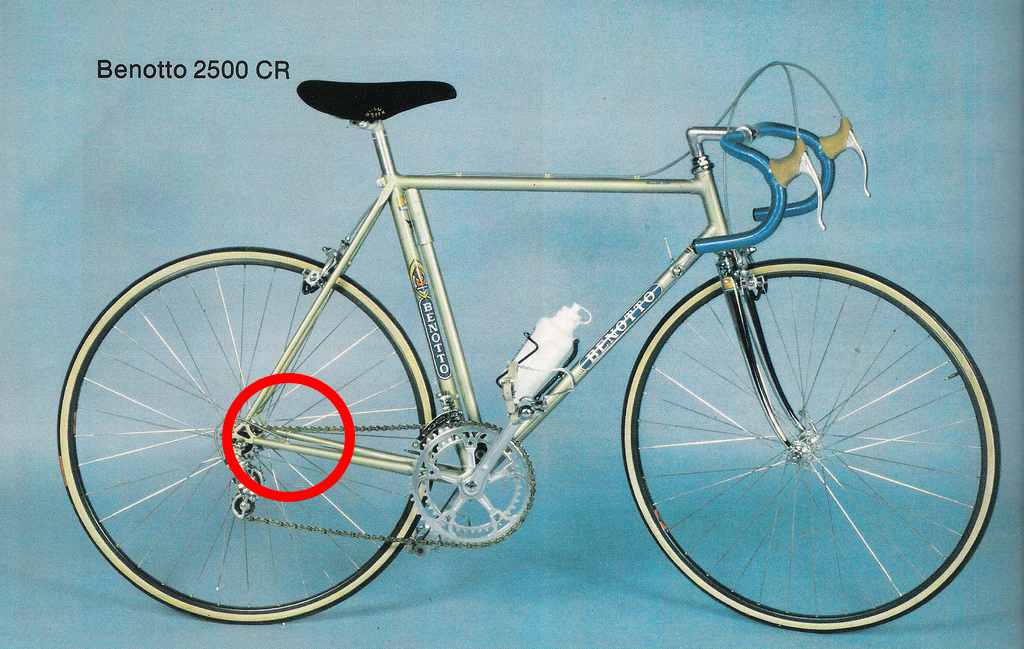
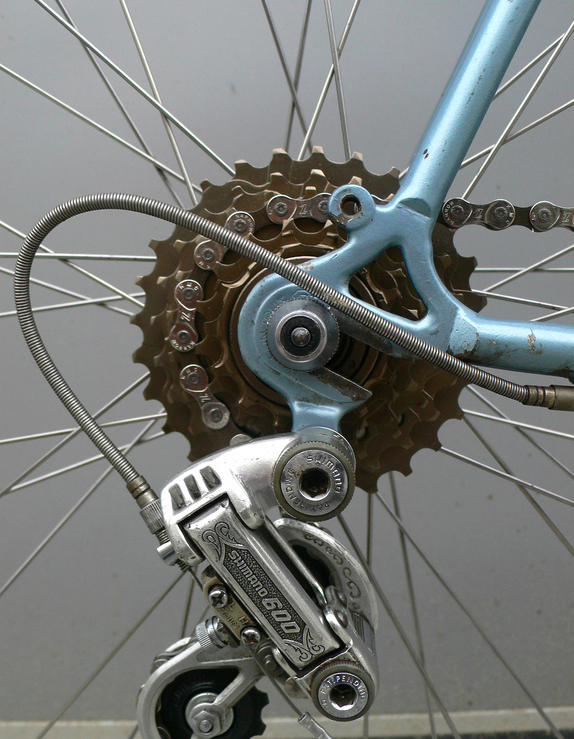
Step 3. Rear derailleur cable guide.
From all the research I’ve done I’ve concluded that Benotto moved their brazed on derailleur cable guides from above the bottom bracket prior to below the bottom bracket in 1979. 1976 and earlier had the clamp on guides.
1977-78 Benotto brazed on cable holders were above the chain stay and bottom bracket1979 and later models have the brazed on cable holder below the chain stay and bottom bracket
Looking at my bike’s rear derailleur cable guides and bottom bracket would indicate that it is a 1979 and later model.
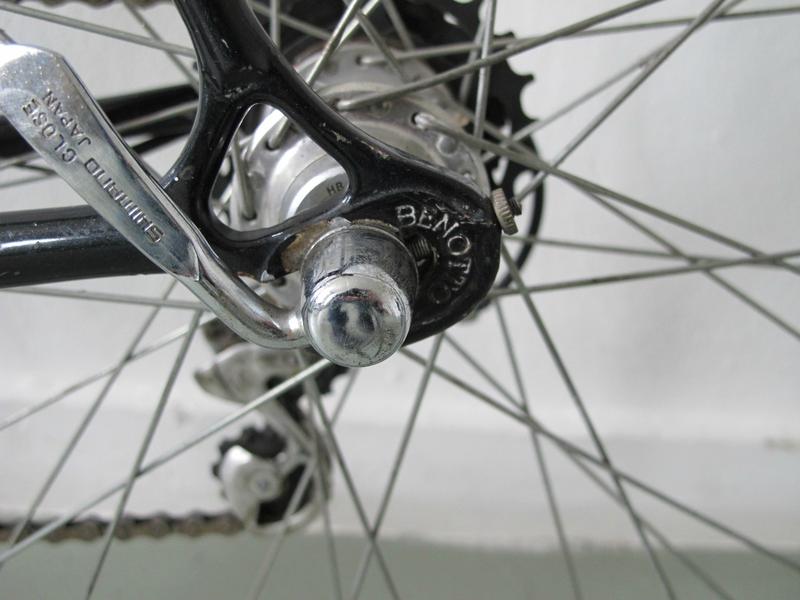
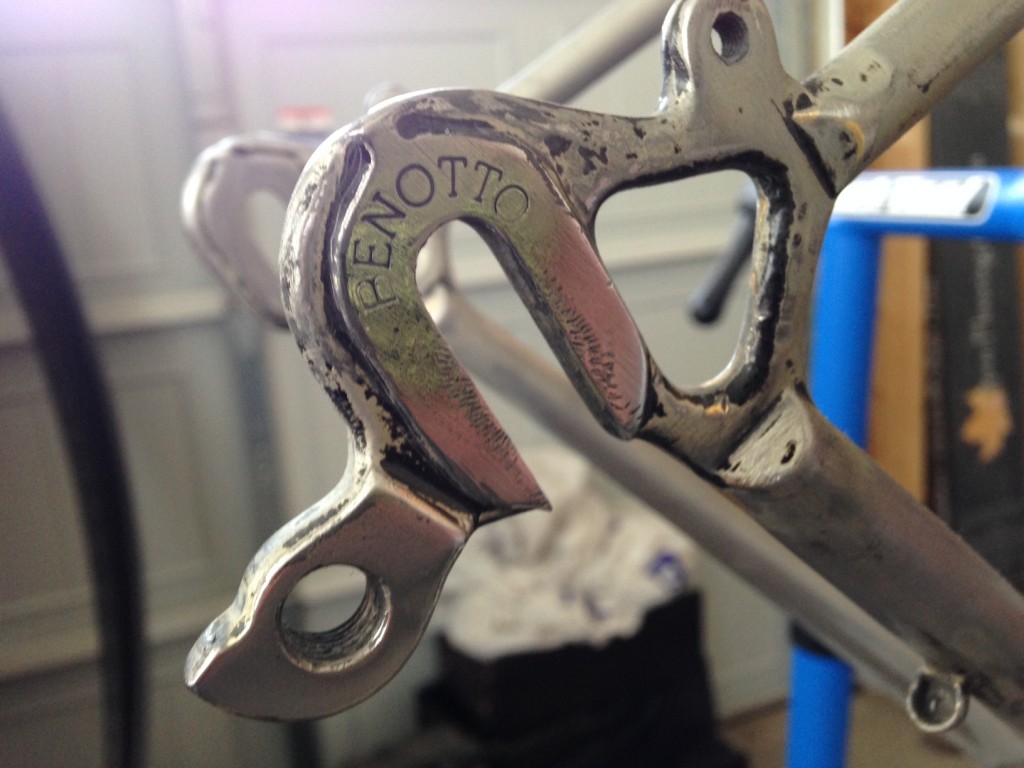
Step 4. Rear drop outs
Benotto Modelo 3000 has Campagnolo rear drop outs.
Benotto 3000 Campagnolo rear drop outs
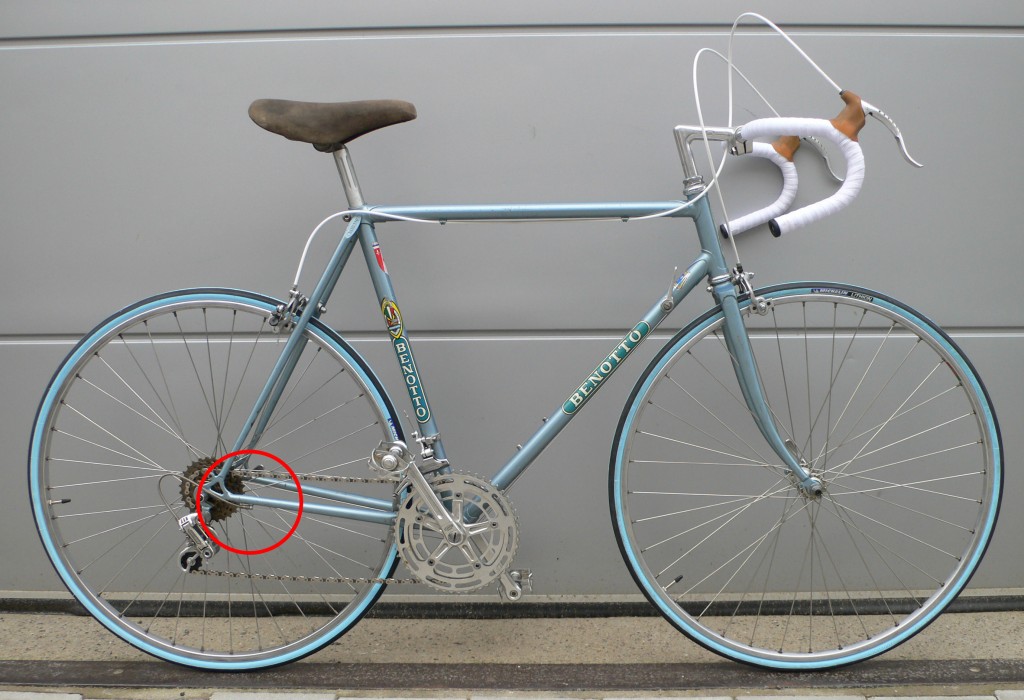
Benotto Modelo 2500, 2000, 1600, 1500, 850 had Benotto rear drop outs
Benotto 1500 rear drop outBenotto 2500 rear drop out
Benotto Model 800 and lower had Suntour, Benotto or other rear dropout
Benotto Modelo 800 Suntour dropout
My bike has the Benotto rear drop outs
Step 5. Tubing vs Pipe
It’s not always possible to see this. In my case, because I sanded my frame down to bare metal I could make this observation.
Steel Tubing frames are made in forms and molds. Whereas piped frames are rolled metal. From a strength perspective there are tradeoffs. Randy from mytenspeeds.com mentioned that tubing can be more fragile than piping. But Tubing can generally be made to be thinner in some areas and thicker in others to save weight. Piping is uniform in thickness. Columbus frames are made of tubing.
I noticed what appear to be seams in the metal. That would mean that the frame is made of piping. It’s interesting to note that my seat tube was 26.6mm. So perhaps Benotto used a thinner piping. Either way my Benotto must be a Modelo 800 or lower.
Okay, so that’s where I am in the process so far.
More posts to come. Will write a piece about Benotto Forks as that should give some more clues. Will hopefully have the sanding completed and primer soon.
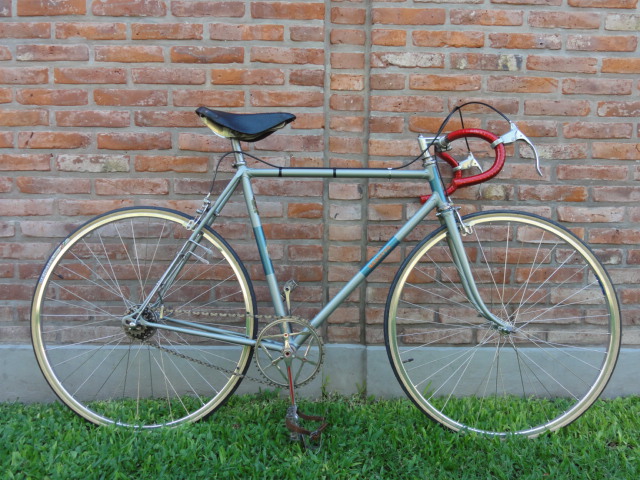
I remember it like it was yesterday. It was a bright sunny morning and I had just gotten a phone call from my friend Ryan, “You’ve got to come quick … there’s another guy that really wants this bike.”
The bike was a $5 Benotto at Ryan’s garage sale. It was a killer deal. Granted this was 10 years ago and the love of all things classic hadn’t yet come into vogue.
Bikes have somehow been involved with all the big milestones in my life. One of my earliest memories is of my dad surprising me with my first bike. He had worked in the garage fixing up and painting it. My family moved countries when I was 8. That was when I sold my then red 6 speed bike. It was the most precious belonging I had. Selling it was a big deal for me – bigger than moving countries. My parents were perhaps aware of this. They let me sell the bike myself, barter for a fair price, and then throw in my lock because I liked the kid.
Later at the iconic age of 16 I got my first “real” mountain bike. It was a Giant ATX 870. Our family had moved again (we moved around a bit growing up – which may explain my nomadic inclinations). Shortly after arriving in the new town I got this beautiful machine. It was my pride and joy. I liked that it was a hard-tail and I liked that it was a bit more technical to ride down some trails. I took care learning to do drops and my first gap jump. I never dropped the bike, never crashed, or endoed. It was the perfect bike for me. Then it was stolen.
The next day my dad called to let me know he saw a guy riding downtown on a bike that looked identical. But the guy disappeared and that was the last time I ever heard about it.
I learned a valuable lesson. If you value something – look after it. Instead of looking after this bike I had left it behind a friends house because I didn’t want to bike back up the hill home. That’s where it was stolen.
Skipping a few years and I’ve been without a bike for about 3 years. That was when my friend Ryan called. He knew that I had been looking for a road bike and a family member had donated this bike for his garage sale. So I headed over there and closed the $5 deal.
For me this Benotto represented more than a bike. It felt like a gift from God. It was just what I needed that summer.
It was late spring when I picked up the bike and the weather was warming up. That bike became my primary mode of transportation. In those days I was working on a construction site. I would bike to the job site early in the morning, work through the day, and then ride back through the town, cross the bridge and then up the long steady hill climb home. The Benotto took me on weekend adventures, peddling up the roads with friends to explore and climb nearby mountains.
I didn’t know anything about the bike, all I knew was that I loved the way it was to ride.
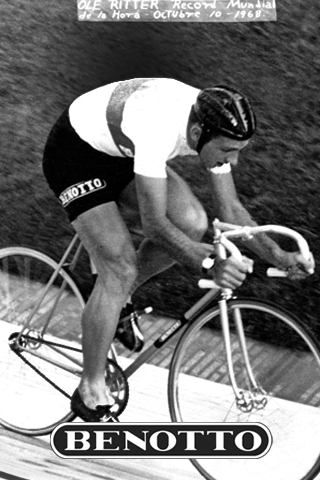
Earlier that year I had helped out briefly at a local bike shop as a bike mechanic. As the shop was on my route home I swung by to give the bike a tune up. It was the guys there that let me know just how special the Benotto was – and how rare it was to find. Apparently Benotto was one of the best bike makers in the world from 1930s to the 1980s. Benotto team riders lead the world’s cycling scene in the 1960s to 80s – breaking records and winning races.
This was all news to me. I liked the frame and had sprayed it black right after getting it. Later converting it to a single speed and using it as my town commuter. Turns out this was a mistake. Benottos are like the holy grail – not to be tampered with.
This faithful bike has been with me now for about 10 years, through thick and thin, rain or shin, and I feel it deserves a new life – one fitting of the Benotto name.
So this week I’ve started the restoration. It proved really challenging to identify the model and year having removed all decals when I first got it (I did leave the front decal). Despite its legendary status there is surprisingly very little information available about the Benotto. I’ve tried to document what I’ve learned as I go and share that with the world on this site. You can learn more about the history of Benotto here.
The restoration – Part 1
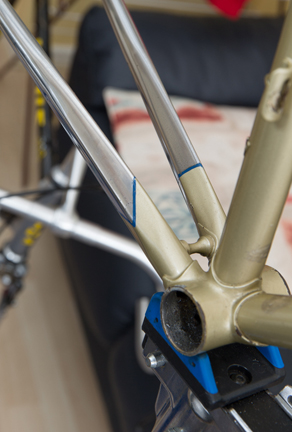
First the dismantling. This is the fun part. Stripping off all the parts revealed some really nice brazing in the bottom bracket.
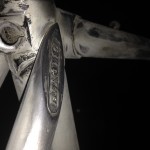
You can see the original gold/champagne colour remained hidden beneath some of the parts.Sanding begun. You can see Benotto’s signature heart cutout. The quality of a Benotto bicycle can be seen everywhere. Here are the cast rear wheel dropouts.
As the black paint is removed, more quality craftsmanship is revealed. Here you can see the nicely built seat stays.
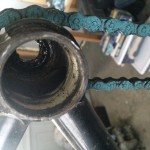
Then tragedy strikes. I accidentally broke one of the cable guides on the top tube with my bike stand’s clamp. Was hoping to braze it back in place, but it’s broken into 3 pieces. Not sure what I will do. Might grind off all the cable guides and replace them with new ones. Or I use the old fashioned cable guides. Will see what comes to mind tomorrow.
This is an attempt to document all of Benotto’s pre 1985 models. I need your help, if you have a photo of a Benotto and know the year/model please send it to me or share a link to it in the comment section. That will really help out the community.
About 10 years ago I was lucky enough to pickup a Benotto of my own at a local garage sale. Having ridden many local hills and windy roads on this beautiful vintage frame I have personally experienced the esteem and fondness that Benotto owners and admirers have for these bikes. Benotto is a true Italian classic. The only problem is that there is very little information about them online. So this is an incomplete list at best, but hopefully it will help you learn more about your bicycle.
If you have any question, ask me in the comments below and I will try my best to answer them.
1931 Bicicletas Benotto was established by 24 year old Giacinto Benotto


 Riders everywhere are slamming their front ends. It’s gone global and it started with the pros switching to more aggressive frame setups. But is it the best option for you (or the pros)?
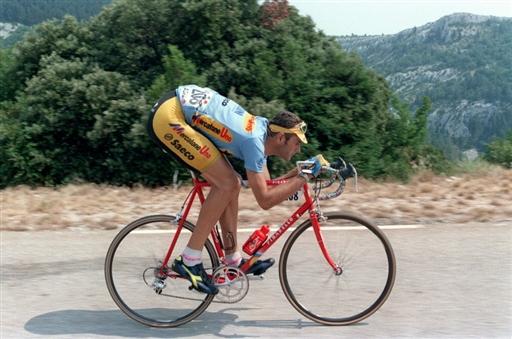


 You can see the original gold/champagne colour remained hidden beneath some of the parts.
 Sanding begun. You can see Benotto’s signature heart cutout.
 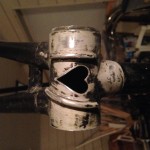 The quality of a Benotto bicycle can be seen everywhere. Here are the cast rear wheel dropouts.
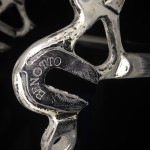
 Then tragedy strikes. I accidentally broke one of the cable guides on the top tube with my bike stand’s clamp. Was hoping to braze it back in place, but it’s broken into 3 pieces. Not sure what I will do. Might grind off all the cable guides and replace them with new ones. Or I use the old fashioned cable guides. Will see what comes to mind tomorrow.