Categories
On Bicycles Resource

A look into real world cycling aero gains – Part 2 on Body Position

Welcome to part 2 of how cycling aerodynamics effects the real world. This article will look at body position, training and most importantly how these translate into real results for you.

Introduction – Why I’m posting on this.

Part 1 – Aero gains for clothing

Let’s begin. The Perfect Body Position for Aero Savings

Aerodynamic savings on bicycles can cost a small fortune. What I love about getting gains from body position is that it is 100% free.

It seems pretty intuitive that lowering your body will reduce drag as you are making yourself a smaller object. But, which position is really the most efficient? And does fatigue impact aerodynamics? And when does vascular restriction outweigh the benefits from an aero position?

It turns out these all play important factors, and it’s not as simple as slamming a stem or using the drop bars to get gains. (I’ve tried both of these options).

What does David Miller have to say?

David Millar is a Scottish former professional road racing cyclist. He’s no saint, having admitted to using EPO, but he was the first British rider to have won the leaders jersey in all three Grand Tours. He was also the British Time Trial and Nation champion and has worn of all Tour de France Jerseys.

And, most importantly, he’s the most winningest time trialist that I know of who has shared his training techniques.
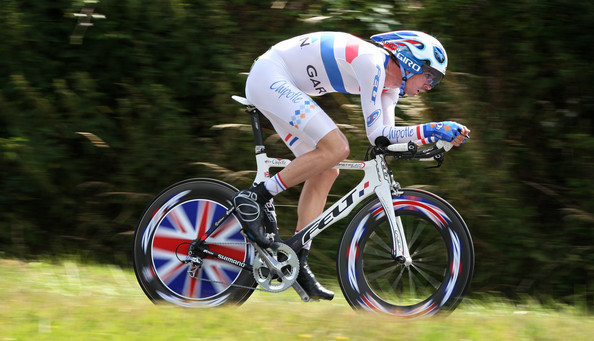
David Miller Time Trialist

A1 coaching did a series of videos with David Miller. And he’s surprising forthright of his experiences with aero testing. He shared that he’s learned, that, “You can acquire as much data as you would like, be it from a home trainer or a wind tunnel, but when it comes down to it, it’s that course on a road where you will be able to gauge [the benefits of position] most consistently.”

He tells a story of working on his aero position with coach Peter Keen who did a lot of research and testing using wind tunnels and science. David thought that he also needed to do a lot of science to get his position right. But Keen said, “You look fast David, pretty much that’s what we’ve learnt. If you look fast, generally you are fast, and you can’t do much more about it.”

BikeRadar’s testing confirmed this line of reasoning. They showed that even though Ben Delaney could ride for a short time in a more aero position, he was actually losing aero performance (from lateral movement and constant adjustments) because his body wasn’t relaxed in that position.

So before we get into which position is most efficient. Here’s what David says are the five things he focused on to improve his position and performance.

Number 1: Get a course, so that tests are repeatable outdoors.

Number 2: Focus on your current position on your current equipment to get a benchmark.

Number 3: Apply training around the course you are trying to improve your time on.

Number 4: Make sure you have all the equipment that suites the course and temperature you are riding in.

Number 5: Race strategy. Your pre-race should be the same for every race.

Using David’s system in the real world

As a result of David’s interview I focused my training around my position. I dropped my stem to a position where I was just comfortable and began adding drop-position sessions into my weekly training.

Here’s what I learned. It’s hard to sustain the same effort in a more compact position. The reason was that my heart rate was higher at the same effort/pace with my body in a more compact aero position. With training I was able to increase high effort segments from 1 minute to 8 minutes on the handle bar drops. 12 minutes short of my 20 minute goal at my desired effort.

Was the training worth it?

Yes … and no.

Yes it was worth it for position training. One year on and I am much more comfortable in that new position. However, the performance gains I did experience from this kind of training did not translate into performance gains for century type rides. My original goal was to improve my functional threshold power FTP as well as my aero position. Instead I improved my anaerobic lactate threshold and my aero position.

As you will see below, it may have made more sense to focus on a less aggressive position.

Both GCN and BikeRadar have posted interesting studies on which body position on the bike is the most aero. However they took different approaches.

GCN did a test where they held the same watts over time and then tested for time savings. Whereas BikeRadar tested various positions and tested for watt savings. I think they are both equally interesting.

GCN’s Body Position Test & Results

GCN tested riding with straight arms on the tops of the bars (non-aero position) versus riding with bent arms with hands on the drops. They saw a significant savings between the two.

Non-Aero Position:

  • 200W – 30.2KPH
  • 300W – 36.1KPH
  • 400W – 39.9KPH

Aero Position

  • 200W – 33.4KPH
  • 300W – 40.1KPH
  • 400W – 43.6KPH

Clearly, riding with your hands on the drops is much faster than riding with your hands on the top bars. But is it the most efficient position? BikeRadar helps answer that question below.
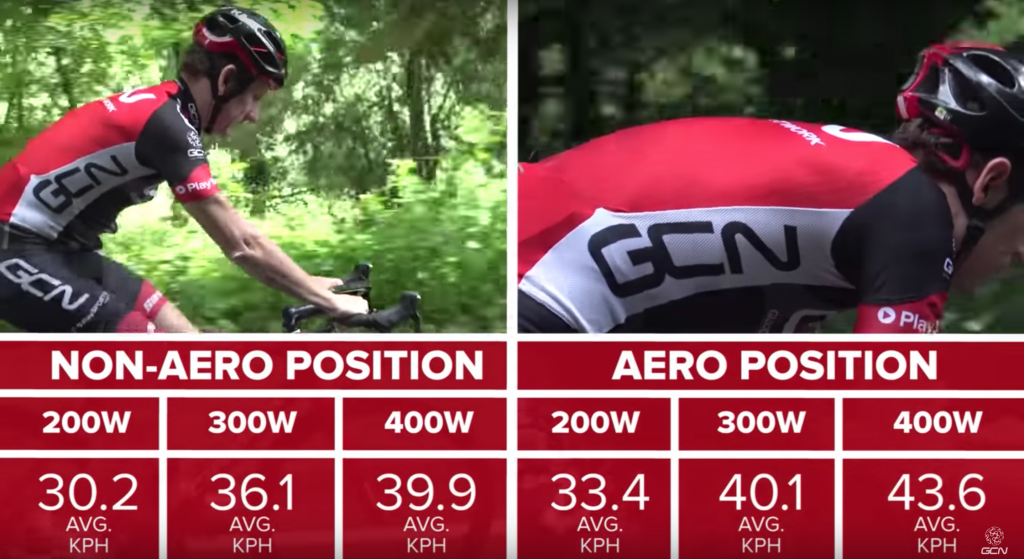
GCN non-aero position vs aero position test results

BikeRadar did another test in which they tested 4 positions.

Position 1: Straight arms with hands on the tops.

Baseline
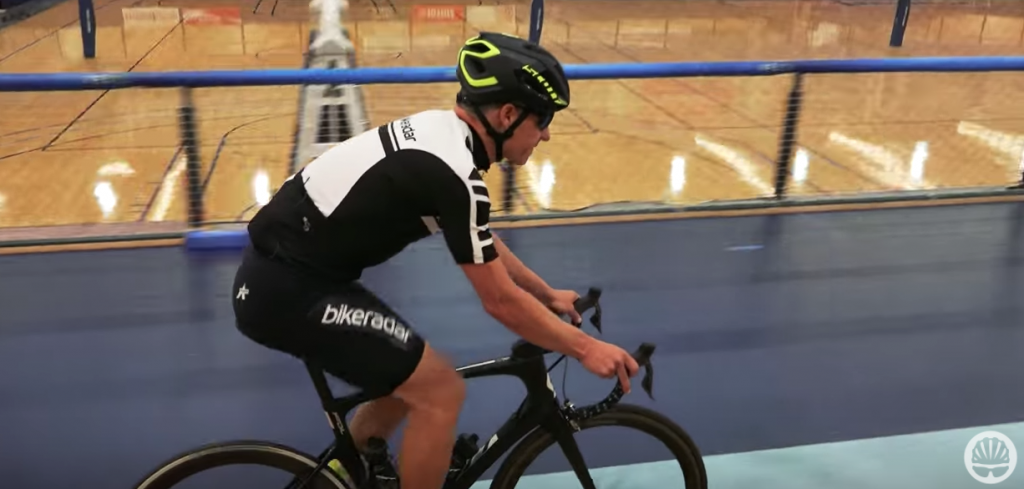
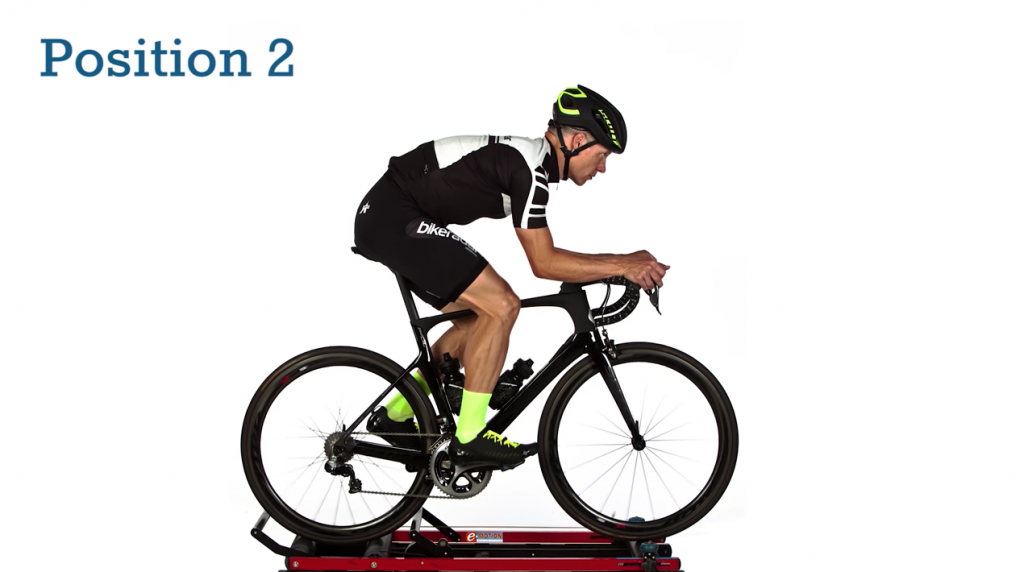
Position 2: Bent arms with hands on the tops.

It lowered his back angle significantly and took his arm angle out of the wind.

Saved an average of 94 Watts which translates to 362 seconds over 40KM at 250 Watt average.
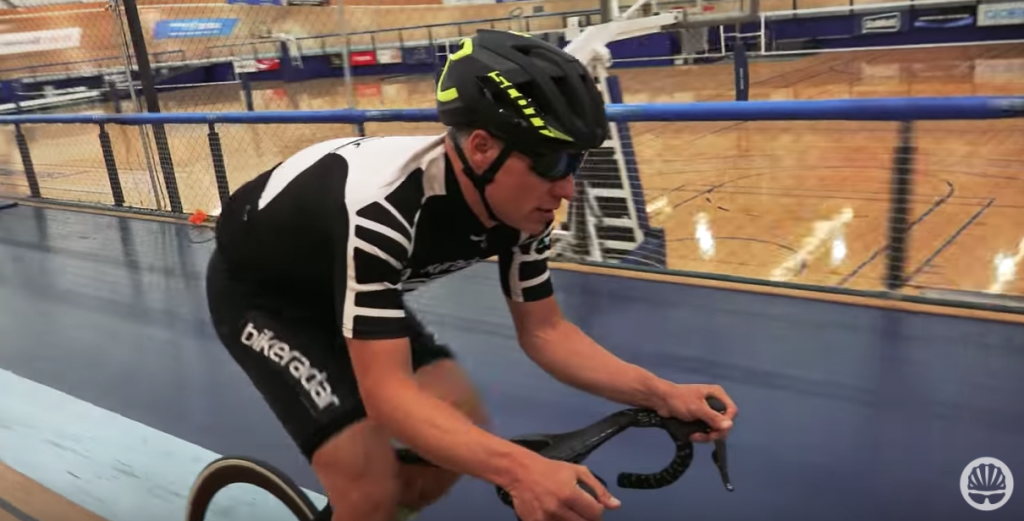
Position 3: Straight arms with hands on drops.

Saved an average of 67 Watts which translates to 214.85 seconds over 40KM at 250 Watt average.
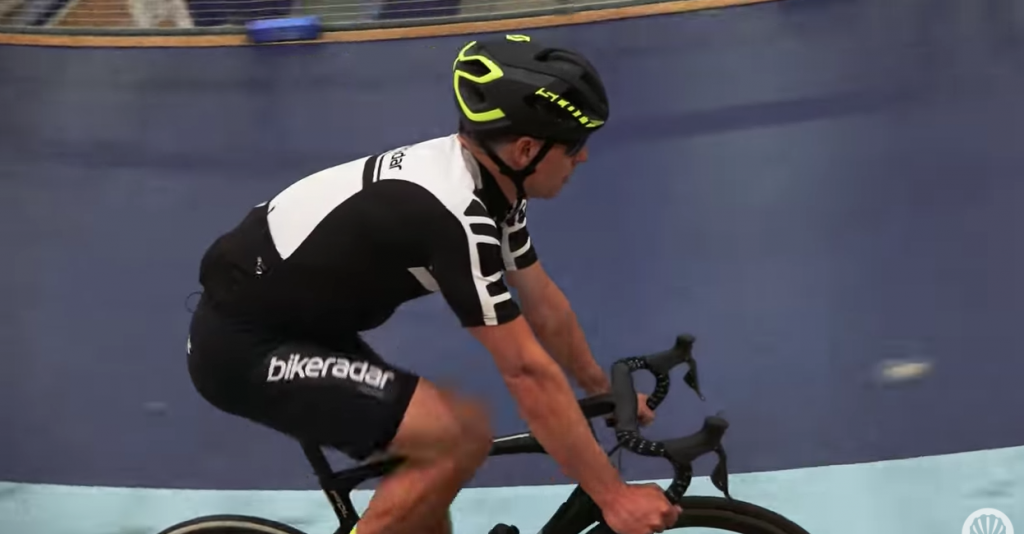
Position 4: Bent arms with hands on the drops.

Saved an average of 112 Watts which translates to 442 seconds over 40KM at 250 Watt average.

However, even though it saved him wattage, he was moving around a lot and it was clear he wasn’t going to be able to stay in that position over 40KMs.
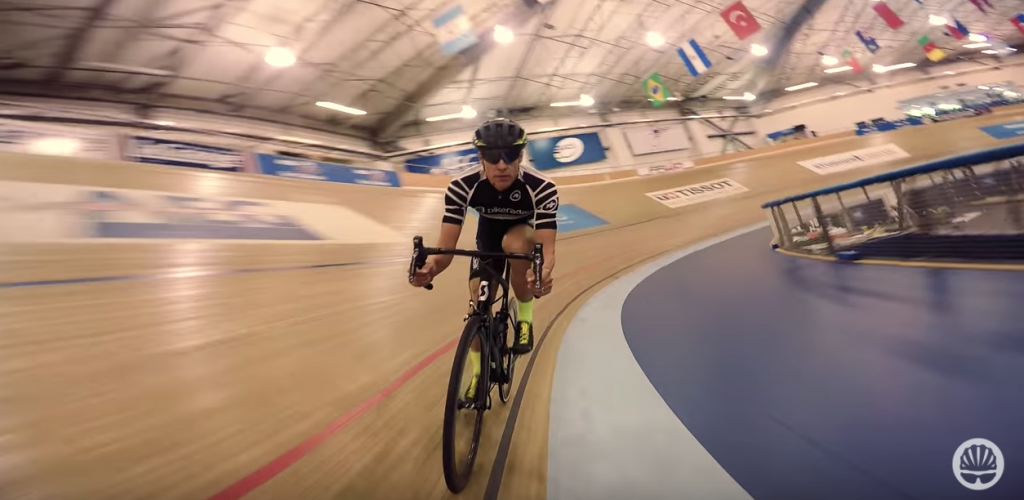
The overall winner?

It turns out that the most efficient position for Ben was Position 2. It saved him slightly less time than position 4, but because it was more sustainable and comfortable, overall his body would be significantly less fatigued holding it over the course of 40 km’s and would give him the greatest gain.
 

Here’s both BikeRadar and GCN’s videos:

BikeRadar – Finding the perfect cycling position

GCN – Aero challenge. How much time can you save?

Categories
On Bicycles Resource

A look into real world cycling aero gains – Intro and Part 1 on Clothing

The study of aerodynamics is a science, but when it comes to cycling it can be a bit of a black art. Go to any bike shop and you will see options from aero frames, aero helmets, aero bars, aero wheels, aero clothes, and the list goes on. But it’s unclear which of these offers the greatest benefit to the modern cyclist – and how much of an impact they will have in real world settings.

For example, Specialized claim that their latest Venge bike can save you a whopping 5 minutes over 40km’s. But what is that primarily due to? The frame, the bars, the wheels, or the riders body position? And what are they comparing it to? It’s hard to know and Specialized doesn’t release that information.

Furthermore, most cycling conditions are anything but what are offered in wind tunnels. Terrain is often undulating and intermixed with steep hills, rolling descents, rain, crosswinds, potholes, traffic lights, rough surfaces, and bare tarmac.

It it faster riding a lighter bike? Or is it better to invest in a more aero one?

Throw in group rides, drafting and tight cornering in crits… and one wonders if all the “science” is truly relevant to the real world.

I’ve ridden a 2005 Trek 2100 for the past 12 years. It lacks a lot of the features found in modern bike design. Yet, during group and solo rides alike, my times are very similar to riders with much more aero setups. Which has got me wondering, what are the real advantages to aero? And is there a clear cost/aero equation one could use to ensure they really are getting the best bang for their buck?

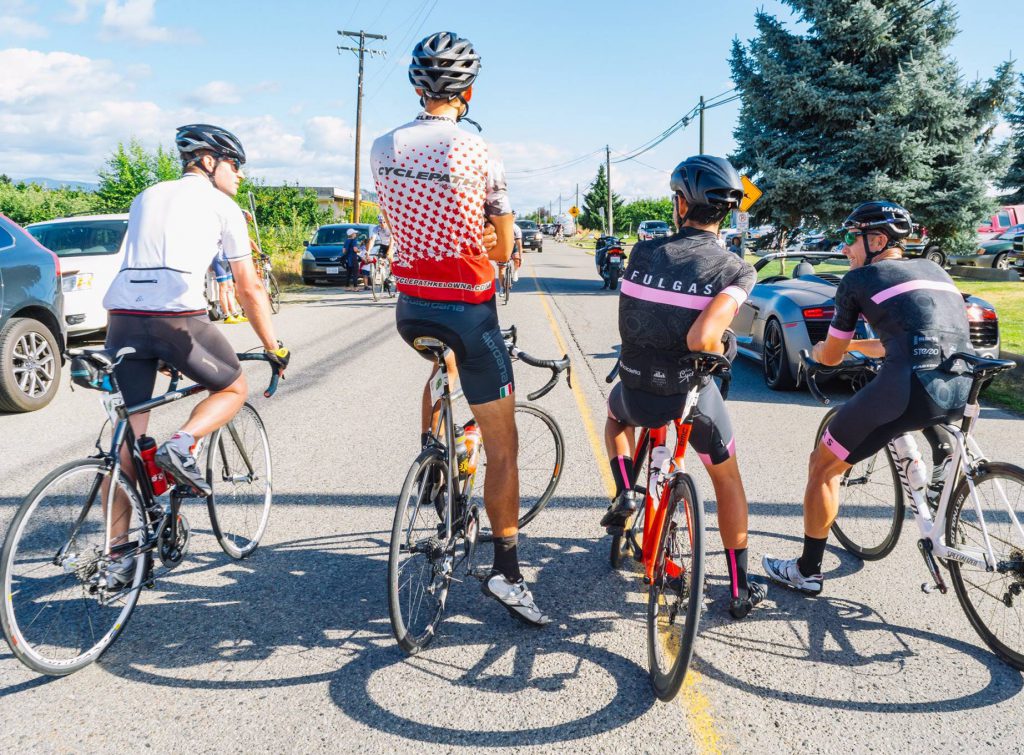
See that sweet lookin’ classic Trek ride on the far left

Intro

Welcome to part 1 of a multi-part series on aero dynamics where I will be sharing what I’m learning through the tests of others and personal experiences. This will be an attempt to reconcile industry tests/results with the real world.

I will be starting with the cheapest options for aero savings (clothing and body position) and working my way eventually to what I’ve learned about aero frames.

Specialized and recently GCN (Global Cycling Network) have released tests on loose fitting cycling apparel versus form fitting ones. And the results… are interesting.

Using a wind tunnel Mark Cote and Chris Yu of Specialized ran their tests at 50k/hr. And tested both winter gear and warm weather kits. According to their findings, there was a difference of 83 seconds over 40 kms for the cold weather clothing. For the warm weather gear the difference was 91 seconds between a size M club fit jersey and a size S form fit jersey.

“We’re talking about a difference that’s more than race wheels.” Chris Yu. Specialized R&D

But how does it compare to the real world? Well that’s where GCN’s test comes in.

Click here to scroll down to see GCN’s results on cycling aero performance savings with regards to loose fitting versus form fitting clothing.

When did aero first become important to me?

Watch World Tour cycling and it’s perfectly obvious why aerodynamics is important when race leaders are separated by seconds and time trials can split the field.

But what about the recreational racer?

In 2016 I road what was to be my second last event of the year. The morning started as many epic autumn rides do; with light sprinkles of rain and the threat of more to come. I put on a blue Sugoi cycling jacket gifted by my parents. It’s a great design (or so I thought). The arms and back are held together by magnets and literally peal away if needed to reveal a vest.  It’s perfect for layering.

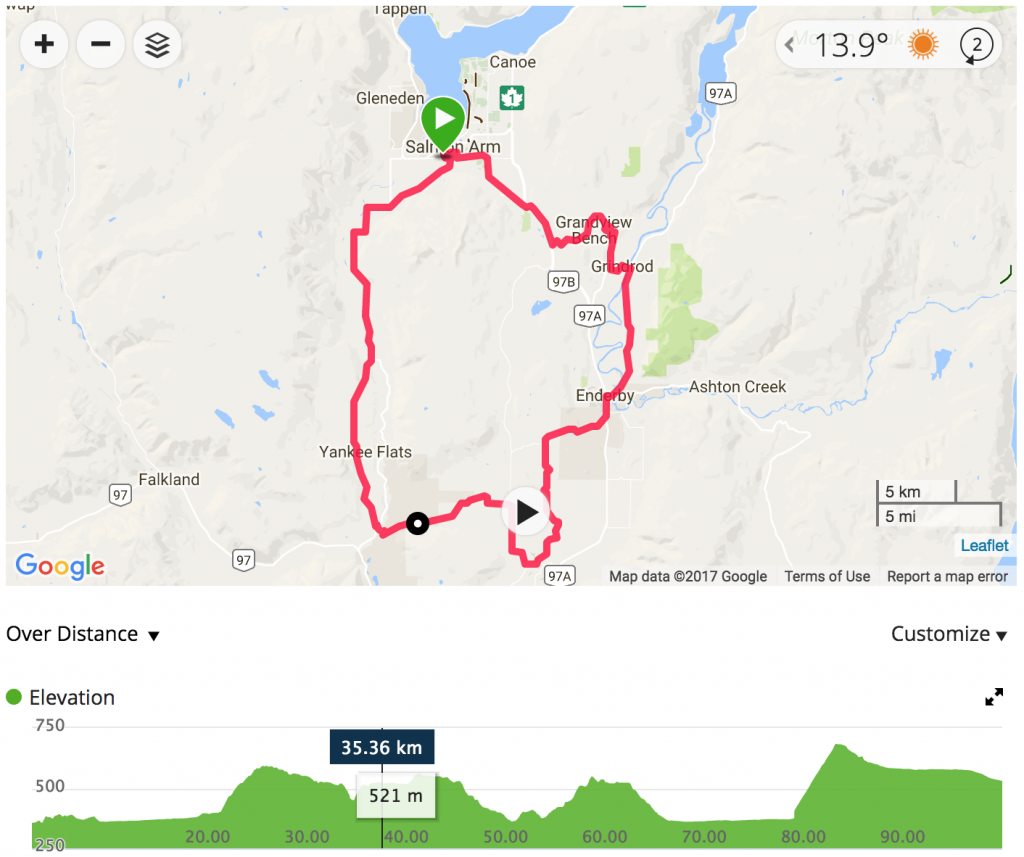
A Wet Salmon Arm Bike For Your Life Century Ride

The peloton split early. I joined the front group as we attacked the first climb. I’m a climber, I don’t have a specialty per se, but if I did it would be climbing. I noticed immediately that the ride was feeling tougher than usual. I took note that my legs weren’t as recovered as I thought they would be. Slowly I lost touch of the riders. Dropping back about 200ft.

We hit the flats and I felt confident that I would find my rhythm and catch them. It was an out of town event, but a strong rider that I knew had also lost the front group, so I intended to catch his wheel and then catch the front group again.

Salmon Arm Bike For Your Life Century Ride Route

Unfortunately neither of those scenarios panned out. Riding on a relatively flat section I was easily 3km/hr slower than I would normally ride and was feeling frustrated at my apparently tired legs.

The leading pack was long gone and soon I was caught by a strong chasing group. To make matters worse my father was in it (he’s a very fit father *cough). By now the rain was beginning to open up and soon it was pouring down. I joined the second group. And by the latter leg of the race my pace was closer to normal.

Looking at the times at the end of the day it turned out that my father and I finished just 4 minutes behind the race leaders. How could this be? I thought, clearly the front group had been riding much stronger.

The reason should have been obvious, but I didn’t know what I didn’t know. Later some of the riders came up to me and joked about my parachute. Unbeknownst to me, the clever 2 part design of my jacket had caught the wind and converted the top layer into a perfect parachute.

It wasn’t until the rain started pouring that the jacket was soaked enough to stay compact.

I thought long and hard about the results of that ride and have since learned that clothes can make a significant difference to aero performance. As we’ve learned from Specialized’s wind tunnel test.

Real world aero apparel test by GCN

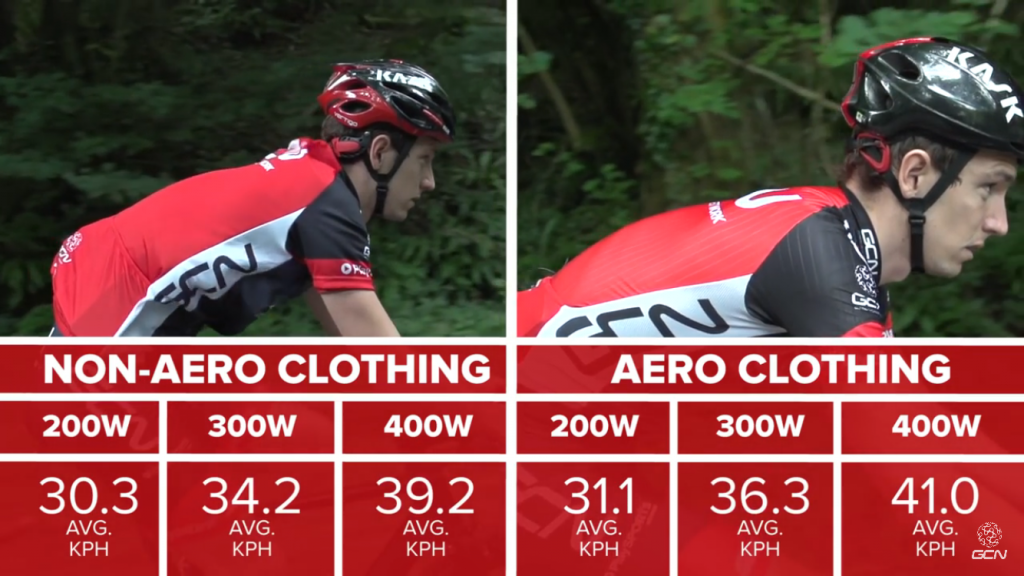
GCN also posted an excellent video evaluating the speed difference between a loose fitting cycling jersey (say 1 size too big) versus a snug one at the same watts. The results were equally surprising.

This was a real world test held at 3 different intervals of power.

GCN results on aero clothing for cycling

As you can see by this picture. At just 200W average a rider has a 0.8km/hr advantage with a tight shirt versus one with a relaxed fitting shirt. This goes up to 1.8km/hr at 400W.

When one considers the times they are pulling at the front of a group, closing down on a leading peloton or attacking solo, these numbers suddenly become much more important.

“The bottom line is whether it’s summer or winter if you just pay a little attention to how well the stuff fits your looking at a couple minutes over a medium to a long ride. So it really does matter.”
Chris Yu, Specialized

What have your experiences been with aero? Have you noticed a major performance advantage or disadvantage? Cycling is as much about science as it about personal stories, please share yours in the comments below.

Watch the full video here.