Categories
Adventure Vehicle Journal On Vehicles Resource

Installing Flatout Suspension on a 2009-2013 Subaru Forester SH

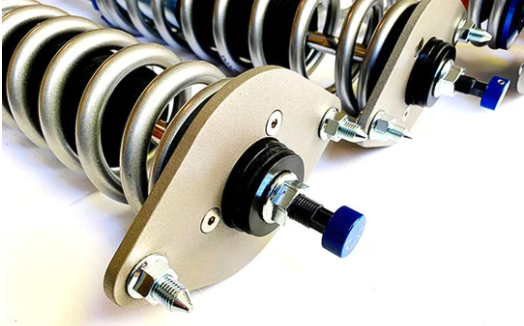
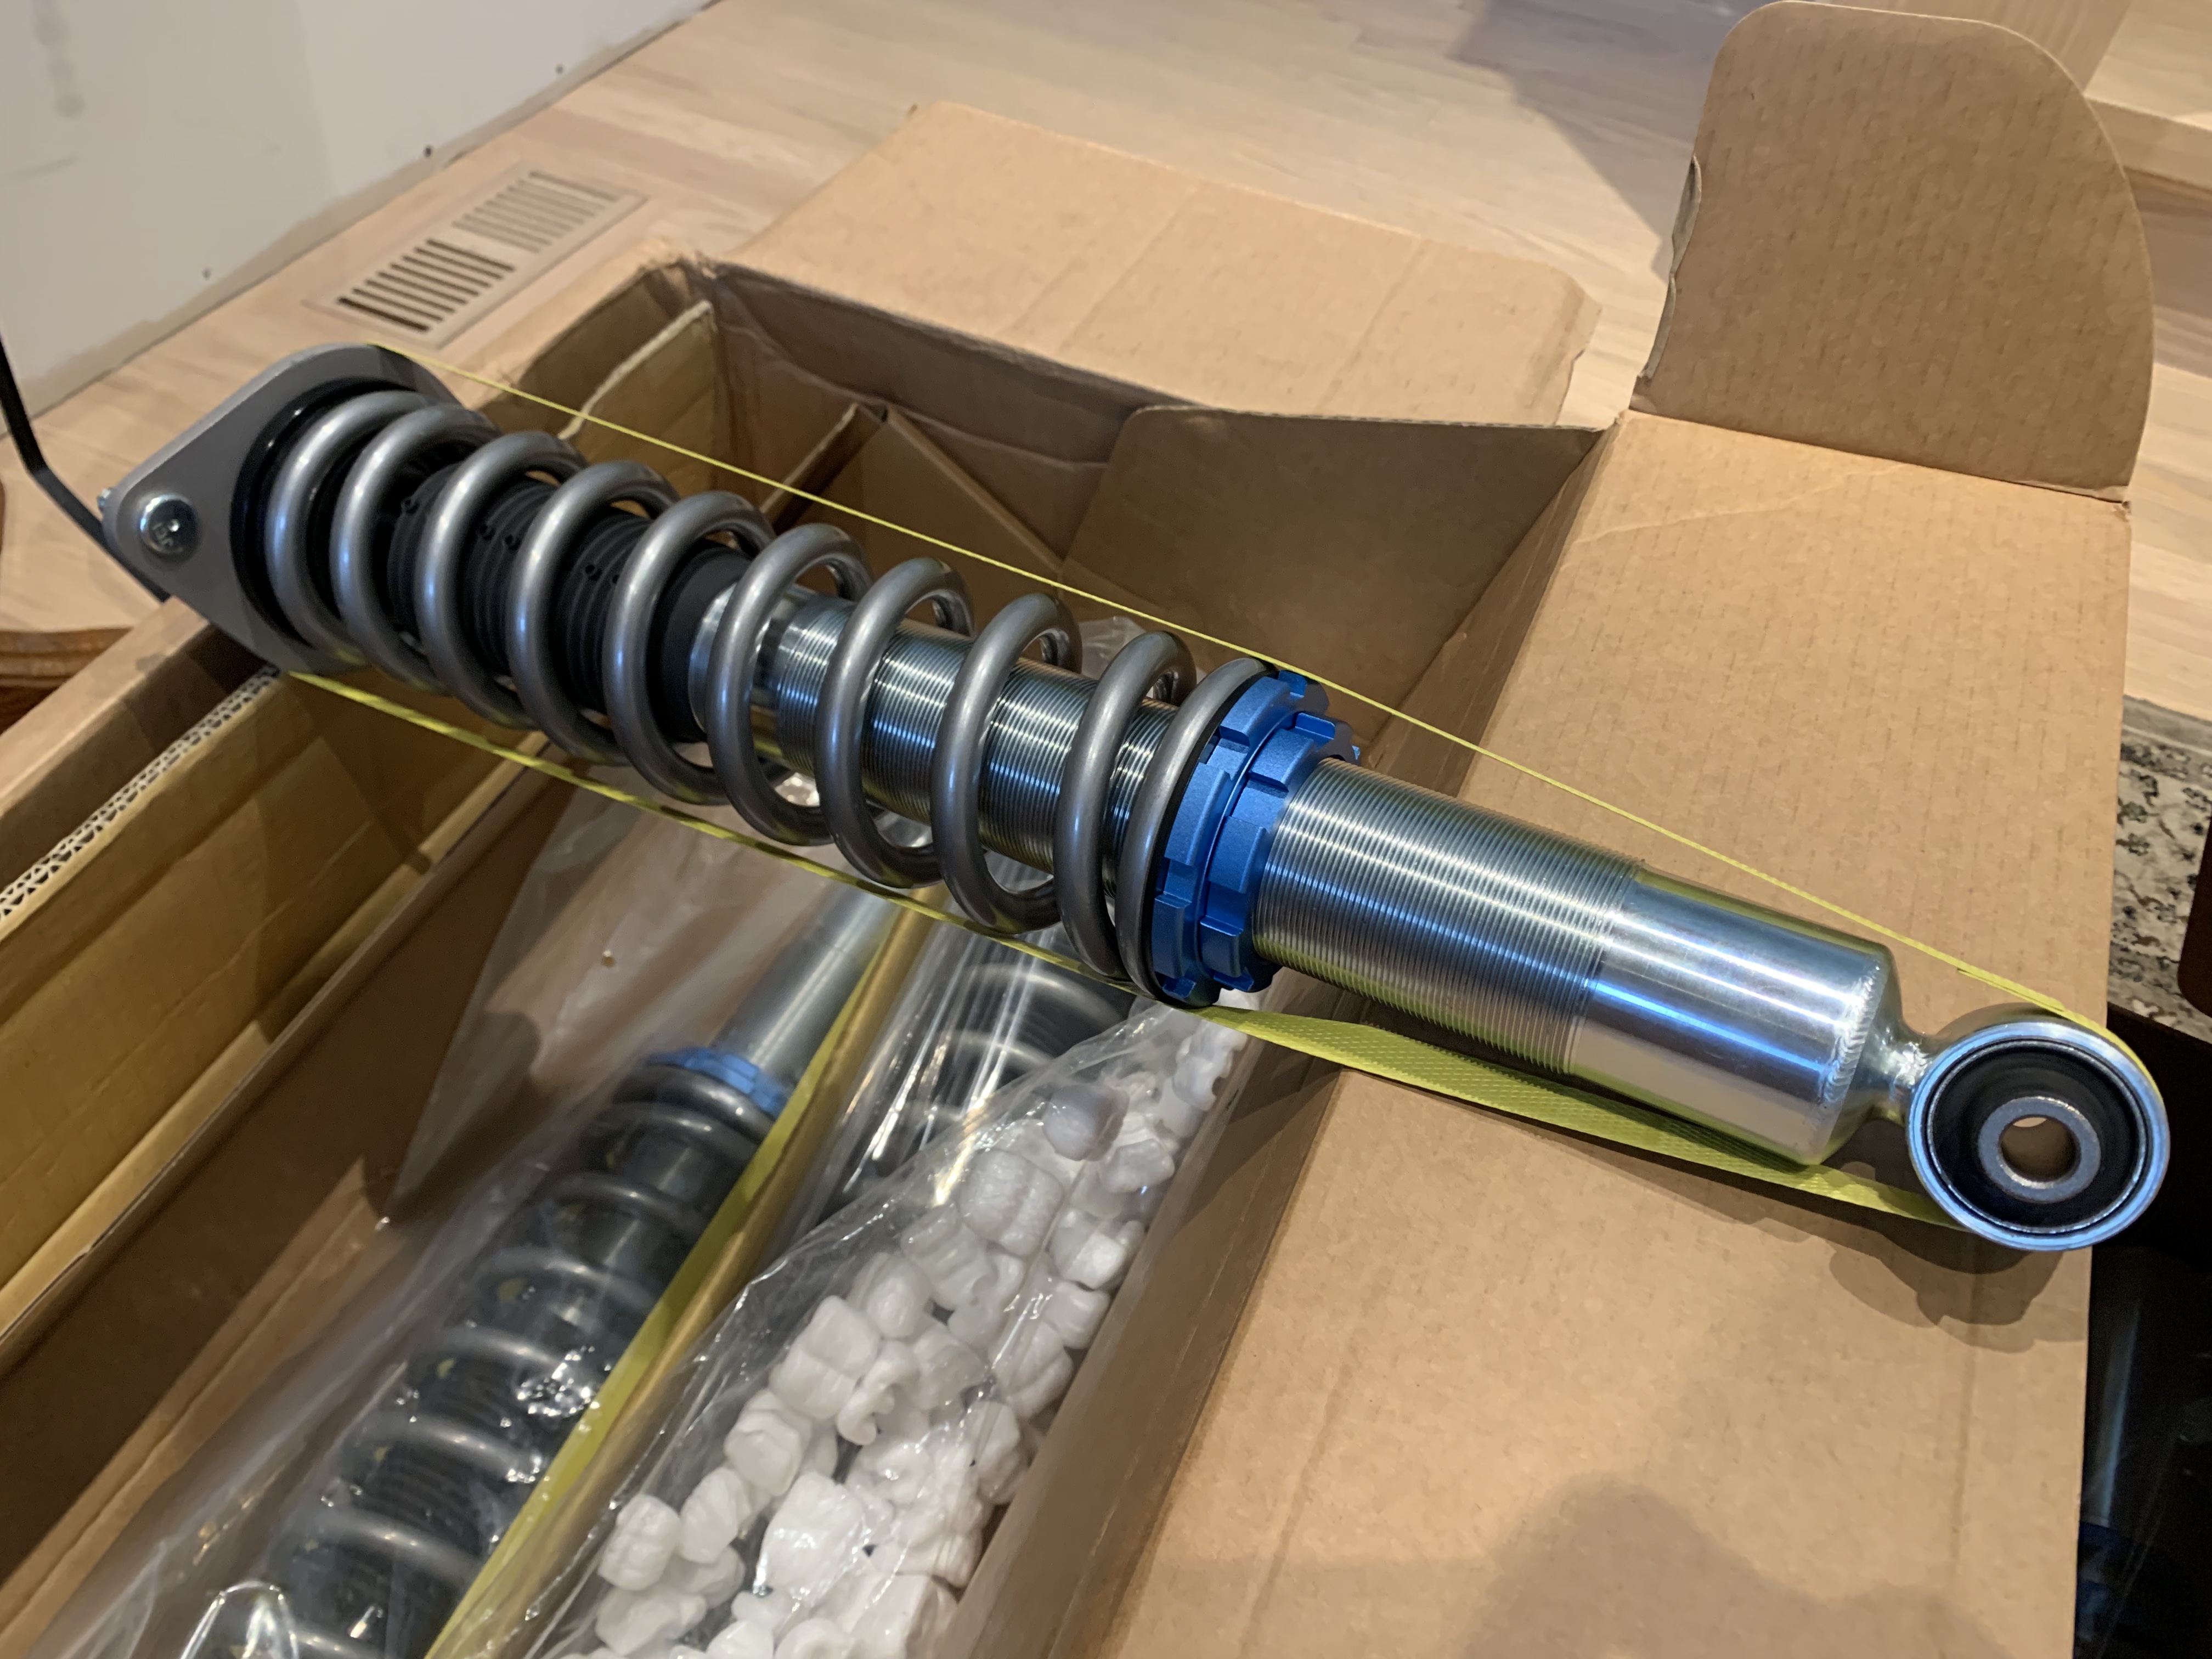
This past weekend I installed the Flatout Suspension’s GR-Lite coil overs and Rallitek spacers. They arrived packaged in the box.

There were a couple things that to note for the install.

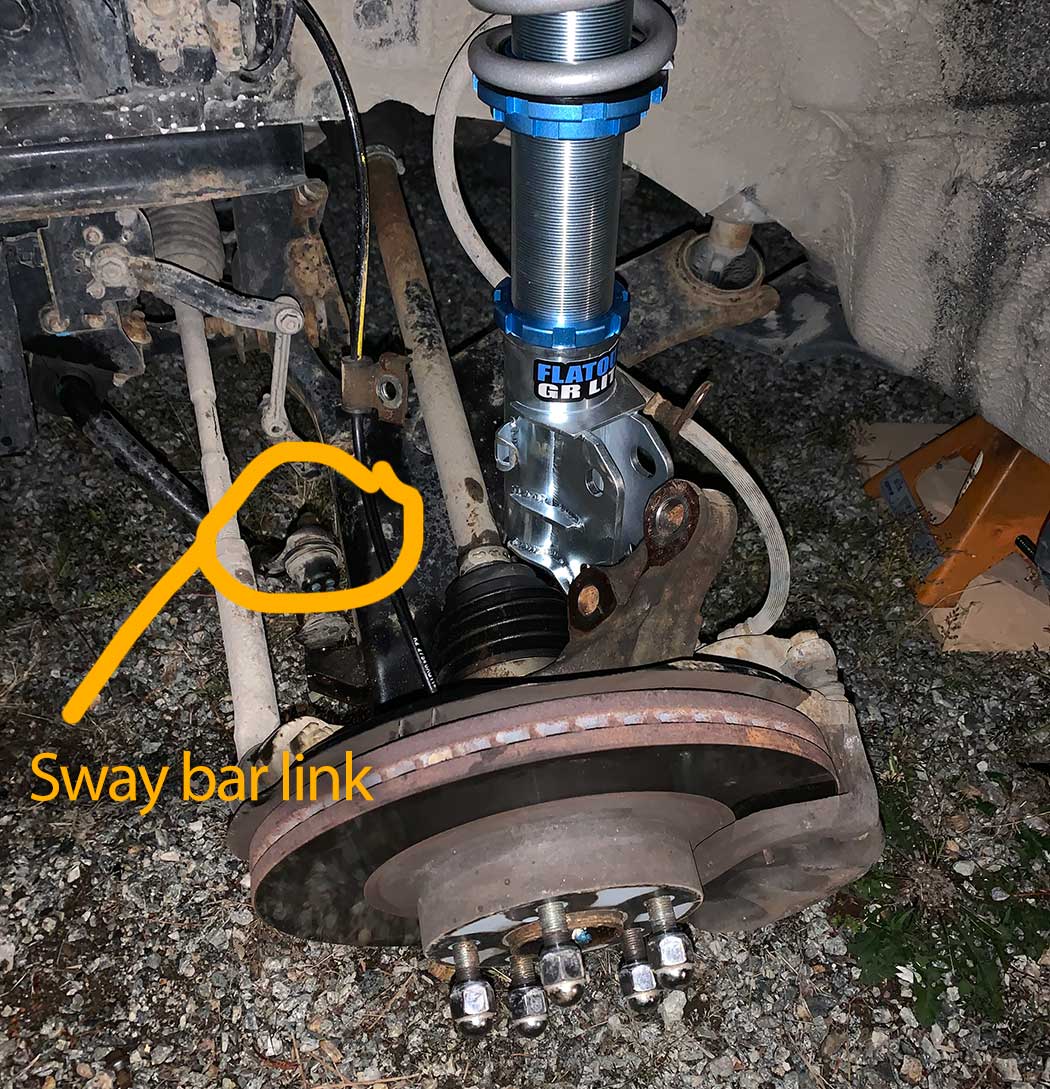
  1. They are longer than stock suspension. They do fit. I had to disconnect the front sway bar links to drop the control arm low enough. Then used a jack to lift the control arm. After that I reinstalled all the bolts. And presto, it was installed.
  2. If you hear a spring recoil noise when turning your front wheel after the install, this means the bottom lockout rings need to be tightened. To do this place the provided locking ring wrench on the locking ring and tap it using a hammer to tighten it. You’ll see it snug up an additional quarter turn. After that, the noise is gone.
  3. The top dampening adjustment is set to 0. I counted the number of quarter turns to tighten them up. Divided that by half and then set all the dampeners to half way. This gave me a good baseline. I could stiffen it (for cornering) or soften the bounce (for going over corrugated gravel), but it is feels good at this setting.

Step 1

On level ground measure the current ride height from the ground to the centre of the wheel well. This will give you the baseline height. After the install, you will measure each wheel again and you will know how many inches you’ve raised or lowered the vehicle by. You can then make adjustments to the ride height accordingly.

Step 2 setup the suspension

Front suspension: I adjusted the lower struts so the inserts were flush with the bottom. And set the top lockout ring so it is at 0 preload. Basically spin the lockout ring until it is snug against the spring so there is no up/down movement, but the spring isn’t too tight so it can rotate freely.

Rear suspension: Adjust the top lockout right so it is at 0 preload. Same as above.

Installing the front suspension.

I started with the front to get momentum.

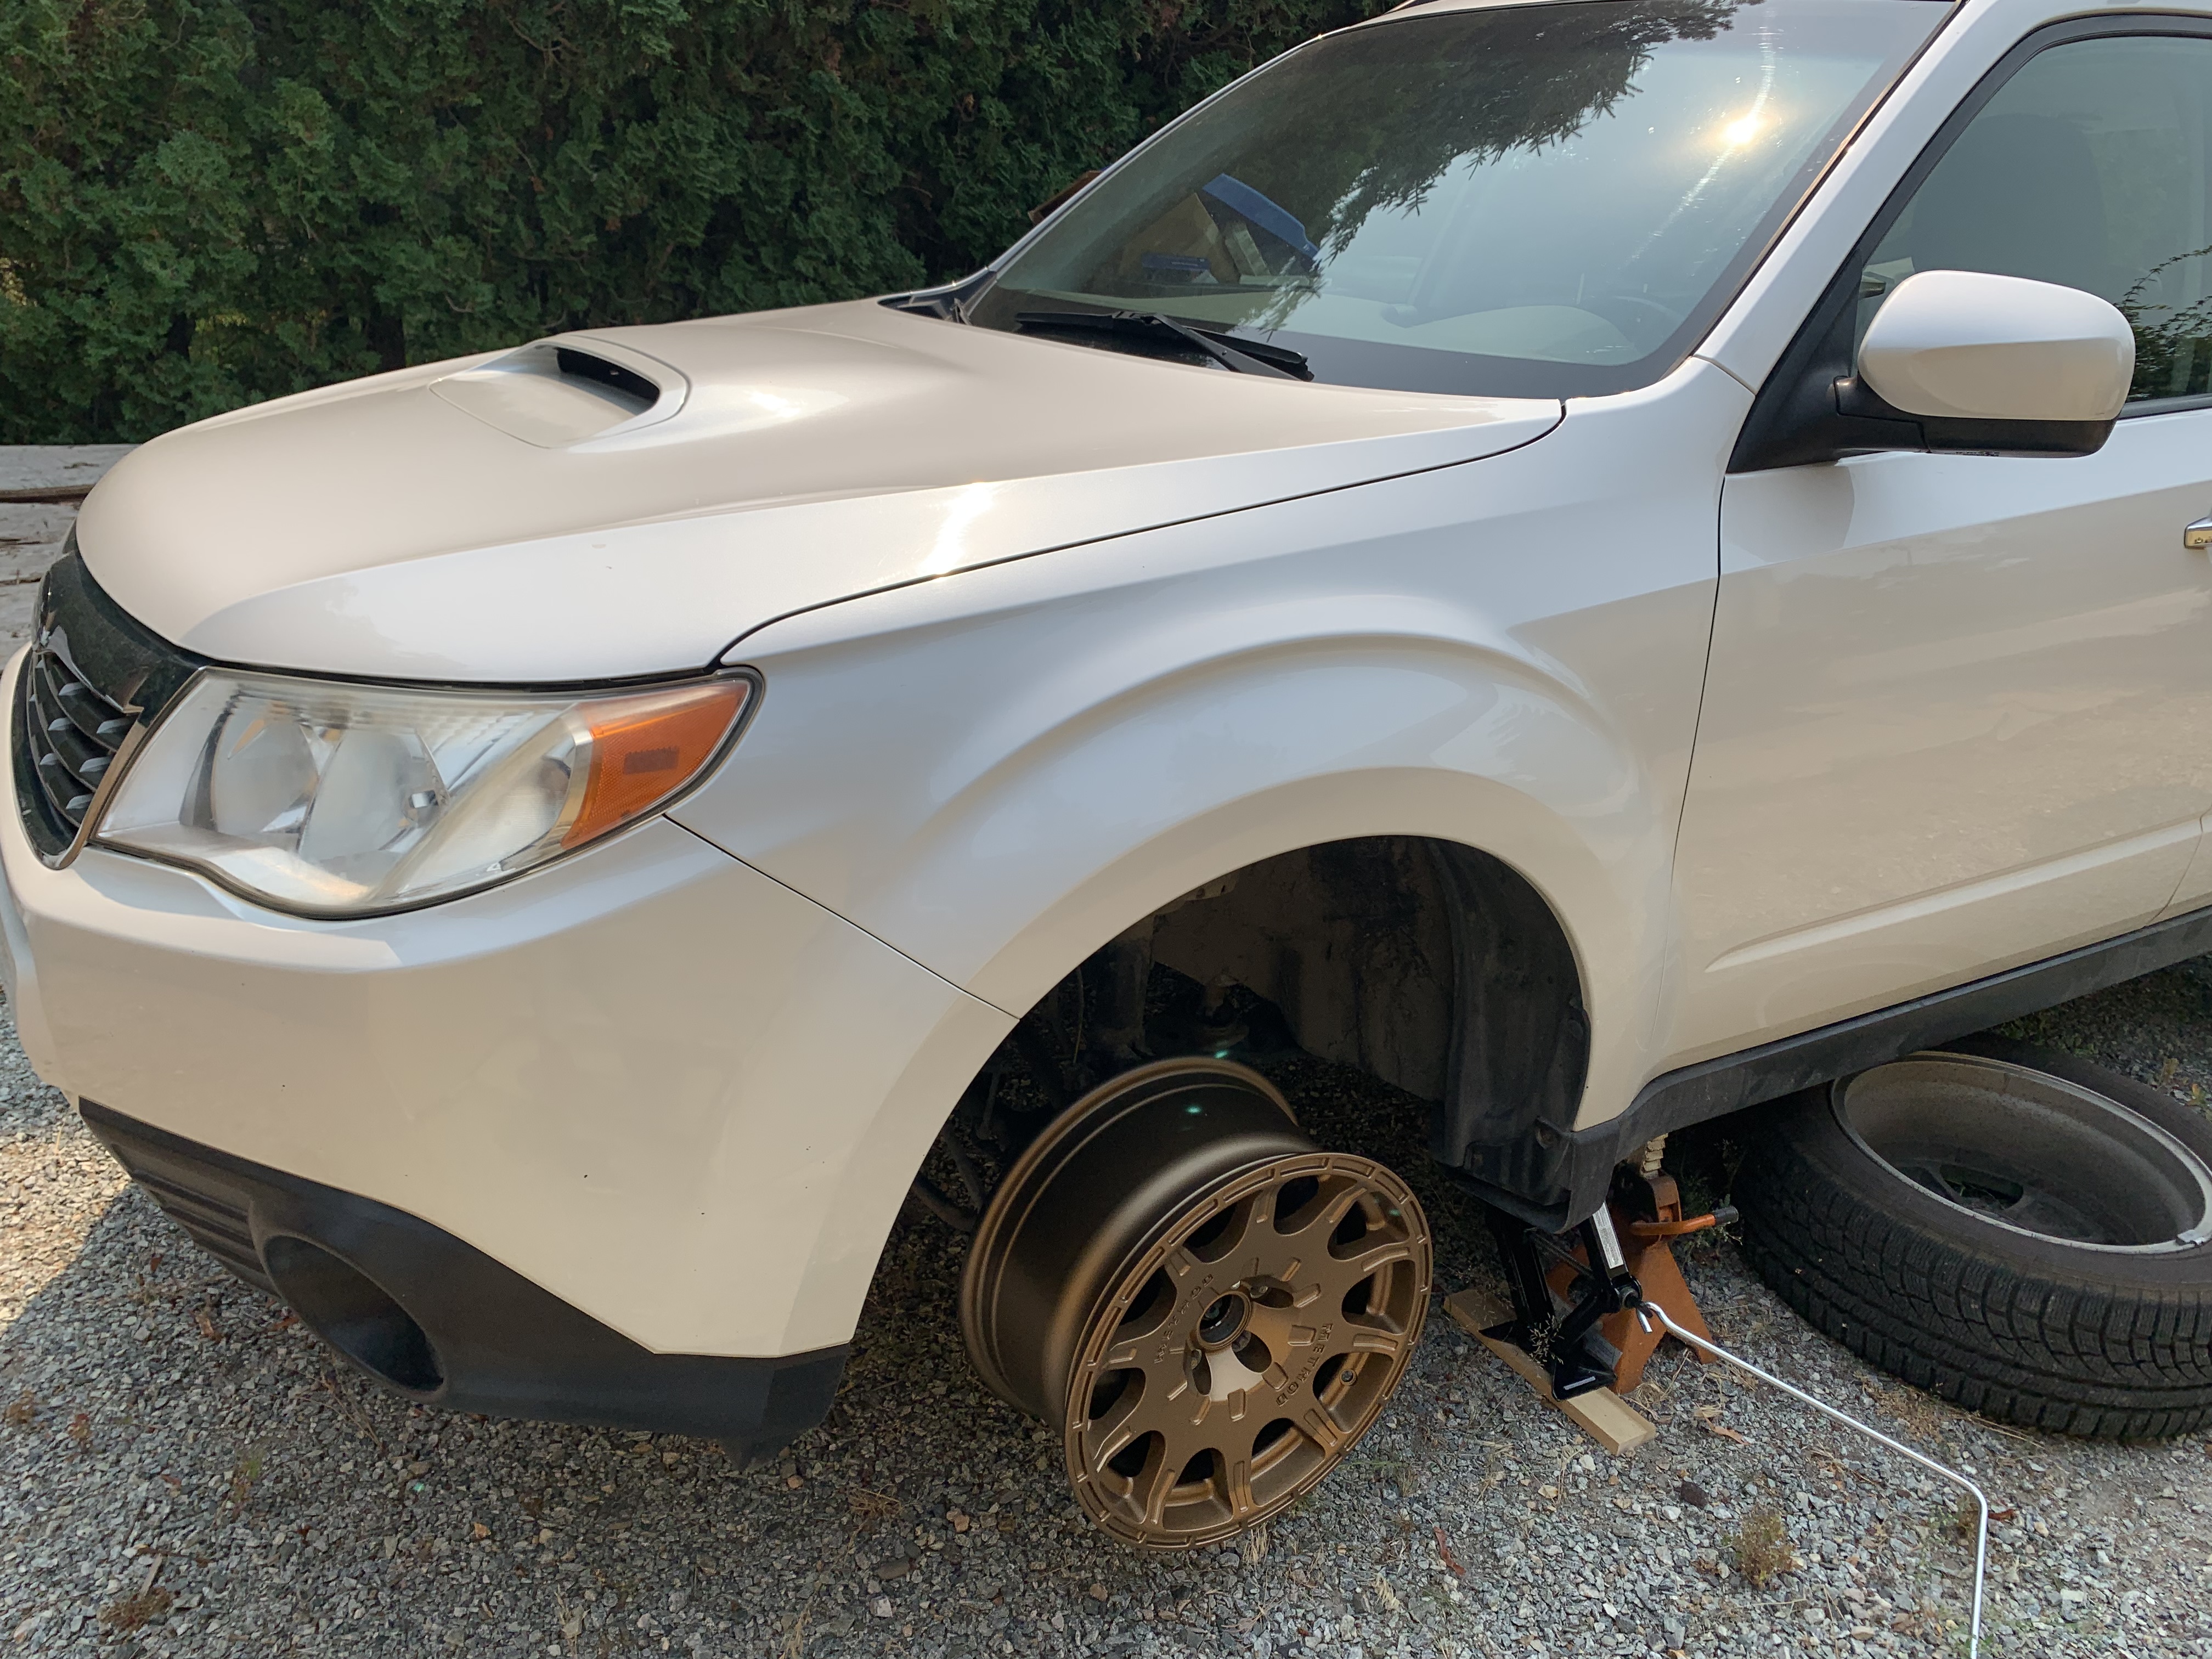
Step 1 remove the wheel

Loosen the bolts while the wheel is on the ground.

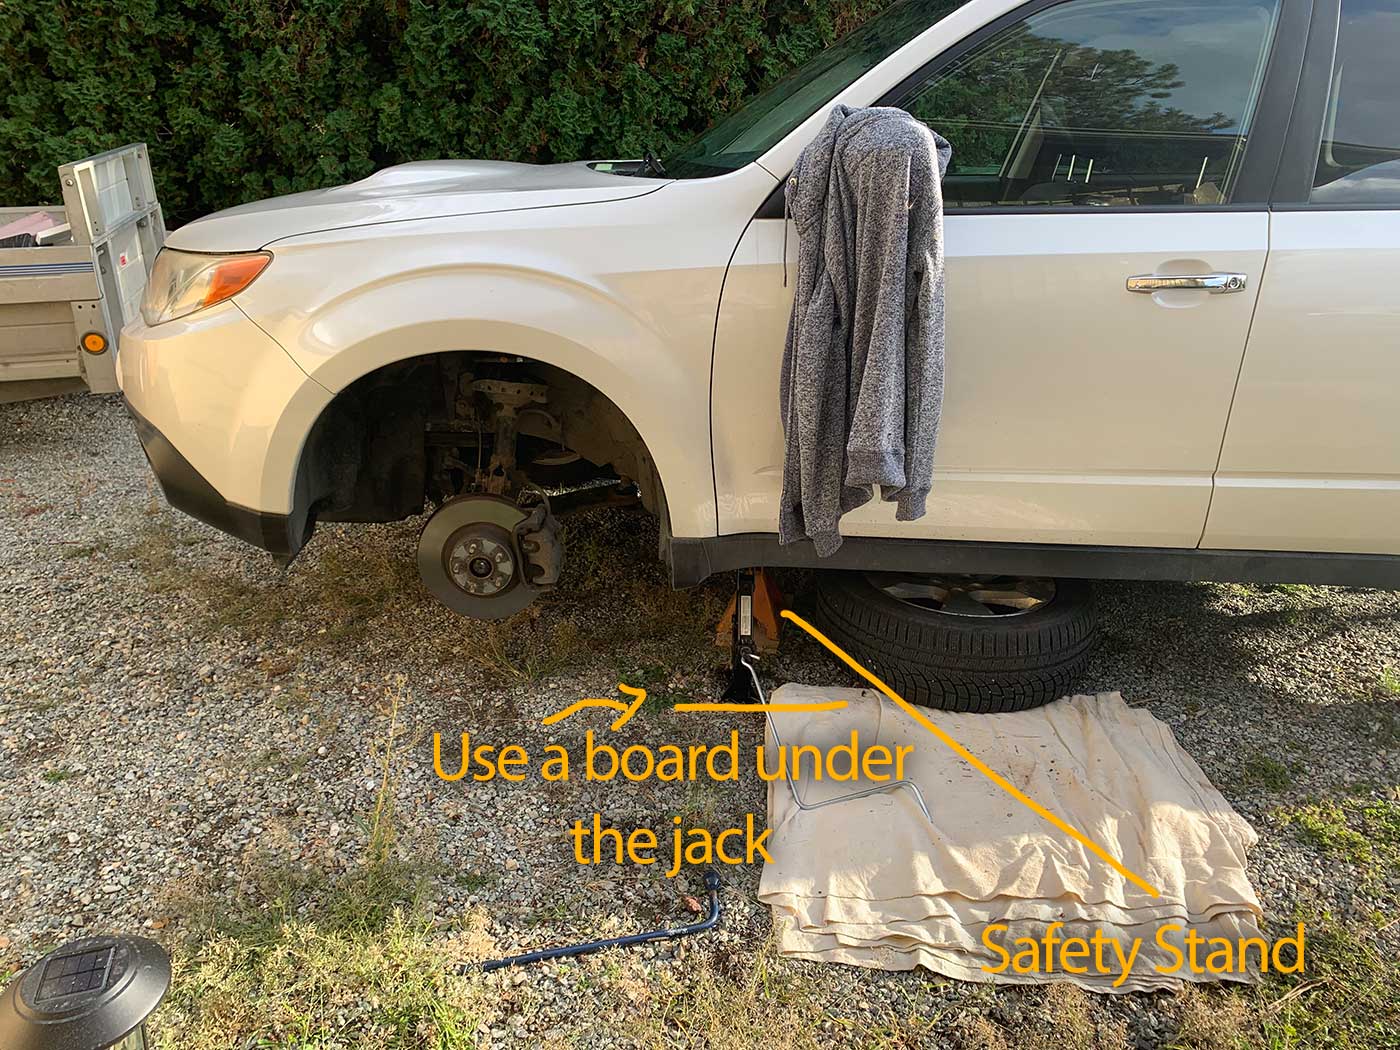
Then lift the vehicle with a jack. Be sure to put a safety stand under the vehicle once jacked off the ground, so it doesn’t fall on you if the jack failed.

Remove the bolts and take off the wheel.


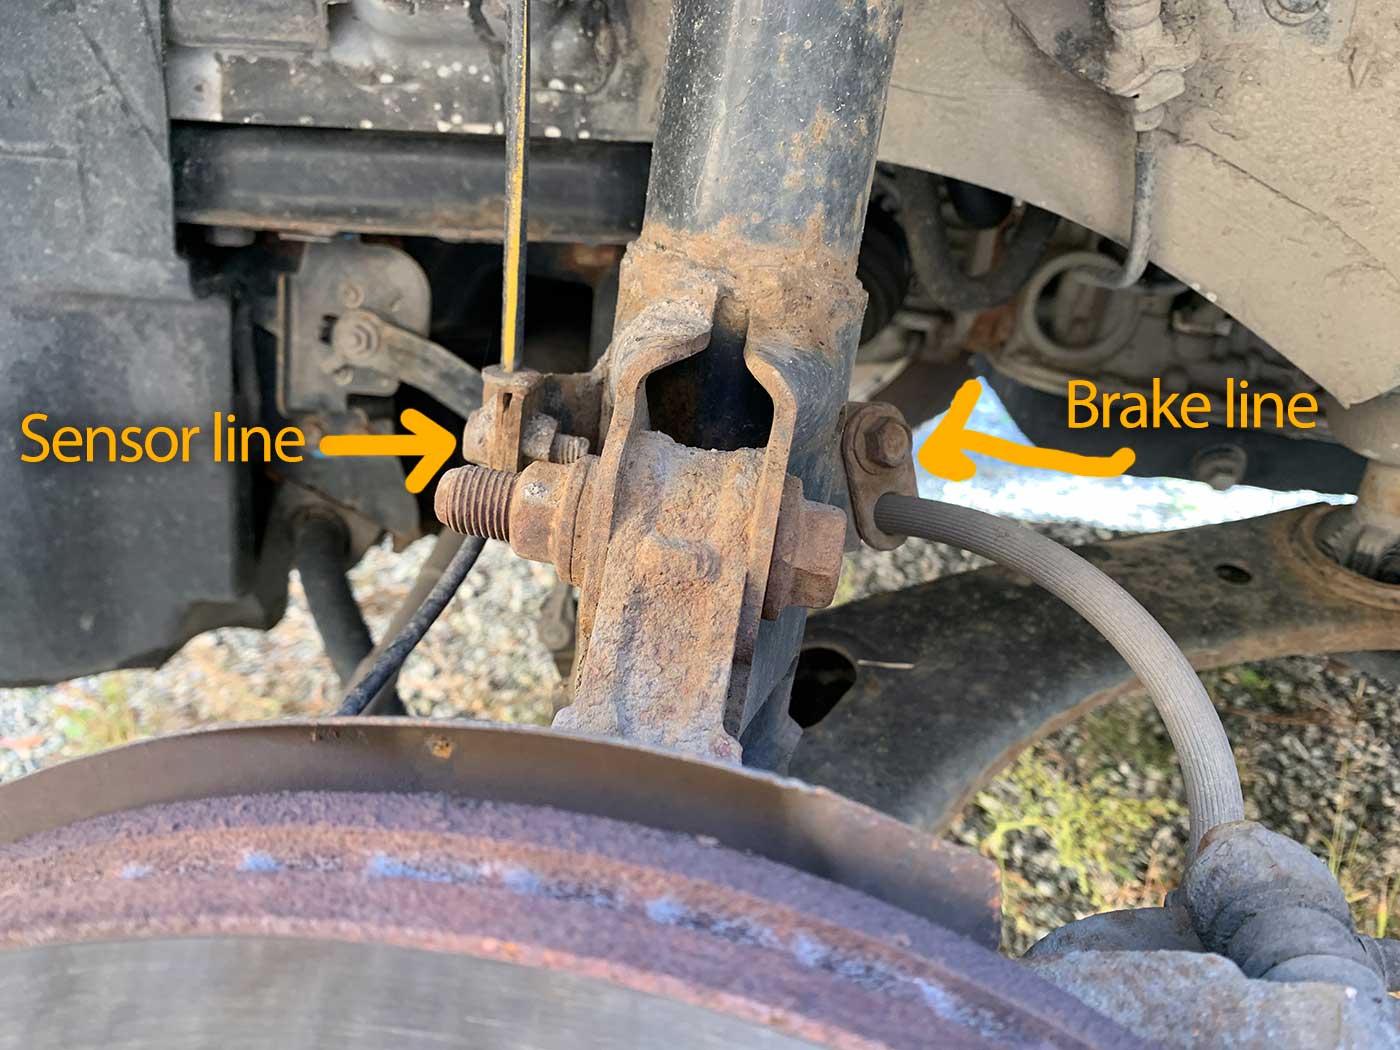
Step 2 disconnect the bolts holding the brake line and sensor lines from the strut

*Tip: I don’t have an impact wrench, so what I do is spray nuts with WD40 and hammer a wrench using a 5 pound rubber mallet. This breaks the nuts loose without damaging them.


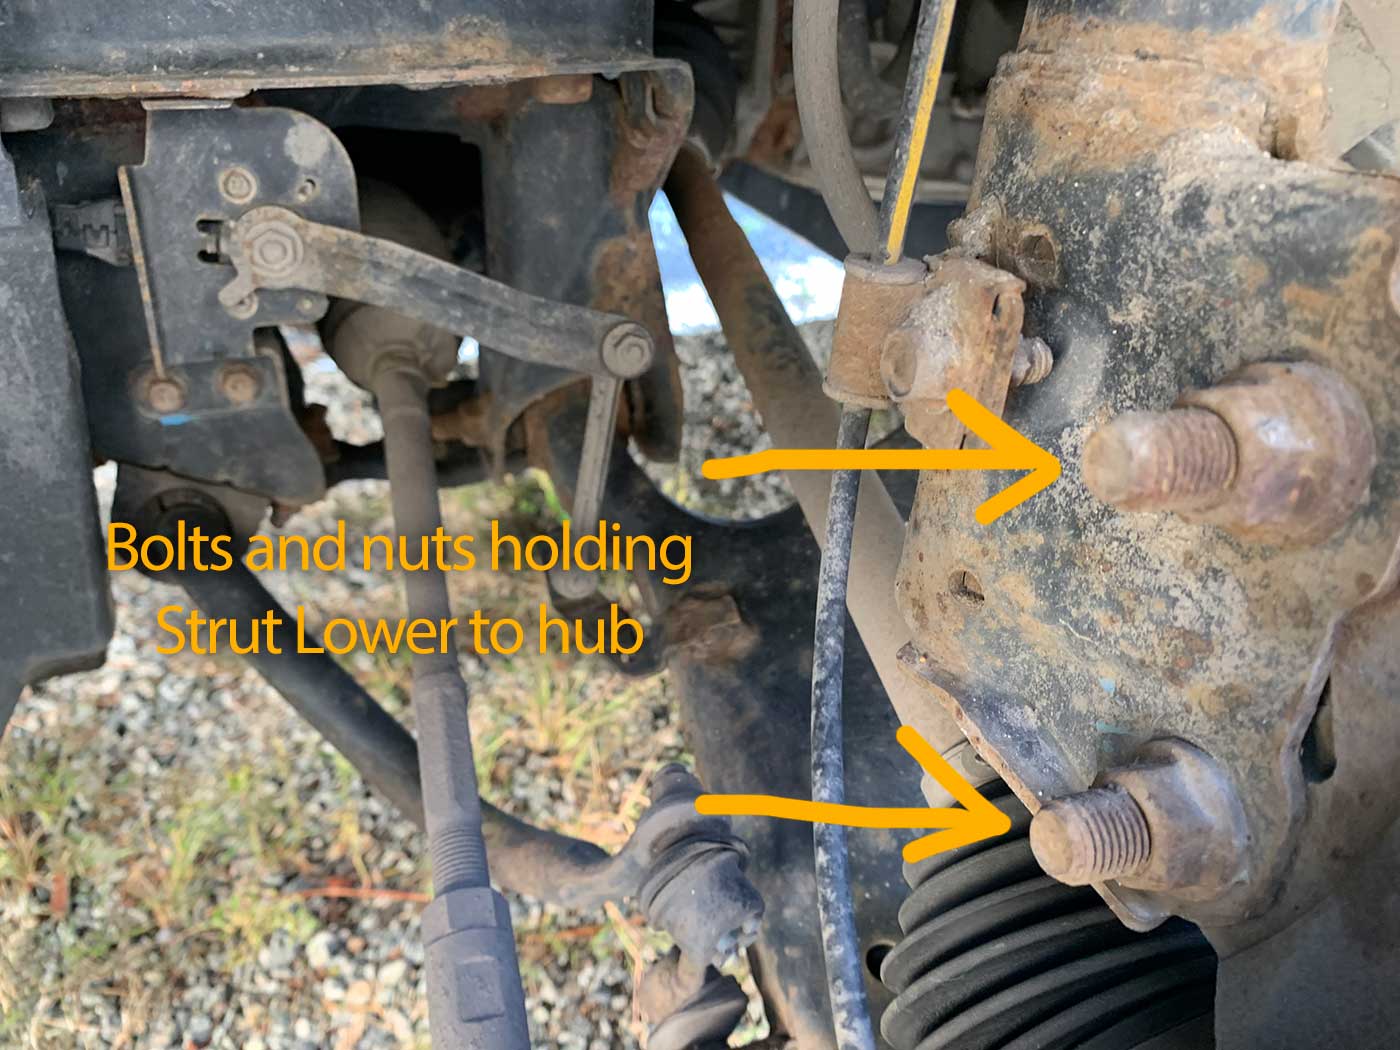
Step 3 remove the bolts and nuts holding the strut to the vehicle’s hub.

Note: The top bolt is used for adjusting camber. There’s a washer on the top camber bolt. Make note of the position of the camber bolt if you want to retain the original height. (I didn’t do this as I had an alignment booked at a shop, but would have been easier to set camber had I marked it).


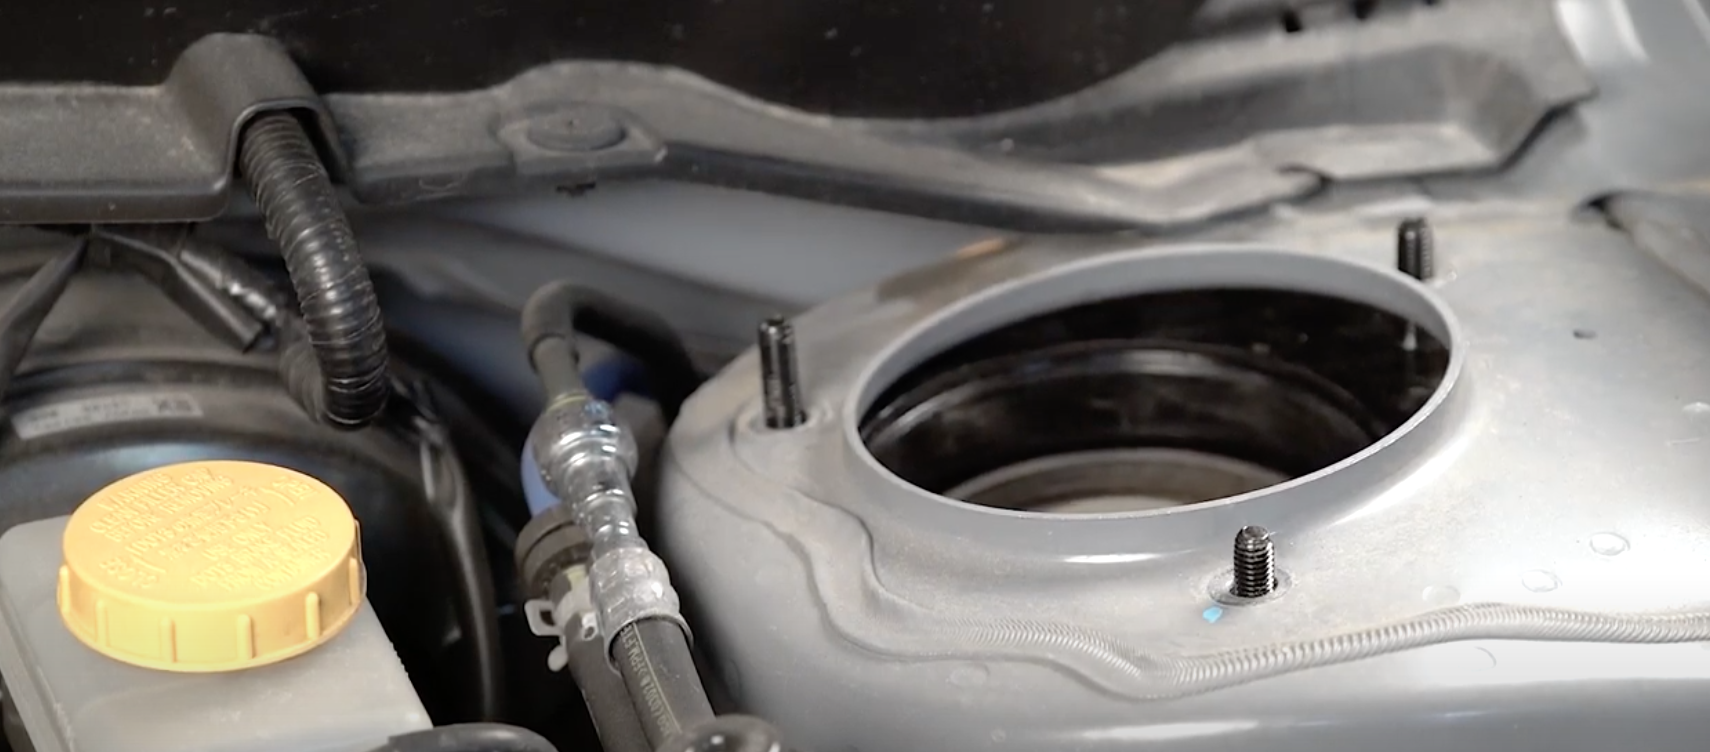
Step 4 disconnect the nuts from the top strut mounts

Then with one arm on the strut drop it out

Step 5 Install the new front strut

Remove the top mount nuts from the new strut, install the front strut and screw the new nuts on top.

Step 6 Install the bolts and nuts holding the strut lower to the hub

*Note I had to disconnect the sway bar link to drop the control arm enough for it to fit.

Step 7 reconnect the brake line and sensor brackets.

Step 8* reconnect the sway bar link

Using a jack under the control arm hub, lift it up until the sway bar link lines up. Then reconnect. I found this step straight forward.

Step 9 reinstall the wheel.

Hand snug the bolts while in the air, then tighten them when on the ground.

*Once finished installing the suspension check the bolts on all the wheels use a torque wrench to tighten them all to spec

Step 10* check the height of the your wheel well

Do this step after all suspension is installed to ensure the vehicle is level. After measuring the height of your wheel well compare it to the heights you measured on step 1. Now you can make adjustments to the suspension to raise/lower it to your desired height.

To raise the suspension on the front twist the whole strut assembly, and it will unscrew. Using the locking ring as a guide, you can measure the distance you’ve raised it. You can also add preload using the lockout ring at the top if you need additional height. Again, use the lockout rings to measure the space adjusted.

Step 11. Tighten the lockout rings

Once happy with the heights of your suspension use a hammer and the lockout wrench supplied and tap all the lockout rings tight. You’ll see it tighten approximately a quarter turn.

Now do the other front wheel (repeat above steps).

Installing the rear suspension.

Step 1. Remove the wheel (see step above)

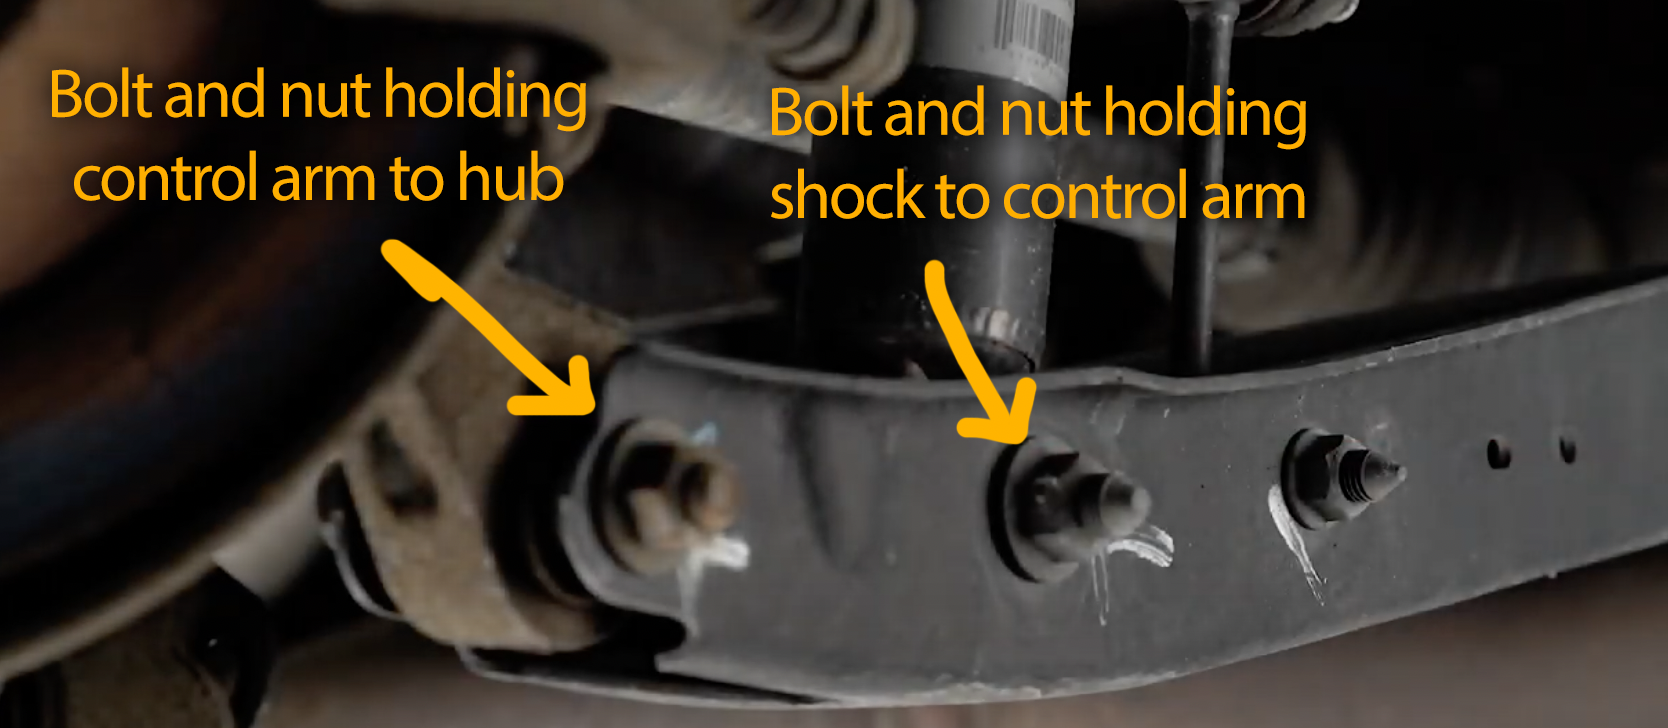
Step 2. Remove the nut and bolt holding the sway bar end link to the lower control arm


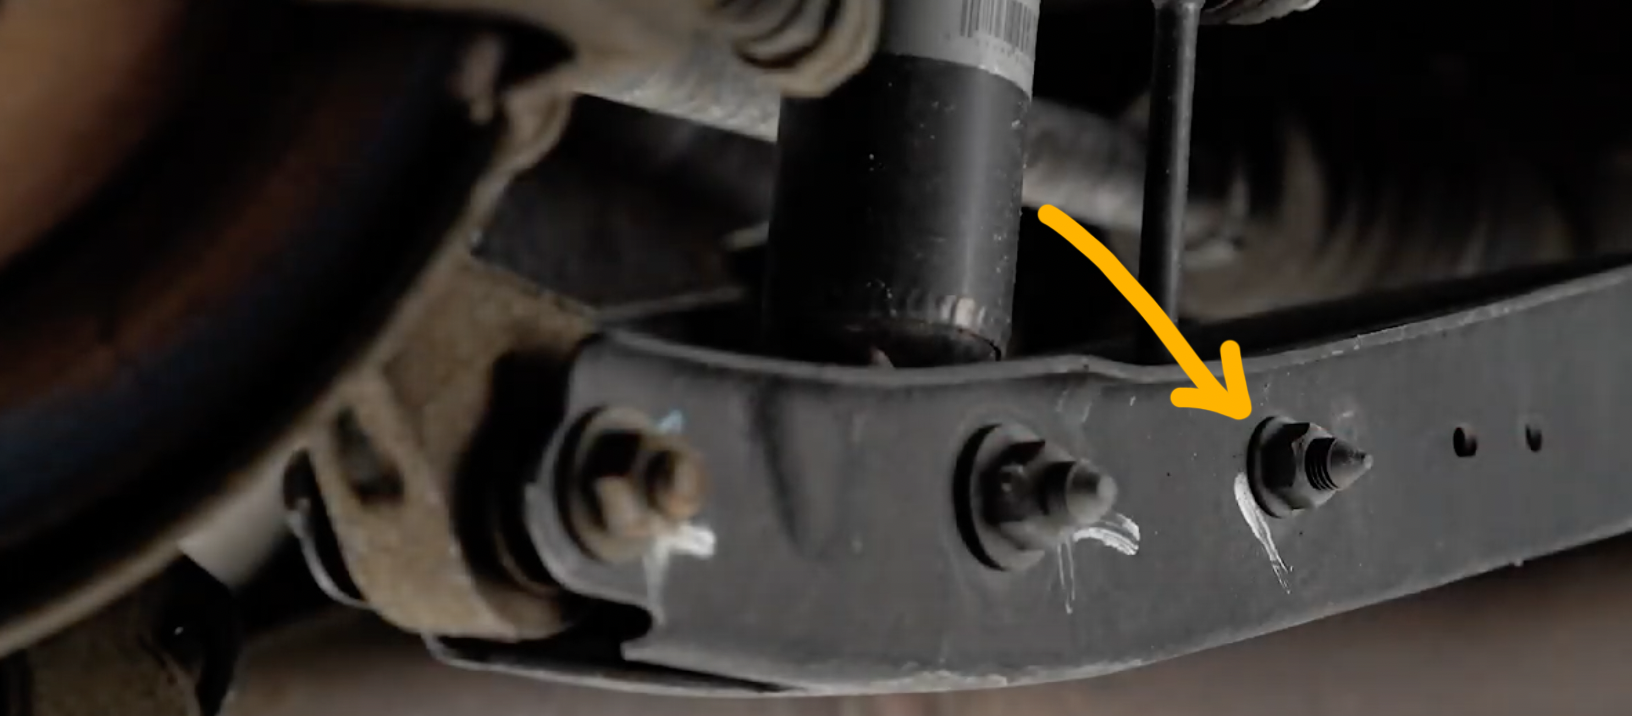
Step 3. Remove the nuts and bolts holding the shock to the lower control arm and the lower control arm to the vehicle’s hub.


Step 4. Open the trunk and remove the carpets and foam filler pieces


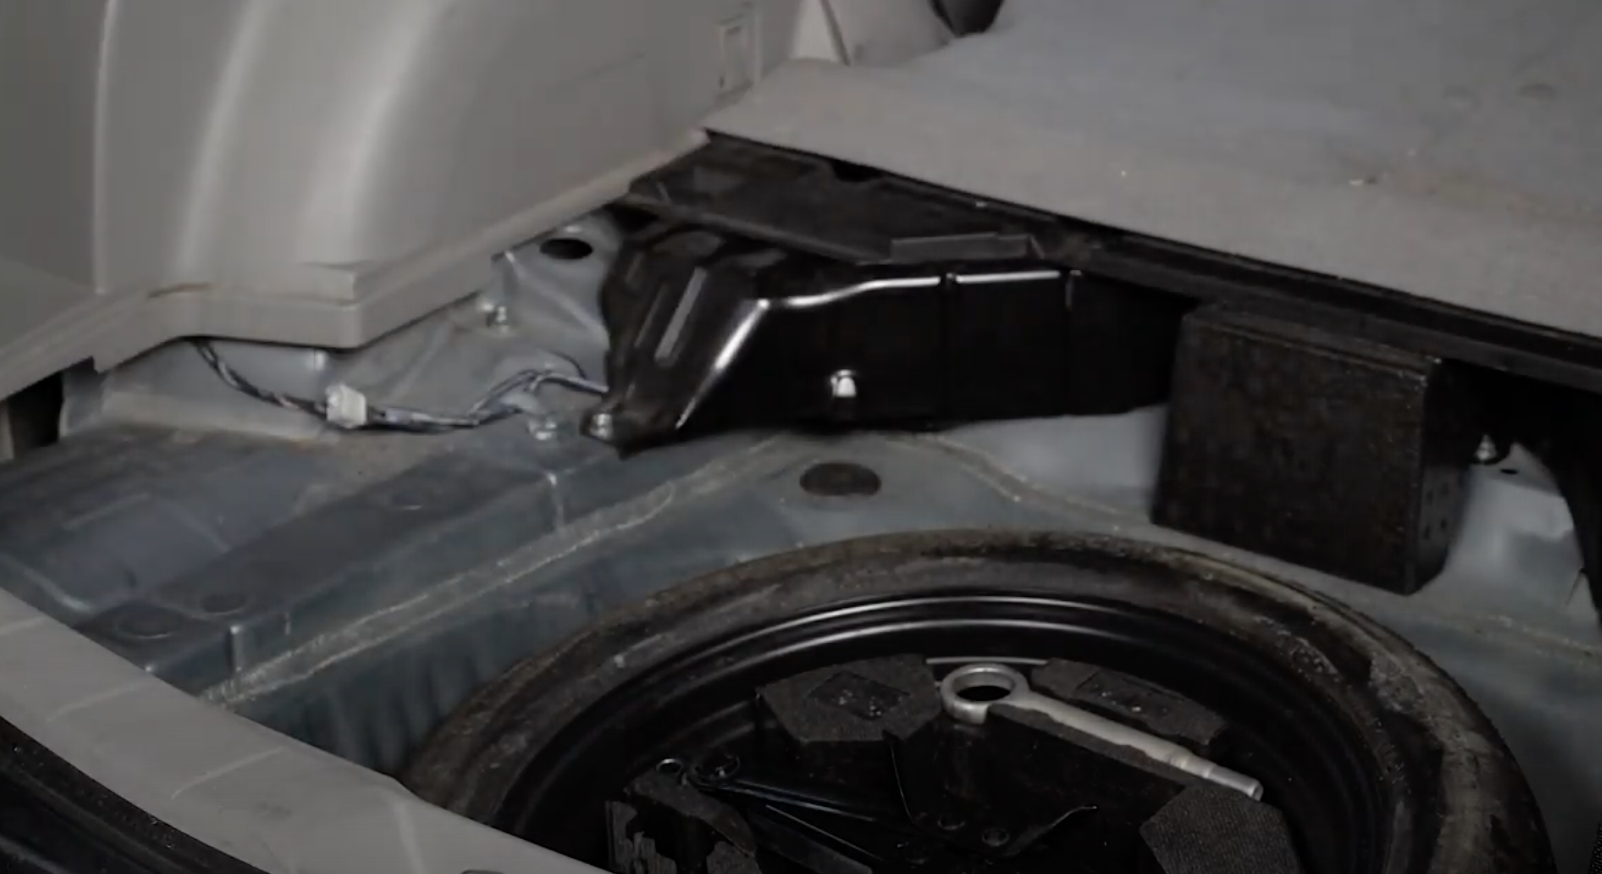
Step 5. Remove the clips holding the seat back carpet panel to the trunk and fold the trim forward

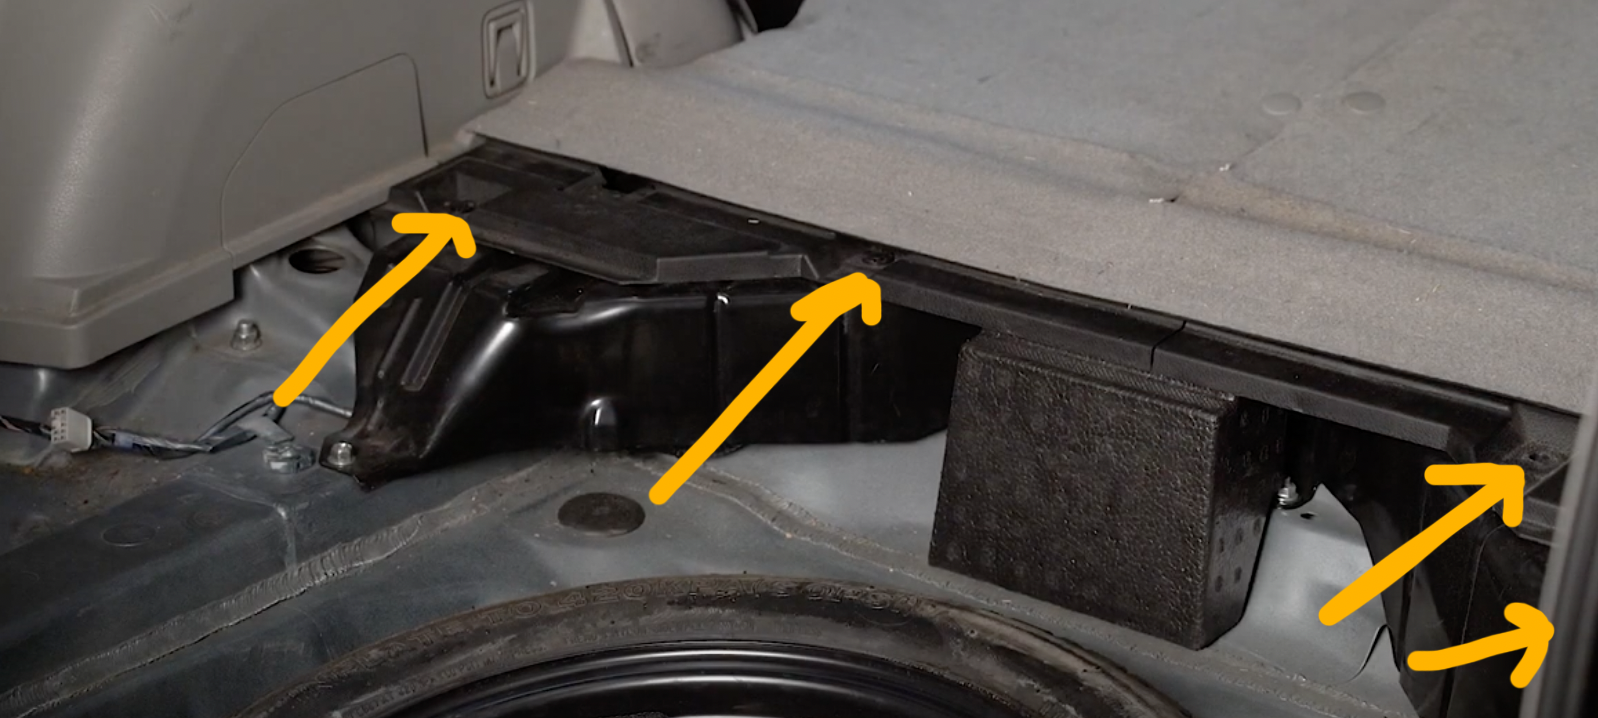
Step 6. Remove the plastic trim piece that covers the upper strut tower. (both sides)

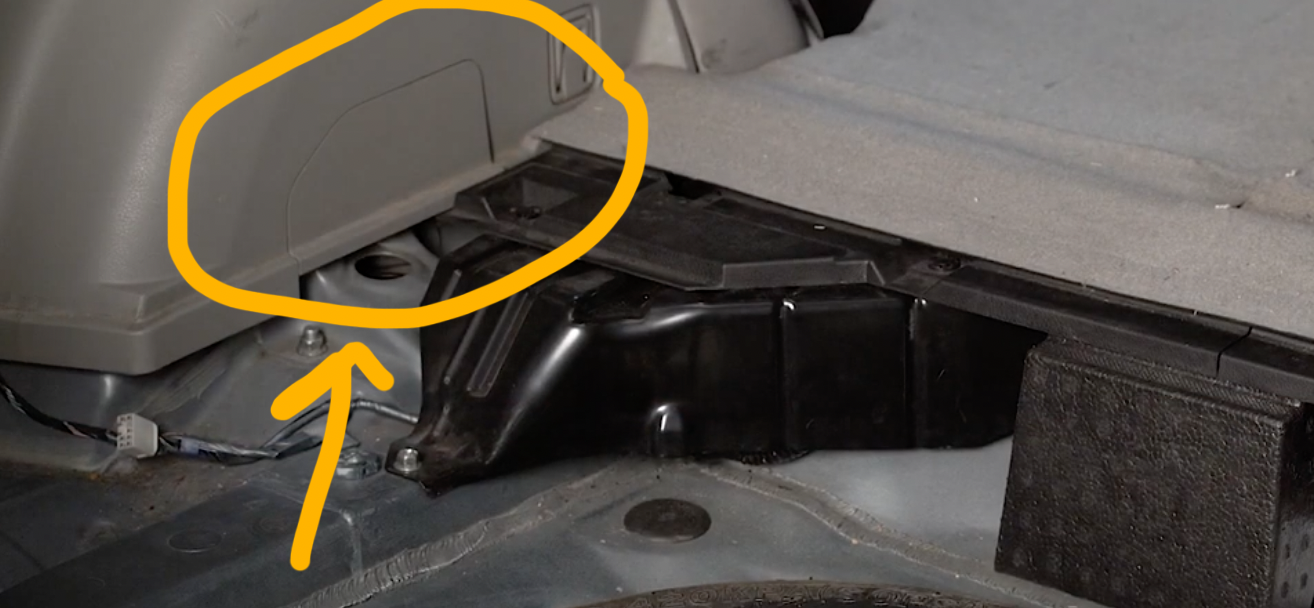
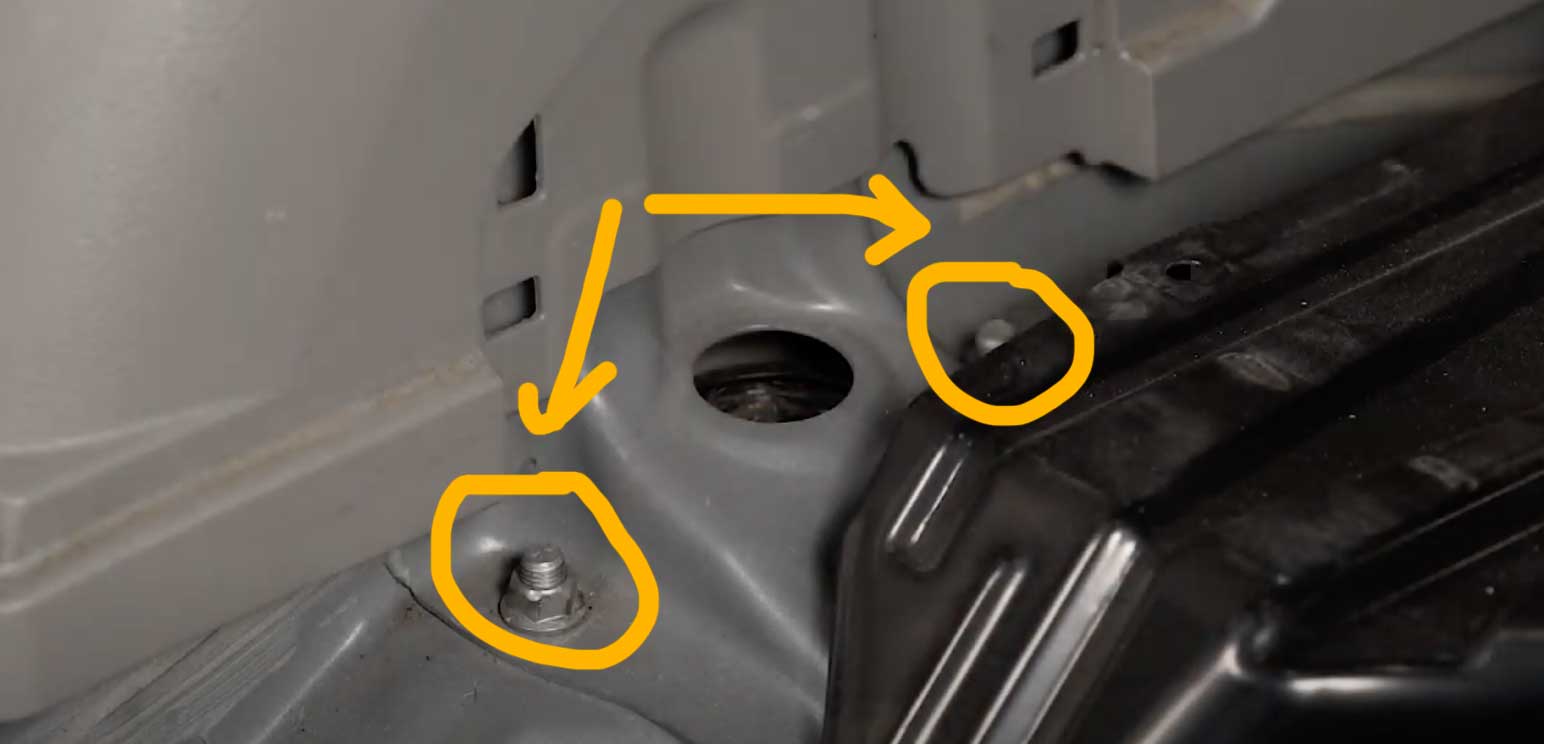
Step 7. Remove the 2 nuts holding the strut mount to the strut tower and remove the strut from the vehicle


Step 8 Install the new rear strut

Remove the top mount nuts from the new rear strut, install the rear strut and tighten the new nuts on top.

Step 9 Loosely reattach the shock to the control arm

Do not tighten these bolts until the control arm is at ride height. Otherwise the rubber parts will twist and wear out sooner.

Step 10 Using a jack, raise the control arm 

The Flatout suspension is longer than stock, so raise the control arm using a jack until the sway bar end link and hub mount line up.

Step 11 Loosely reattach the sway bar end link and hub with the control arm

Step 12 Load the suspension using the jack until it is holding the vehicles weight. Then tighten all the bolts.

Tighten the sway bar, shock, and control arm with the hub.

(Now do the same to the other side).

Step 13 Clip the side panel piece back in place

Step 14 Attach the clips holding the seat back carpet panel to the trunk and fold the trim back in place

Step 15 reinstall the foam pieces and the carpet pieces.

And you’re done. Almost.

Step 16 after all suspension is installed check and adjust the heights of your suspension around the vehicle. 

With the vehicle on level ground measure the heights from the ground the centre of the wheel well.

After measuring the height of your wheel well compare it to the heights you measured on step 1. Now you can make adjustments to the suspension to raise/lower it to your desired height.

To raise the suspension on the front twist the whole strut assembly, and it will unscrew. Using the locking ring as a guide, you can measure the distance you’ve raised it. You can also add preload using the lockout ring at the top if you need additional height. Again, use the lockout rings to measure the space adjusted.

To raise the suspension on the rear simply rotate the locking ring using the locking ring wrench. Use the lower lockout ring to measure the distance raised.

Once complete reinstall the wheels and torque to specs.

Congrats, you’ve installed your new Flatout GR Lite suspension.

I also installed the Rallitek subframe spacers to help center the rear wheel. I may add another article to walkthrough how I installed those. They were somewhat straightforward to install.

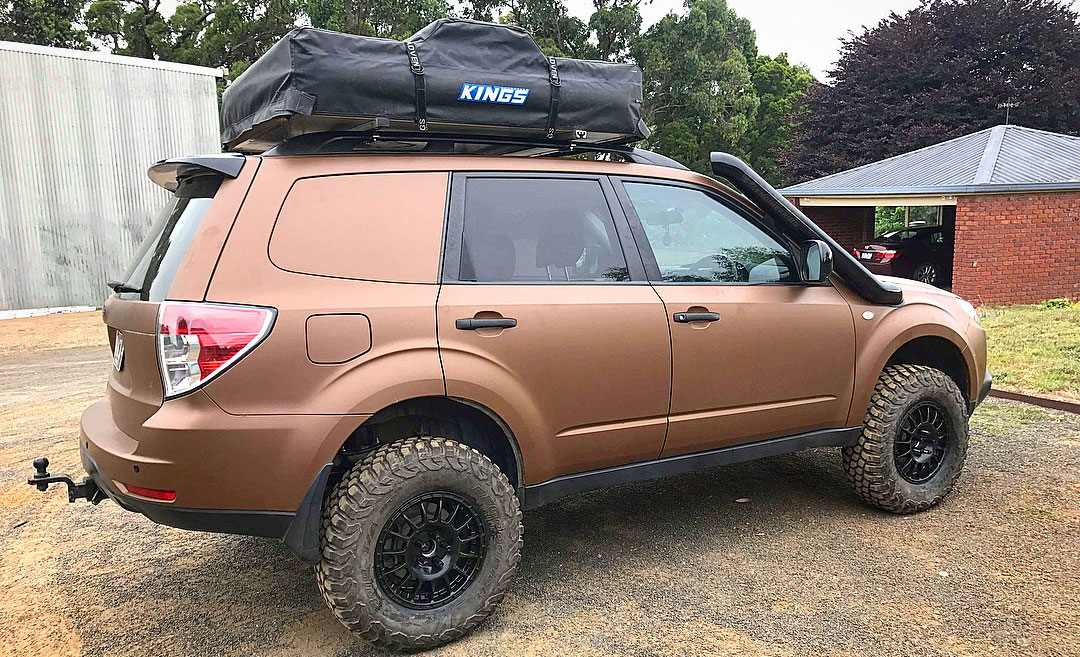
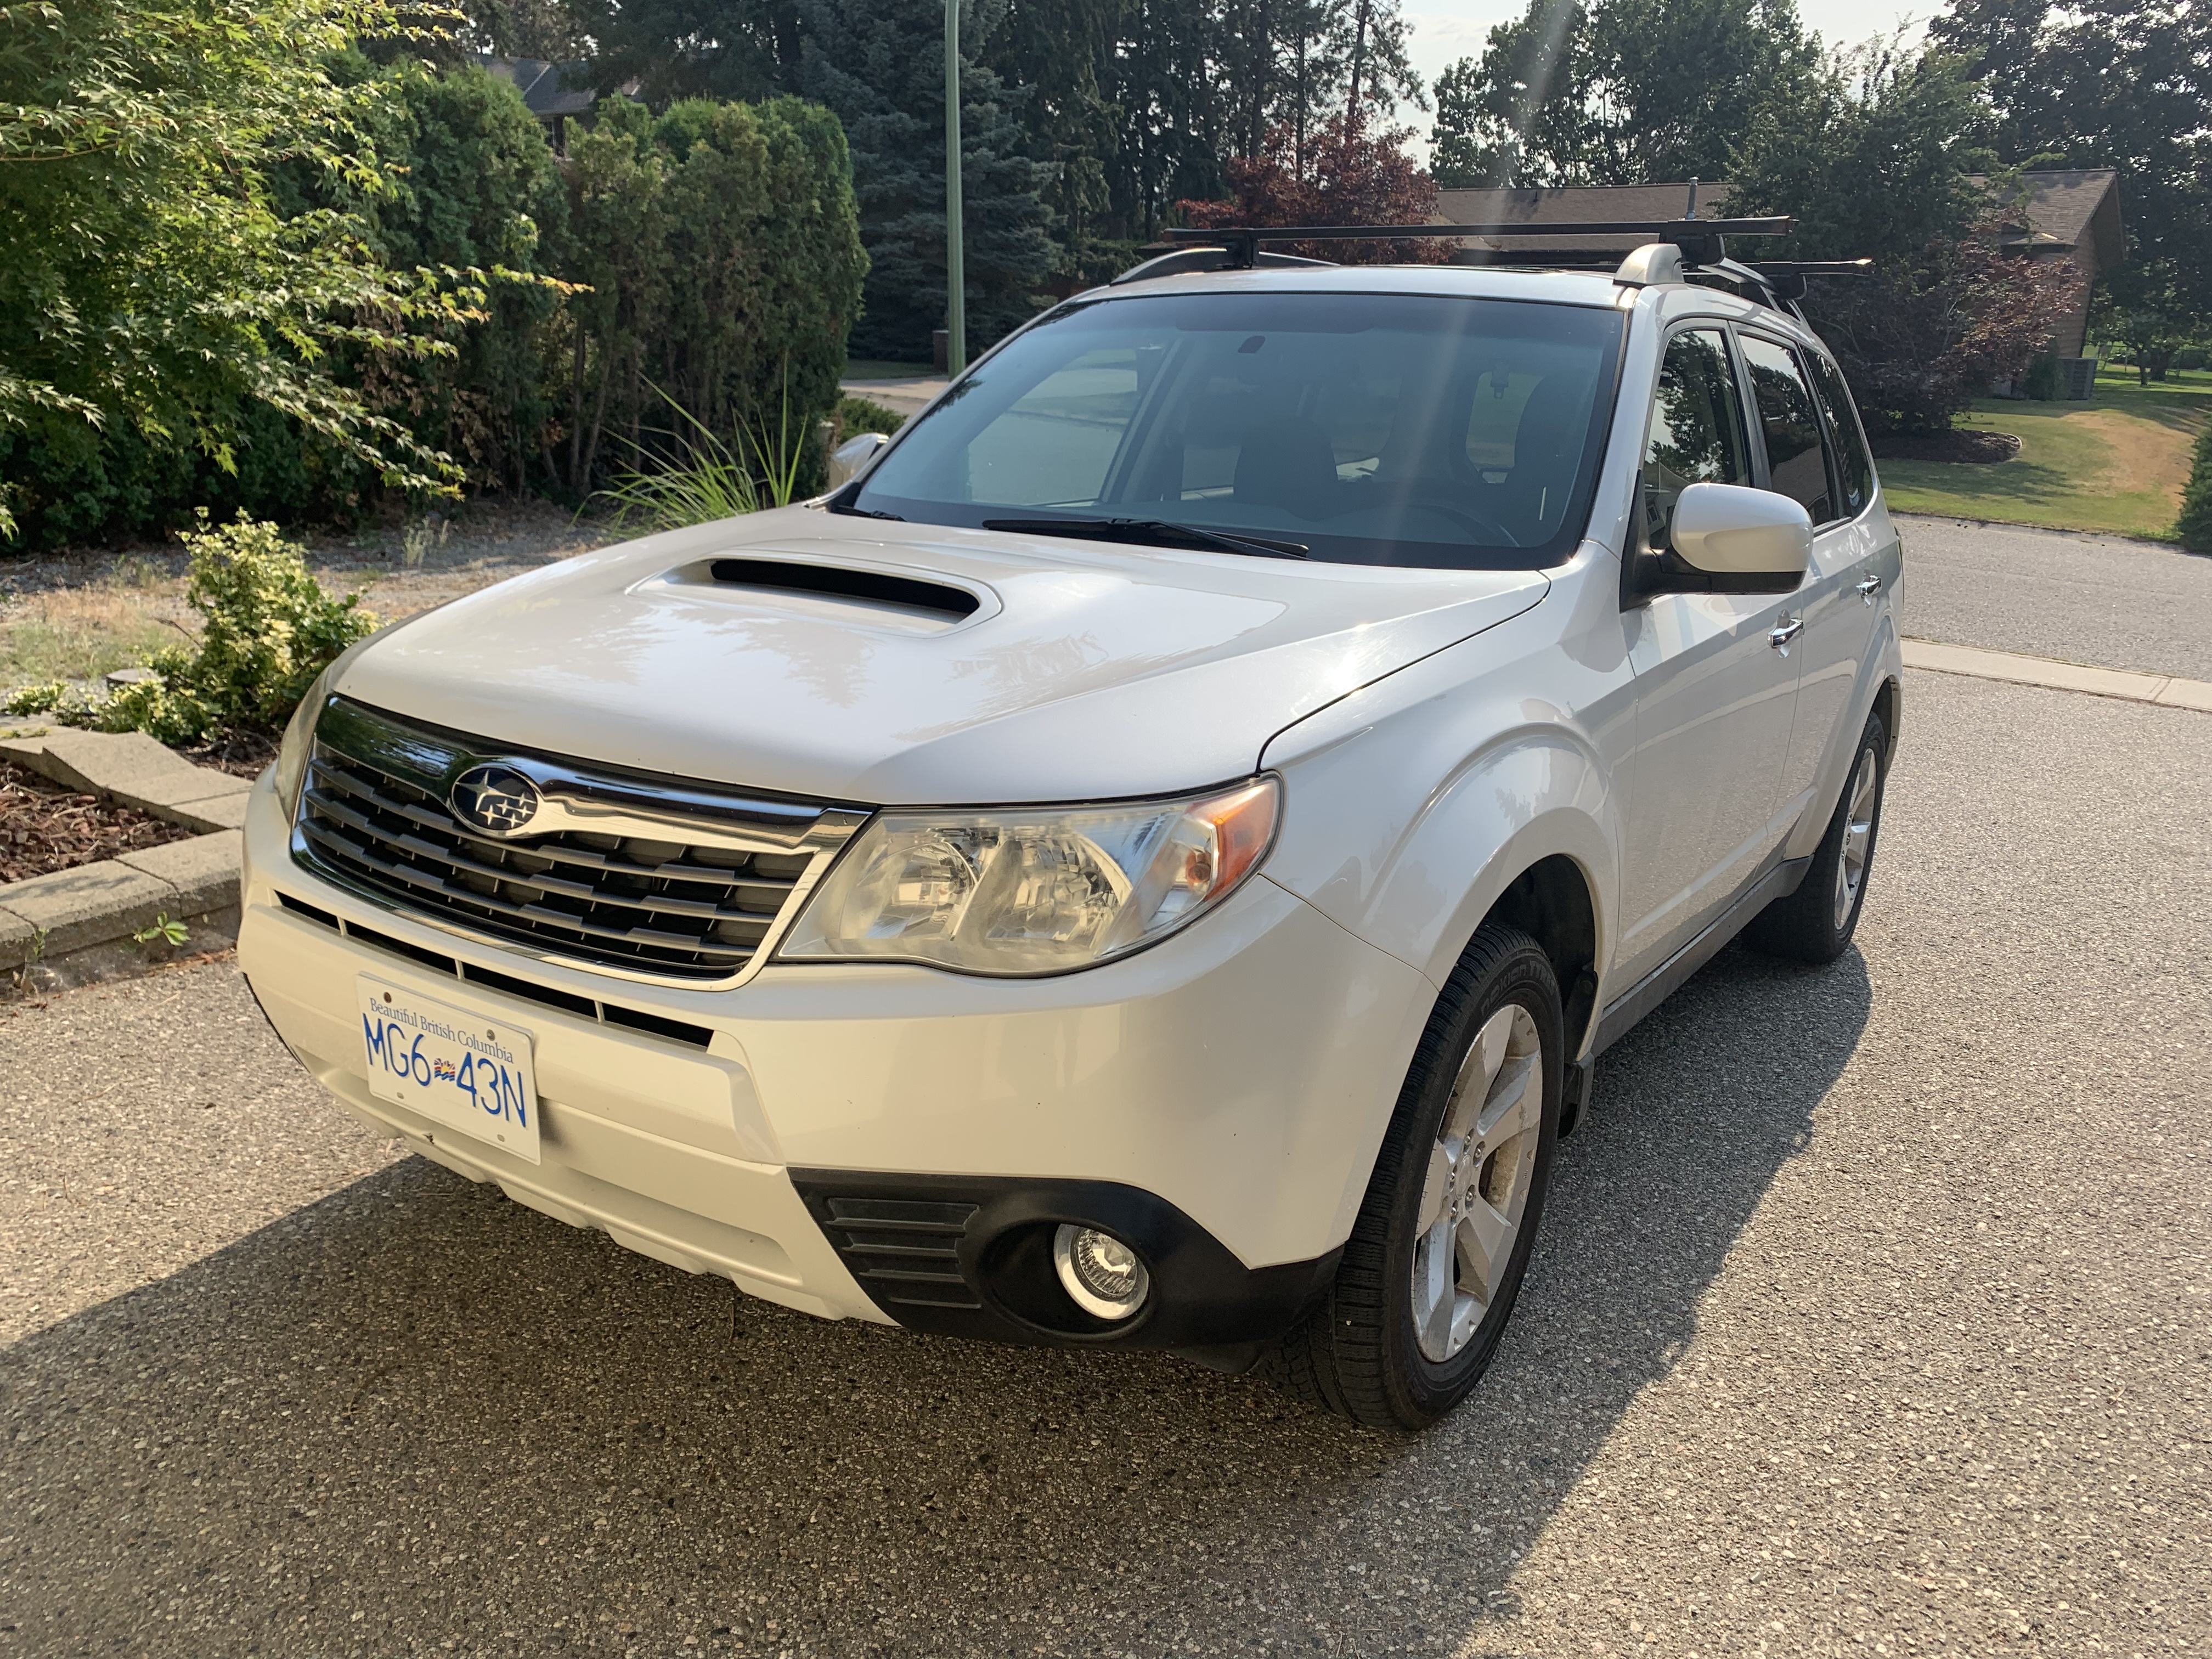
The Subaru Forester build:

From the beginning

Categories
Adventure Vehicle Journal On Vehicles Resource

Do 15 inch Method 502 wheels fit a 2009-2013 Subaru Forester 2.5XT?

Yes!

The 09-13 Subaru Forester 2.5XT has bigger front brakes than the non-turbo Forester. So I was unsure if they would fit. Method’s website say they clear 300mm callipers. I checked the owners manual and the Subaru Forester’s are 300mm.

Hopeful they would clear the brakes, I nervously placed the order and waited patiently. And today they arrived so I pulled off the stock front wheel and test fitted them with success!

There’s plenty of clearance for the brakes and the gold/bronze looks like a dream with the white. Very happy.

Test fitting the 15 inch method 502 wheels on the Subaru Forester xt

The beginning of the Forester build is taking shape.

I went with 15″ wheels so that I could have more sidewall on the tire. This will allow me to deflate the tires more when needed driving over snow, sand and rocks. As well, the additional sidewall makes it less likely to hit the wheels when driving over pot holes, curbs or rocks.

Method 502 15x7 wheels on a 2009 Subaru Forester 2.5xt


Categories
Adventure Vehicle Journal On Vehicles Resource

09-13 Subaru Forester XT – The start of an adventure vehicle

I’d been considering setting up an adventure vehicle to access the backcountry roads for ski touring. A 2009 Subaru Forester 2.5XT sat stored at our property for a year. It was my folks’ and then my younger brother’s until he got married and moved to the UK. It needed some work so they offered it to us. Finally the day came. Do we insure it? Or do we sell it?

Then it hit me… what’s better on the snow than a Subaru? All it needs is clearance for driving the winter forestry roads where I go.

Subaru is world renowned for their rally racing having won 47 World Rally Championship races. In Switzerland there’s a saying, “Subaru is the farmer’s Ferrari.” Which, when translated, means Subaru’s powerful AWD has a reputation for holding up on difficult terrain.

Subaru Rally

A mostly stock Subaru Forester took on the Sunraysia Safari Rally and nearly won. It lead the race up until the last 3 miles of day 3.


In 2009 the Subaru Forester XT won MotorTrend’s Sport/Utility vehicle of the year. MotorTrend wrote that the stock 8.9” clearance bested the stock Land Rover LR2, Toyota FT Cruiser, Ford Expedition, Honda Pilot, among others. Along with that, it has a surprising 63.0/30.8 cubic feet of cargo space behind the front/rear seats. And the AWD system impressed MotorTrend with its capability.

2009 MotorTrend SUV of the year

There are a few other things that make the 4 speed Subaru Forester XT an interesting vehicle for enthusiasts. For one, the WRX/STI parts swap right in to the Forester XT. And even without modifying anything the vehicle can be tuned to increase gas mileage, horse power and torque. But… given the opportunity with a new exhaust and a couple of mods it can easily make 300hp. Why stop there? With the WRX/STI parts you can tune it for 400hp. Yet mere mortals drive 400hp. So some people tune it to 500hp – all with bolt on parts.

While handy when you’re late for work – for the adventure vehicle that I require… this is well beyond my needs. And not only that… maybe the most important feature of any adventure vehicle is reliability. So while I like the idea of tuning it for more torque at the low end – I think 500 horses ripping through the forest may be a bit much.

But arguably its single best trait is its low centre of gravity. This is due to the boxer engine, which not only reduces vibration because of the horizontally opposed pistons, it spreads the weight of the engine lower in the engine bay. It’s the thing that makes a Subaru so stable at high speeds and in rally races. In fact, the Subaru Forester is the only SUV that was not required to add a “risk of rollover” warning label when it entered the market.

In an ideal world the wheels stay on the ground while cornering

There are other features that make this candidate stand out. The turning diameter is only 34.4 feet. That’s 10 feet less than the very capable four door wrangler and 2 feet more than the nimble 2 door Suzuki Jimny. That’s outstanding for a four door SUV and simply means you’ll find it easier to manoeuvre while on the trails..

It has a multi-plate transfer case that distributes power to the front and rear wheels – while non-traditional in that it is not a differential – over the years it has proven faithful. What’s most interesting is how it splits the power. Is sends power from 60/40 to 50/50 front to rear. In other words, the front and rear will always be fully engaged with a 10% variation depending on the terrain. For example, while driving uphill 50% of the power will be sent to the rear wheels and while going downhill 60% will be sent to the front. And what’s incredible with this model year is that no matter the situation both the front and rear wheels will have a minimum of 50% or 40% power. That’s essentially the same as what a locked centre diff does and along with the VDC explains why it handles so well in loose gravel hill tests.

Gravel hill test

Feel free to watch the climb on Youtube here.

The Subaru has a unibody. Manufacturers are moving towards unibody chassis – think Hummer EV and new Land Rover Defender. The Subaru frame has been thoroughly tested in rally races and by enthusiasts alike. It’s torsionally stiff and lighter than a body on frame chassis. But if plan to add recovery points or a winch, it’s best to first mount a solid steel front or rear plate to distribute the load evenly across both sides of the frame.

Reinforced Steel Plate on the front bumper

Now you’re good to add a winch and build something fun like this.

Having owned the 2010 Subaru Impreza I know first hand how it drives in the snow. It’s incredible. I’ve also owned the 1999 Nissan Pathfinder R50 and the Mercedes GLK350. Between these three the Subaru is by far the best on the snow. It would spring to life in the winter taking on a personality all of its own. This is really what they’re known for.


Then the question for my purposes is… will it lift?

The stock 8.9″ of ground clearance on the Subaru Forester 2.5XT is fine. But ideally I would like more ground clearance for driving logging roads in the winter. The last thing I’d want is to find myself high centered out in the back country.

Well fortunately the answer is yes. There are suspension spacers and suspension lifts available giving you anywhere from 0.5″ to 4″ of additional clearance.

Flatout Suspension makes an adjustable set with spacers for the Forester that will give it an additional 2 to 3 inches of suspension lift. Not only will this give you more clearance, it will also increase the articulation of your wheels. Excellent.

To put this in perspective check out the RTI score, which is a measure of wheel articulation for a given wheelbase length. These are articulation scores a few vehicles get:

Gladiator Rubicon: 623
TRD Pro: 492
Colorado ZR2: 489
TRD Off-Road: 468
Colorado Z71: 410

With a 2” suspension lift the Forester gets a score of 535. That’s pretty impressive. The higher the score the more your wheel can lift vertically while the others stay on the ground. Helpful as you navigate obstacles as you’ll have more traction to roll over lumpy terrain.

There’s another area for improved clearance. Increased wheel size. I’ve seen people fit 31″ tires on a Subaru Forester with a lift and some finagling.

31″ wheels with a lift and some finagling

I’ve chosen to go with 29″ wheels as that will give me an additional 1 inch of ground clearance and it fits without any modifications required. The stock wheels on my Subaru Forester are 27″

All-in-all together with the suspension lift this should give our Forester a combined ground clearance of between 11.9 inches to 12.9 inches. Plenty for my needs.

But speaking of needs there is a world of options that allow you to modify this vehicle as your needs require. This is where the community supporting Subaru stands out.

To list a few of the more notable mods.

  1. A rear automatic diff lock by Torq Masters is available
  2. Lo/Hi dual range conversion is available by All Drive Subaru
  3. Cobb tuning kit to increase the stock mileage and power

The list goes on…

In conclusion the 2009 Subaru Forester 2.5XT may be just the adventure vehicle I’ve been looking for – and the funny thing is that it was right in my own backyard, figuratively speaking (it was actually parked on the side). It’s affordable, capable, easy to work on, comfortable, reliable, light weight, decent fuel mileage, and fun. While I’ve taken it on gravel roads locally I’m most looking forward to exploring the backcountry this winter.


Categories
Resource

How to train for a Granfondo in 2 months

The Penticton Granfondo is two months away. So how do you train for a 160 kilometer event in just 8 weeks?

Having ridden Dave’s Ride Granfondo, Penticton Axel Merckx Granfondo, and Whatshan Granfondo here’s my strategy to prepare in just 8 weeks.

This will help anyone who’s able to ride about 30km’s on the bike – but hasn’t trained much beyond that.

A Granfondo is 160 kilometers in length and will take most riders anywhere from 4 to 8 hours to complete.

You need to train your body for endurance rides. If you’re not used to sitting on a bike for that length of time the body can begin to become sore. We usually think of training our legs for bike rides. But it’s the shoulders, back, arms, hands and core muscles that need to become accustomed to the duration.

So the best and simplest way to train for that is simply going for long, easy endurance rides.

Don’t worry about strength training. Your legs will get stronger simply by riding longer. Every time you encounter a hill, another rider, or wind you’ll be recruiting more muscle. Also, if you’re like me, as soon as the gun fires and you’re off – you’ll find you have plenty of strength.

Month 1

So, instead of focusing on short, high-intensity, muscle building rides. We’re going to focus on one long endurance ride per week. With consistent 1hr to 2hr endurance rides between.

Week 1: Start easy

You’ll be surprised how fast your body will gain momentum. So there’s no need to rush into long rides, doing that will just put you into the hurt house and push back your training progress.

Ride every other day. Doing 20km to 40km rides – easy to moderate intensity depending on how your legs feel.

Complete the week with 1 longer ride. Roughly 60kms.

Stay hydrated. My other tip is to not fuel during rides. Why? Because you want your body to learn how to burn fat for fuel, which is essential for long rides. Drink water with electrolytes, but avoid the sugar.

Week 2: Endurance Repeats

Continue riding every other day – again doing 20km to 40km rides. Join group rides. Have fun. There’s no right or wrong when developing endurance. You’re simply training your body to get accustomed to sitting on the bike and your heart to get used to less recovery.

Complete the week with 1 longer ride. Roughly 70-80kms.

Week 3: Endurance Repeats

Because you’re focusing on endurance rides you’ll find your body isn’t crazy fatigued. You can keep building.

Ride every other day. Doing 20-60km rides.

Complete the week with 1 longer ride. Roughly 80-100kms.

Week 4: Endurance + variety

You’re doing great now. You’re building confidence. The longer rides feel a bit uncomfortable. And that’s a good thing. Your body is getting stronger.

Ride 3 days in a row. This week we want to train the body to switch it up. On the 3rd day where you are riding 30km’s do mini hill sprints on every hill you face. If it’s wind sprints, that is good too.

1st ride medium 30-40km.

2nd ride easy 30km.

3rd ride include sprints 30km.

Take a day off.

4th ride do an endurance 100km endurance ride. (Fuel during the ride)

5th ride 20km easy recovery ride.

Month 1 is done!

Amazing work. You’re picking up steam. Your body is probably feeling really healthy. A bit tired, but any pain you feel now are the muscles getting stronger. Take two days off the bike. It seems like a lot, but recovery is how your body gets stronger.

If you’re not improving fast enough, it’s because you’re not recovering enough. When you take a couple days off you’re not just giving your legs a break – you’re giving your a heart a break too.

Month 2 begins

You may be feeling concerned that you won’t be ready in time. You’ve trained for a century but need to get used to riding a granfondo. Have no fear.

Aerobic sports work in the rule of 3. If you can ride 30kms 3 times per week. You can do a 100km ride on the weekend. It’s 3 times as long, but your body is actually able to do it. If you can ride 60kms 3 times per week you are ready for a 120+ km ride. The body just works this way.

You already built up to a 100km distance in your first month’s training. So your body is capable of 160km ride – it just will be uncomfortable. We’re going to keep training so it’s fun.

Week 1: Endurance + variety

Your body is capable of more now. So do more. It will benefit you.

You’ll want to do 3 rides in a row every week. Between 30-70kms in length. Do what feels right. If they are all 30km you will still be good. Make sure to include hill sprints in your 3rd ride. If you have a friendly and competitive group ride, make that your third ride. You want to put the body in a training situation where it is learning to adapt.

4th ride easy.

5th ride 120km (fuel during the ride)

Week 2: Endurance + variety

1st ride recovery

2nd ride 30-40km

3rd ride 30-70km include hill sprints

Take a day off

4th ride 140km (fuel during the ride)

Week 3: Endurance + variety

You’ve ridden 140kms and you’re ready for a granfondo. Your body is used to the distance. At this point you may be feeling strong and ready or the opposite and tired. Either way we’re going to take 3 days off the bike. You read that correctly. Recovery is your friend. You’ve done the hard work – this is how you will improve faster.

3 days recovery.

1st ride recovery

2nd ride easy 30-60km

3rd ride easy 30-60km

4th ride 160km (fuel during the ride)

Well done! You’ve officially ridden 160km. I bet you feel tired but amazing. You know you have the legs. Your body is getting used to this. Now hydrate, drink a beer and refuel.

Week 4: Recovery

Your event is in 7 days – so you may be tempted to keep riding to stay in peak shape until the day of. Or you may want to show your friends how strong your new legs are at a group ride. Don’t do it.

Pros stress their body in a way to keep peak fitness. But they are starting from a baseline of being able to ride 160km. You’ve just built up a lot of fatigue. Which is incredible. So you’re actually already where their bodies will need to get. Now it’s time to allow your body to recover so that it is at its peak strength for the event.

1st ride recovery (easy) – we’re simply clearing lactate

2nd ride recovery (30km easy) – we’re still clearing lactate so take this easy

Now get off the bike. You’re going to rest for 3 days off the bike.

3rd ride – the day before your event do a really easy 1hr ride – and I mean easy. Your body is still recovering. It may even feel stiff after a few days off the bike. You’re simply clearing that stiffness out while ensuring you have as much of your glycogen stores available – as possible.

Your body knows what is coming next. A long endurance ride. It’s storing the fuel it needs. Hydrate well before the event. Starting an event hydrated can make the difference of 30 minutes (or more) over a long ride.

Day of Your Event

Pack everything in advance. Make a list, check it twice. Have it all ready at the door. Fill your water bottles with water, electrolytes and Gatorade. Bring a banana, a few gel packs, and something that’s easy to swallow with substance like banana bread.

You’re ready!

Congrats – you just had the ride of your life. You trained in only 8 weeks and set a PR. Amazing!

Couple notes:

Hydration – I cannot stress enough the importance of hydration and recovery. Drink lots of water, get salt in as well, this will make your training much more effective and your recovery faster.

Nutrition – You know what food your body runs best on. Eat that. The cleaner you choose to eat the faster your body will train to burn fat as fuel – the faster you will be ready for a long endurance ride.

Rest – Rest is really important. Take it seriously. When you are riding your muscles are tearing and breaking down – this is signalling to your body that they need to get stronger. It’s the rest that makes them heal fastest and get stronger.

Fuel – Eat the same foods on your long training rides that you will on the event. While you will want to train without fuel on your short rides (it simulates riding longer as you have to burn fat as fuel), it’s important to train your body with fuel on your long rides to maximize the gains you get from them. And by using the same fuel as you take on race day you know how your body will react to it.

Weather – Some events are in the wet and cold. Others are in the heat. It’s hard to plan for this, but if you know that an event is typically in the heat or typically in the cold, do some rides in conditions that you will best replicate your event. This will better prepare your body for these conditions.

Final thoughts:

This is the training program I am following as I train for my upcoming event. I am starting week 2 of this plan. Yesterday I road 80kms (I misjudged the length of the route so I got a bonus 20km ride). Your body will get better a lot faster than you expect. And be sure to listen to it. If it needs an extra recovery ride in a week, take it.

If for some reason you weren’t able to train for the full 160km prior to the event… have no fear. Granfondos tend to be group rides. Riding in a big group is a lot of fun and time flies quickly. But it also is easier than riding solo. You save upwards of 20% of your energy riding in a group. So you’re actually more prepared for than you realize.

All the best out there.

Categories
Adventure Vehicle Journal

From the backyard to the backcountry – the start of an adventure vehicle

For the past year a 2009 Subaru Forester 2.5XT has sat stored at our property. It was my folks and then my younger brother drove it until he got married last year and moved to the UK. It needed some work so they offered it to us. I had other things I’ve been working on… and there it sat largely forgotten.

Categories
On Vehicles Resource

Off-roading terms and definitions

Often confused and misused – Here is a list of the most common off-road terms and definitions for your reading pleasure.

Off-road
\ ˈȯf-ˈrōd \

A vehicle being designed to operate away from public roads. First known use of the word off-road was in 1954. [Merriam Webster]


Off-roading
\ ˈȯf-ˈrōd′iŋ \

Off-roading is the activity of driving or riding a vehicle on unsurfaced roads or tracks, made of materials such as sand, gravel, riverbeds, mud, snow, rocks, and other natural terrain. Types of off-roading range in intensity, from leisure drives with unmodified vehicles to competitions with customized vehicles and professional drivers. [Wikipedia]

Let’s dive into common types of off-roading

Overlanding
\ ō′vər-lănd′iŋ \

Overlanding is self-reliant overland travel to remote destinations where the journey is the principal goal. [Wikipedia]

Overlanding


Trail Driving
\ ˈtrāl ˈdrī-viŋ \

Off-pavement driving on a track or thorough-fare across land or snow. These travel-ways are established routes through the wilderness and are either constructed or created over time through use. Trails can be maintained or unmaintained and have varying degrees of difficulty. Some trails may be so remote they haven’t been used in years. Yield right of way to hikers, cyclists, horses and non-motorized vehicles. [Americantrails.org, Driving Line]

Trail Driving


Green Laning
\ ˈgrēn lān \

Green laning (or two-tracking) is a leisure pursuit, generally suitable for any four-wheel-drive vehicle, even those without modifications or additional equipment. The term green lane refers to the fact that the routes are predominantly along unsurfaced tracks, forest tracks, or older roadways that may have fallen into disuse. [Wikipedia]

Green Laning


Car Camping
\ ˈgrēn lān \

Day trips or weekend trips where the goal is camping where you park – whether in a tent or in the vehicle. Often confused with Overlanding. With Car Camping the destination is the goal. With Overlanding the journey is the goal. Car Camping is a single trip. Overlanding is a longer journey traversing a route. [4xoverland]

Car Camping


Rock Crawling
\ rŏk krɔːl \

Rock crawling is an extreme form of off-road driving using specialized vehicles ranging from stock to highly modified to overcome obstacles. [Wikipedia]

Rock Crawling


Mud Bogging
\ mŭd ˈbɒɡɪŋ \

Mud bogging (also known as mud racing, mud running, mud drags, or mudding) is a form of off-road motorsport popular in Canada and the United States in which the goal is to drive a vehicle through a pit of mud or a track of a set length. [Wikipedia]

Mud Bogging

Dune Bashing

Dune bashing is a form of off-roading on sand dunes. [Wikipedia]

Dune Bashing

Gravel road
\ ˈgra-vəl ˈrōd \

A gravel road is a type of unpaved road surfaced with gravel that has been brought to the site from a quarry or stream bed. They are common in less-developed nations, and also in the rural areas of developed nations such as Canada and the United States. [Wikipedia]

Related types of roads include Forest Service Roads and Logging Roads.

Gravel Road

Wheeling
\ ˈ(h)wē-liŋ \

Slang term for off-roading.

Four-Wheeling
\ ˈ(h)wē-liŋ \

Traveling in a vehicle using four-wheel drive.


All-Wheel Drive Vehicle (AWD vehicle)
\ ˈȯl-ˈwēl- \

An all-wheel drive vehicle (AWD vehicle) is one with a powertrain capable of providing power to all its wheels, whether full-time or on-demand. [Wikipedia]

The most common forms of all-wheel drive are:

4×4 (also, four-wheel drive and 4WD)
Reflecting two axles with both wheels on each capable of being powered.

6×6
(also, six-wheel drive and 6WD)
Reflecting three axles with both wheels on each capable of being powered.

8×8
(also, eight-wheel drive and 8WD)
Reflecting four axles with both wheels on each capable of being powered.

Vehicles may be either part-time all-wheel drive or full-time: [Wikipedia]

On-Demand AWD (also, part-time)
\ ˈȯn di-ˈmand \

One axle is permanently connected to the drive, the other is being connected as needed.

Full-Time AWD (also, permanent)
\ ˈfu̇l-ˈtīm \

All axles are permanently connected, with or without a differential.

Independent AWD
\ ˌin-də-ˈpen-dənt \

The wheels are driven, but not dependent on a central mechanical power coupling.

SUV – Sports Utility Vehicle
\ ˌes-(ˌ)yü-ˈvē \

A rugged automotive vehicle similar to a station wagon but uses the body-on-frame chassis. [Wikipedia]

SUV

Crossover SUV
/ ˈkrôsˌōvər ˌes-(ˌ)yü-ˈvē /

A crossover, crossover SUV, or crossover utility vehicle (CUV) is a type of sport utility vehicle-like vehicle built with unibody frame construction. [Wikipedia]

Crossover SUV

Truck
\ ˈtrək \

A wheeled vehicle for moving heavy articles. [Merriam Webster]

Truck

Rock Crawler
\ rŏk krɔːlr \

Purpose-built 4×4 vehicle to crawl over rocks and boulders. [Quadratec]