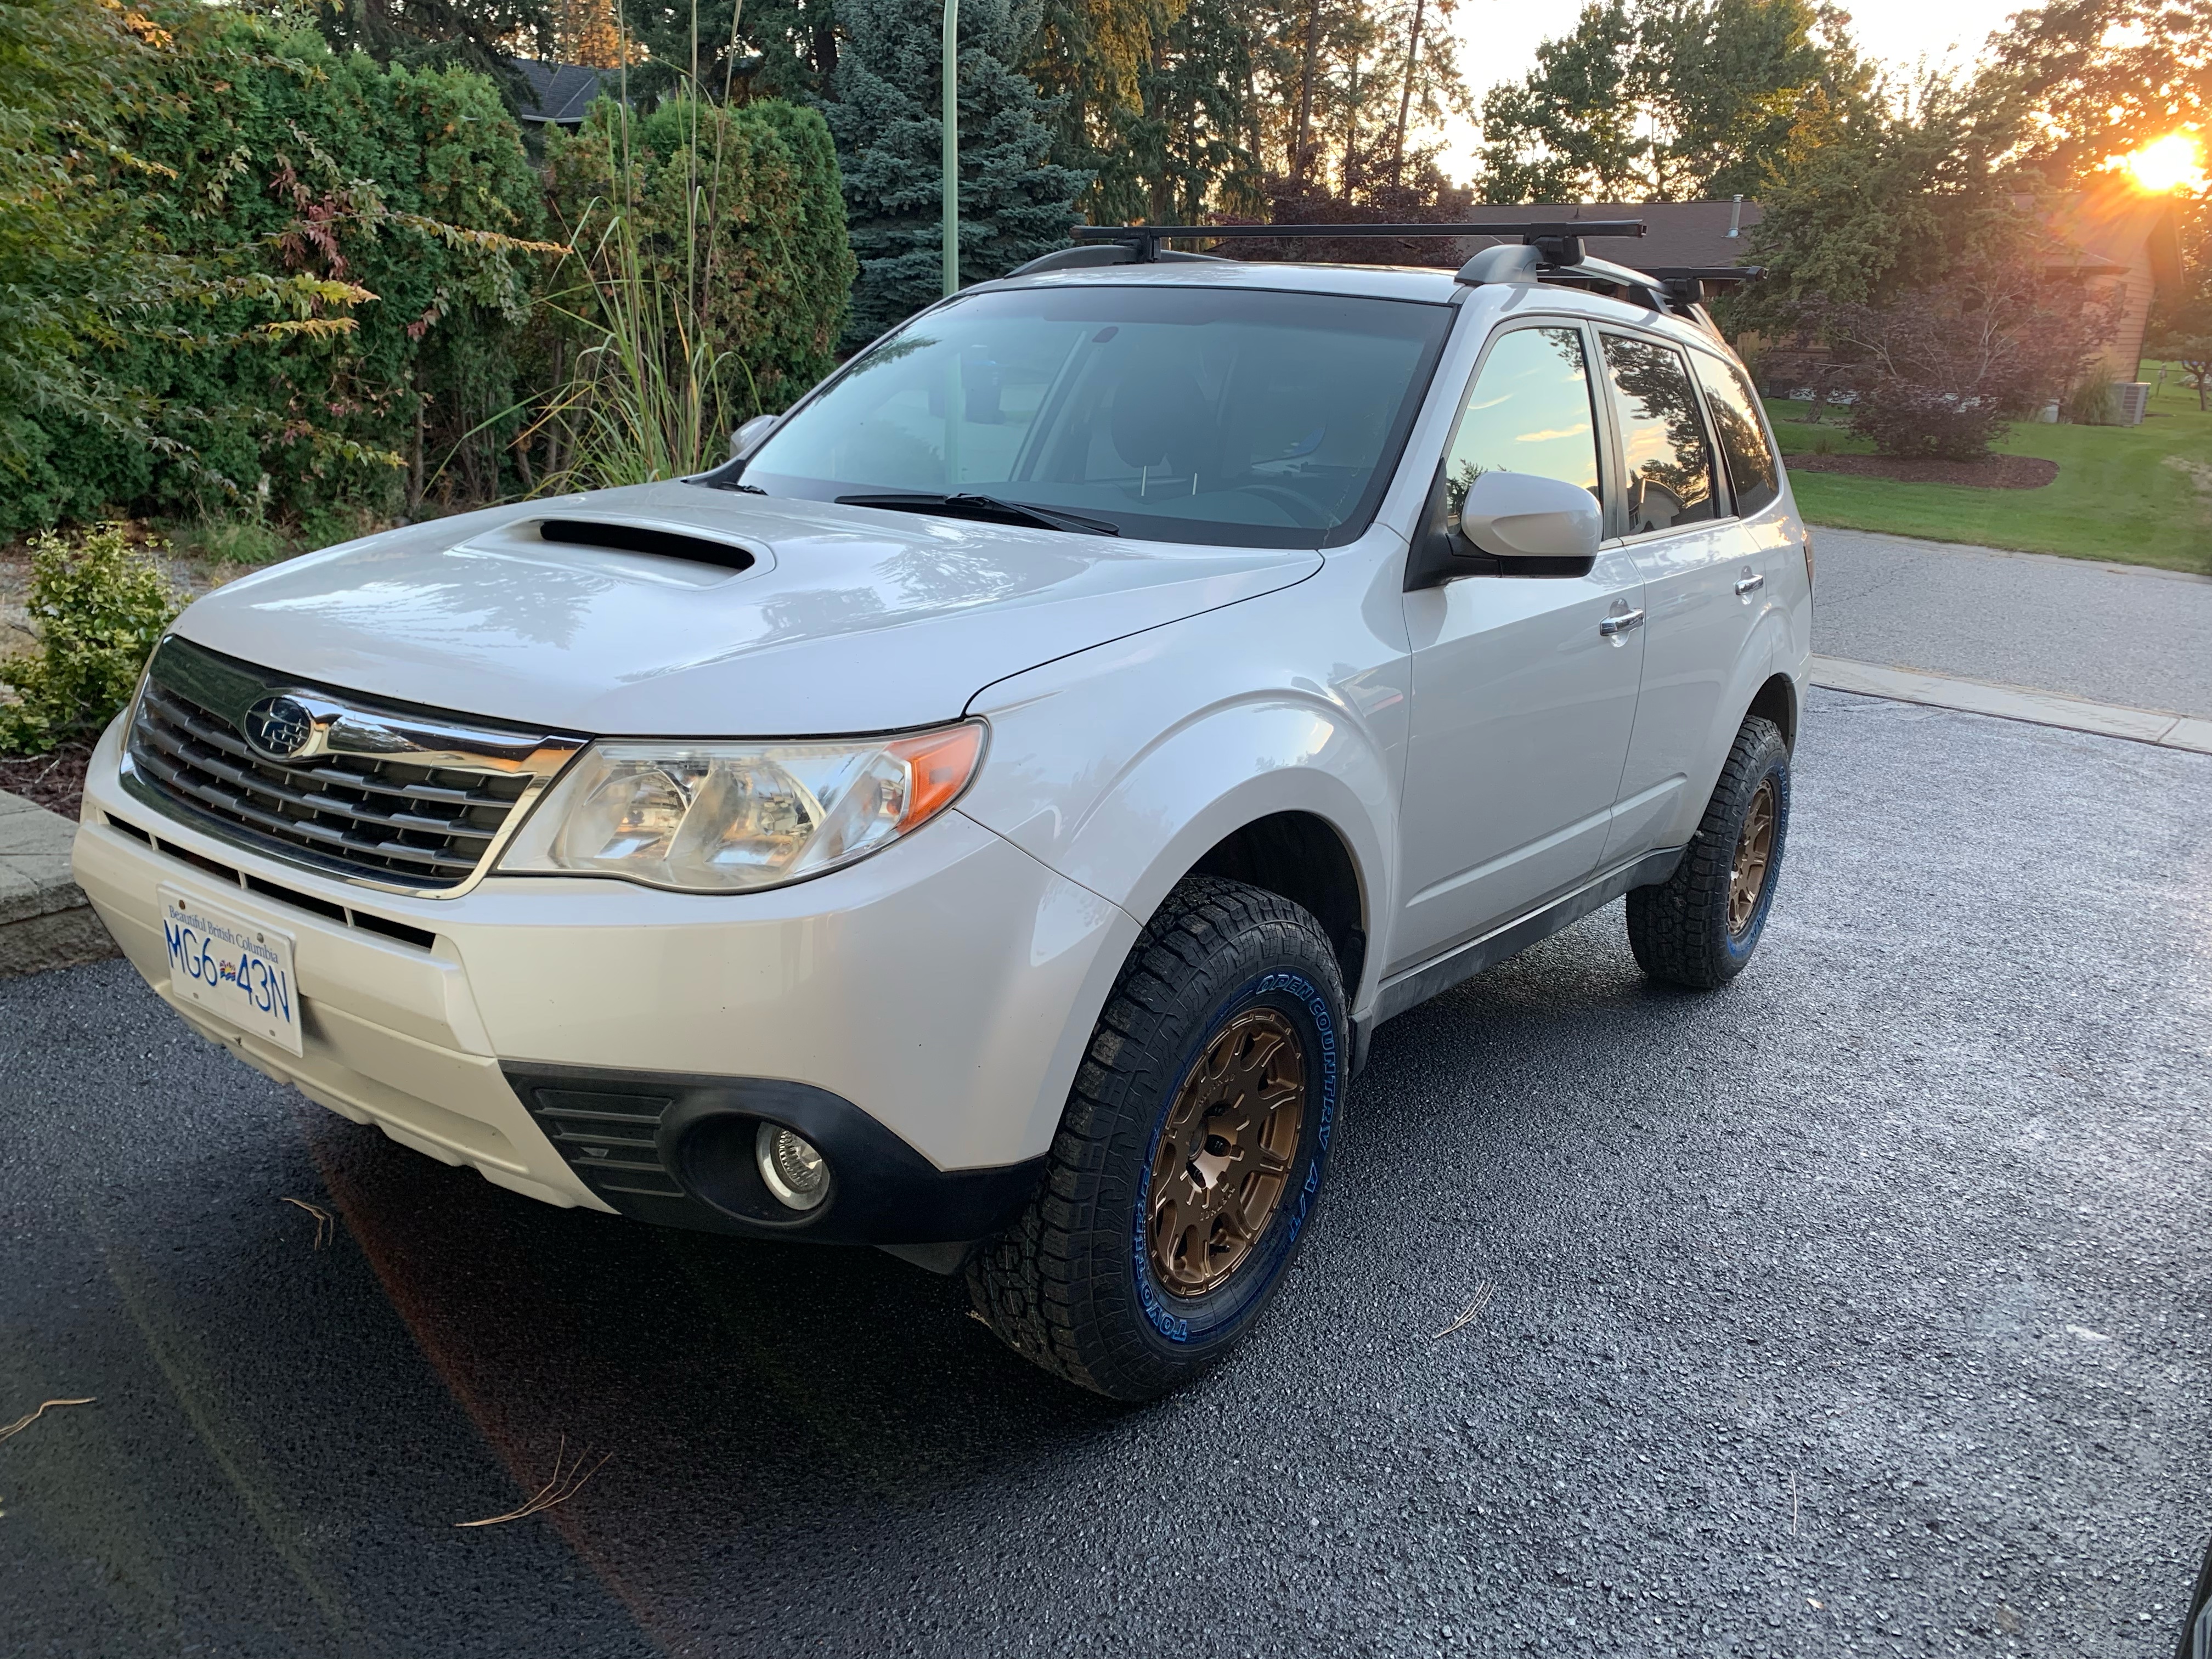
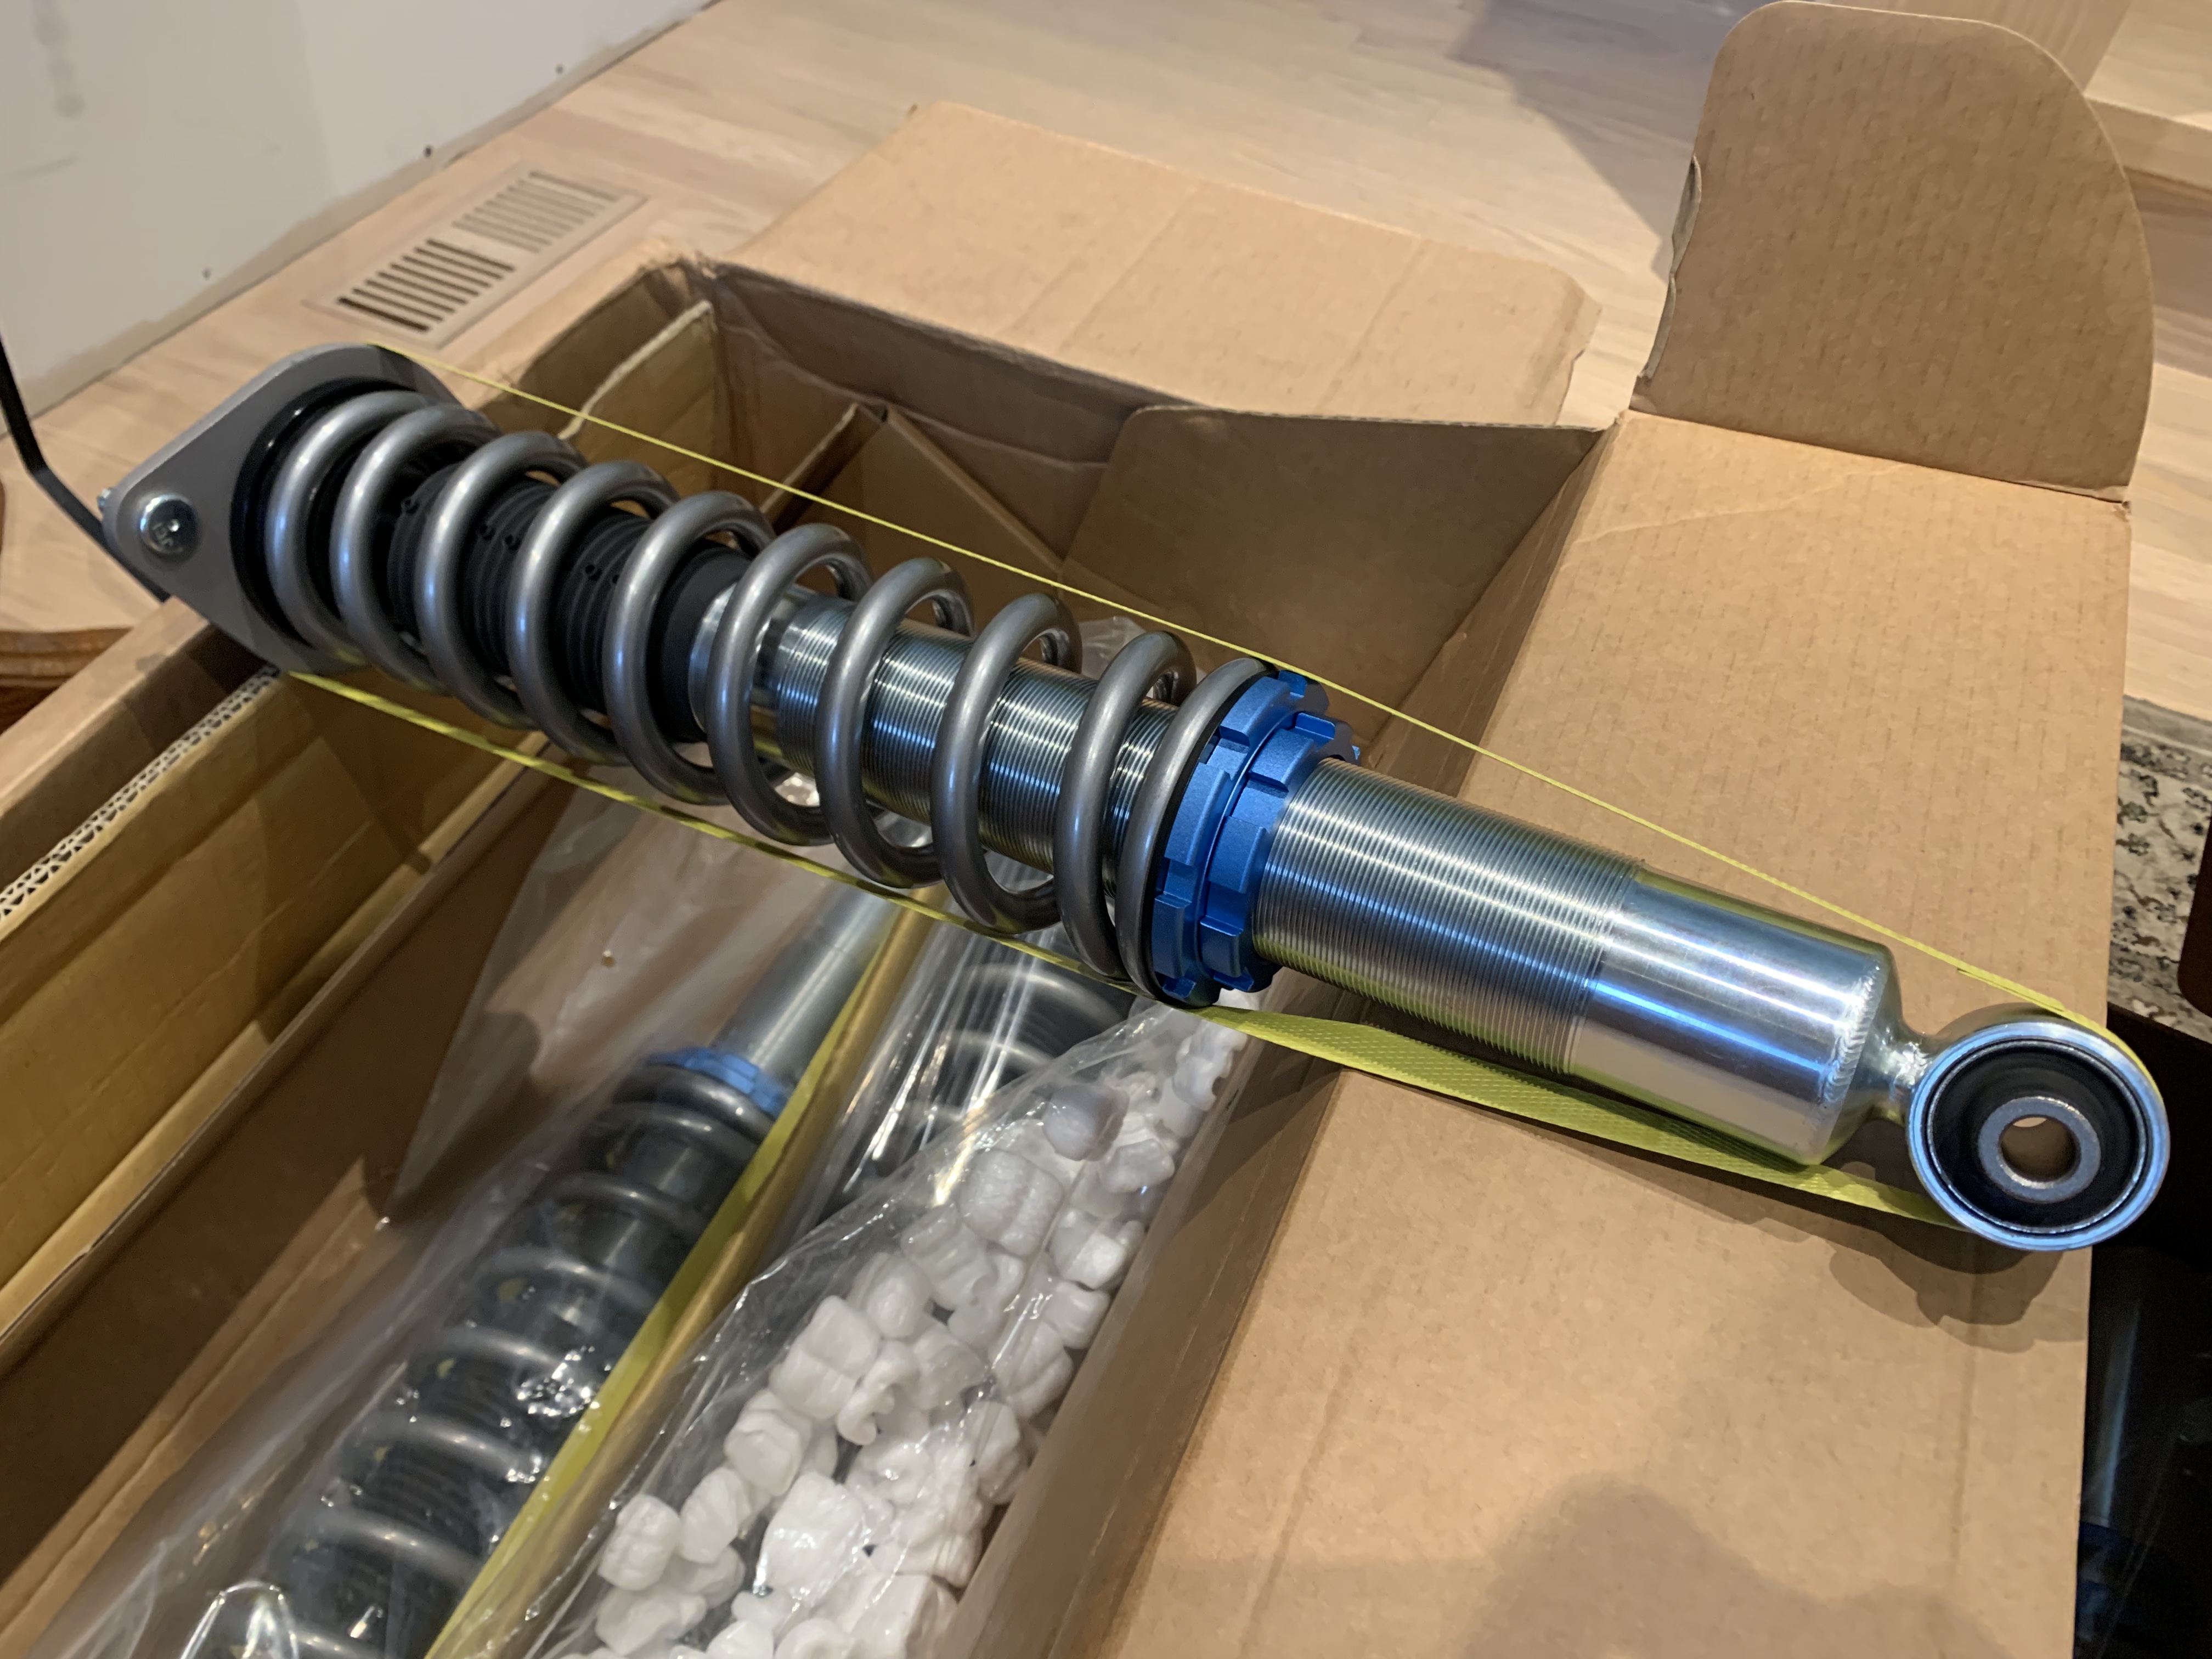
This past weekend I installed the Flatout Suspension’s GR-Lite coil overs and Rallitek spacers. They arrived packaged in the box.
There were a couple things that to note for the install.
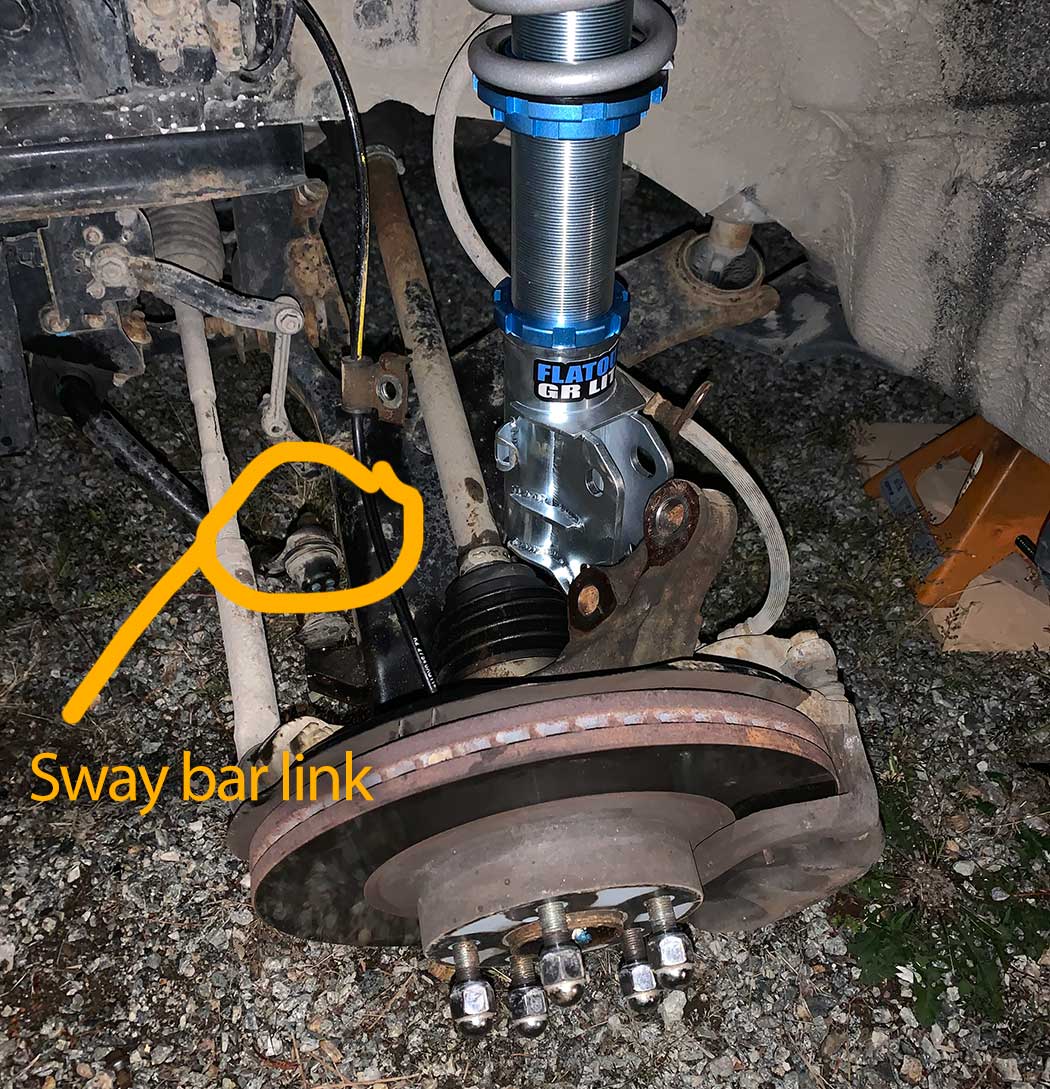
- They are longer than stock suspension. They do fit. I had to disconnect the front sway bar links to drop the control arm low enough. Then used a jack to lift the control arm. After that I reinstalled all the bolts. And presto, it was installed.
- If you hear a spring recoil noise when turning your front wheel after the install, this means the bottom lockout rings need to be tightened. To do this place the provided locking ring wrench on the locking ring and tap it using a hammer to tighten it. You’ll see it snug up an additional quarter turn. After that, the noise is gone.
- The top dampening adjustment is set to 0. I counted the number of quarter turns to tighten them up. Divided that by half and then set all the dampeners to half way. This gave me a good baseline. I could stiffen it (for cornering) or soften the bounce (for going over corrugated gravel), but it is feels good at this setting.
Step 1
On level ground measure the current ride height from the ground to the centre of the wheel well. This will give you the baseline height. After the install, you will measure each wheel again and you will know how many inches you’ve raised or lowered the vehicle by. You can then make adjustments to the ride height accordingly.
Step 2 setup the suspension
Front suspension: I adjusted the lower struts so the inserts were flush with the bottom. And set the top lockout ring so it is at 0 preload. Basically spin the lockout ring until it is snug against the spring so there is no up/down movement, but the spring isn’t too tight so it can rotate freely.
Rear suspension: Adjust the top lockout right so it is at 0 preload. Same as above.
Installing the front suspension.
I started with the front to get momentum.
Step 1 remove the wheel
Loosen the bolts while the wheel is on the ground.
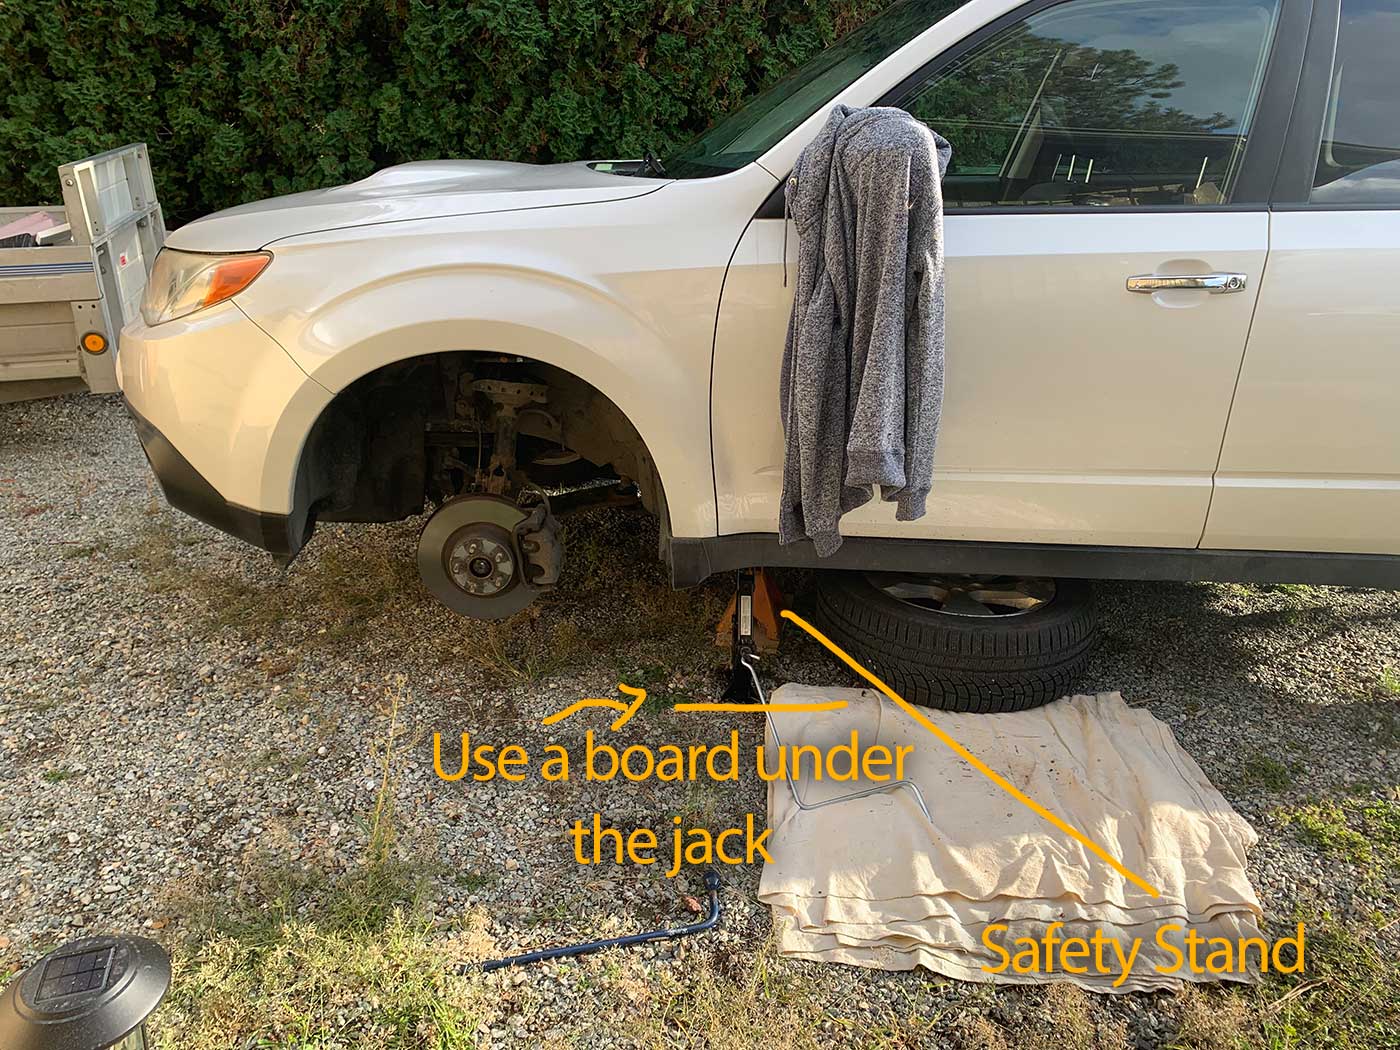
Then lift the vehicle with a jack. Be sure to put a safety stand under the vehicle once jacked off the ground, so it doesn’t fall on you if the jack failed.
Remove the bolts and take off the wheel.
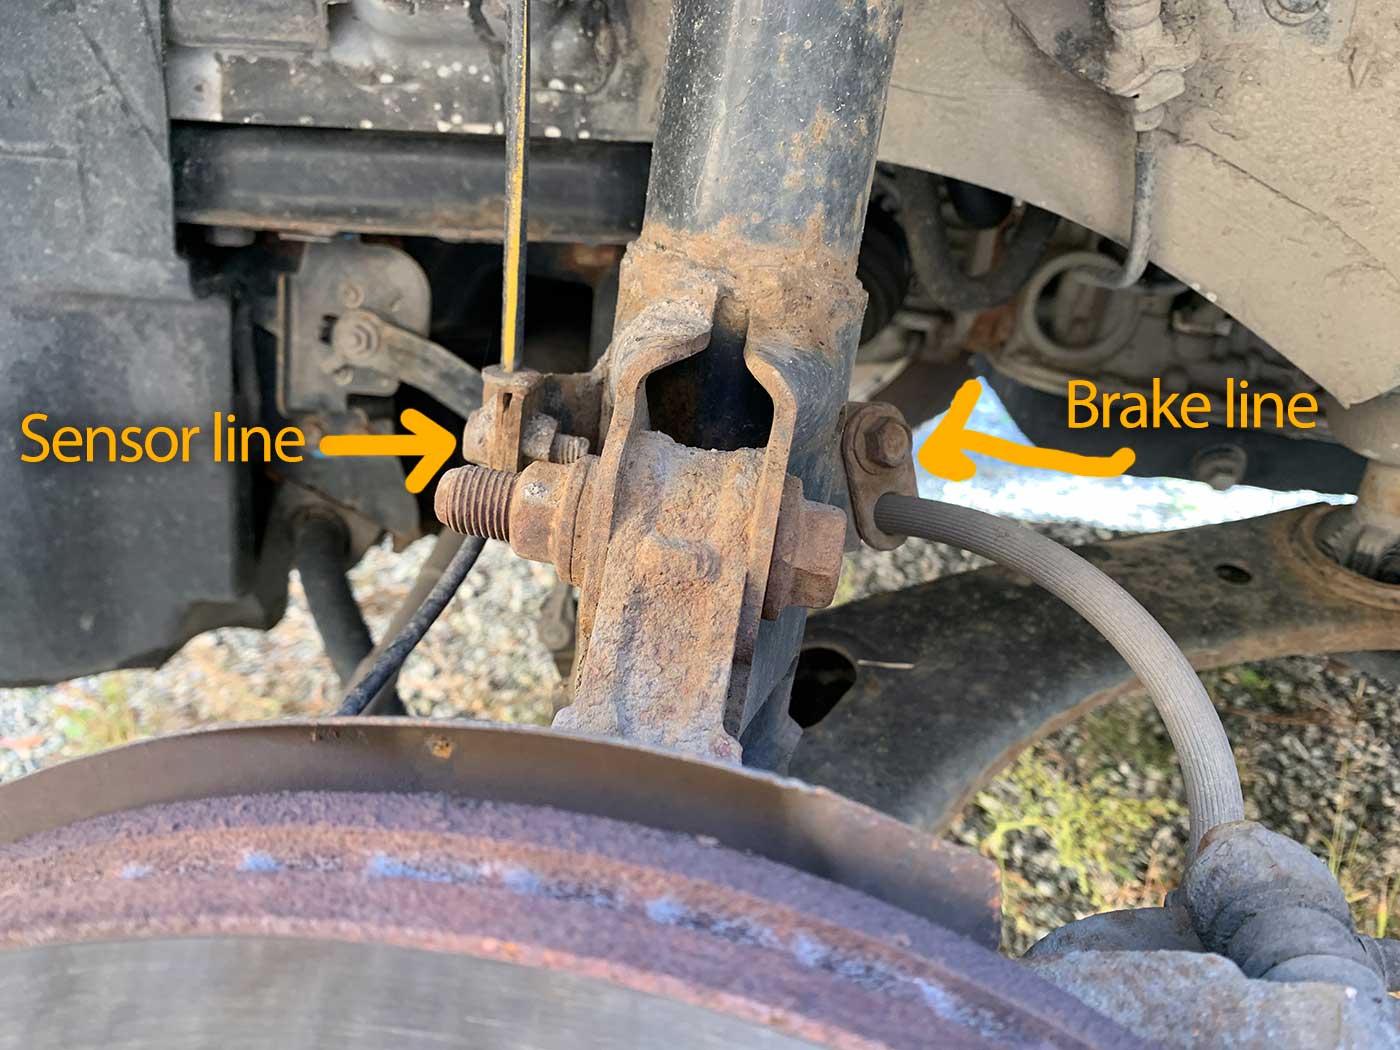
Step 2 disconnect the bolts holding the brake line and sensor lines from the strut
*Tip: I don’t have an impact wrench, so what I do is spray nuts with WD40 and hammer a wrench using a 5 pound rubber mallet. This breaks the nuts loose without damaging them.
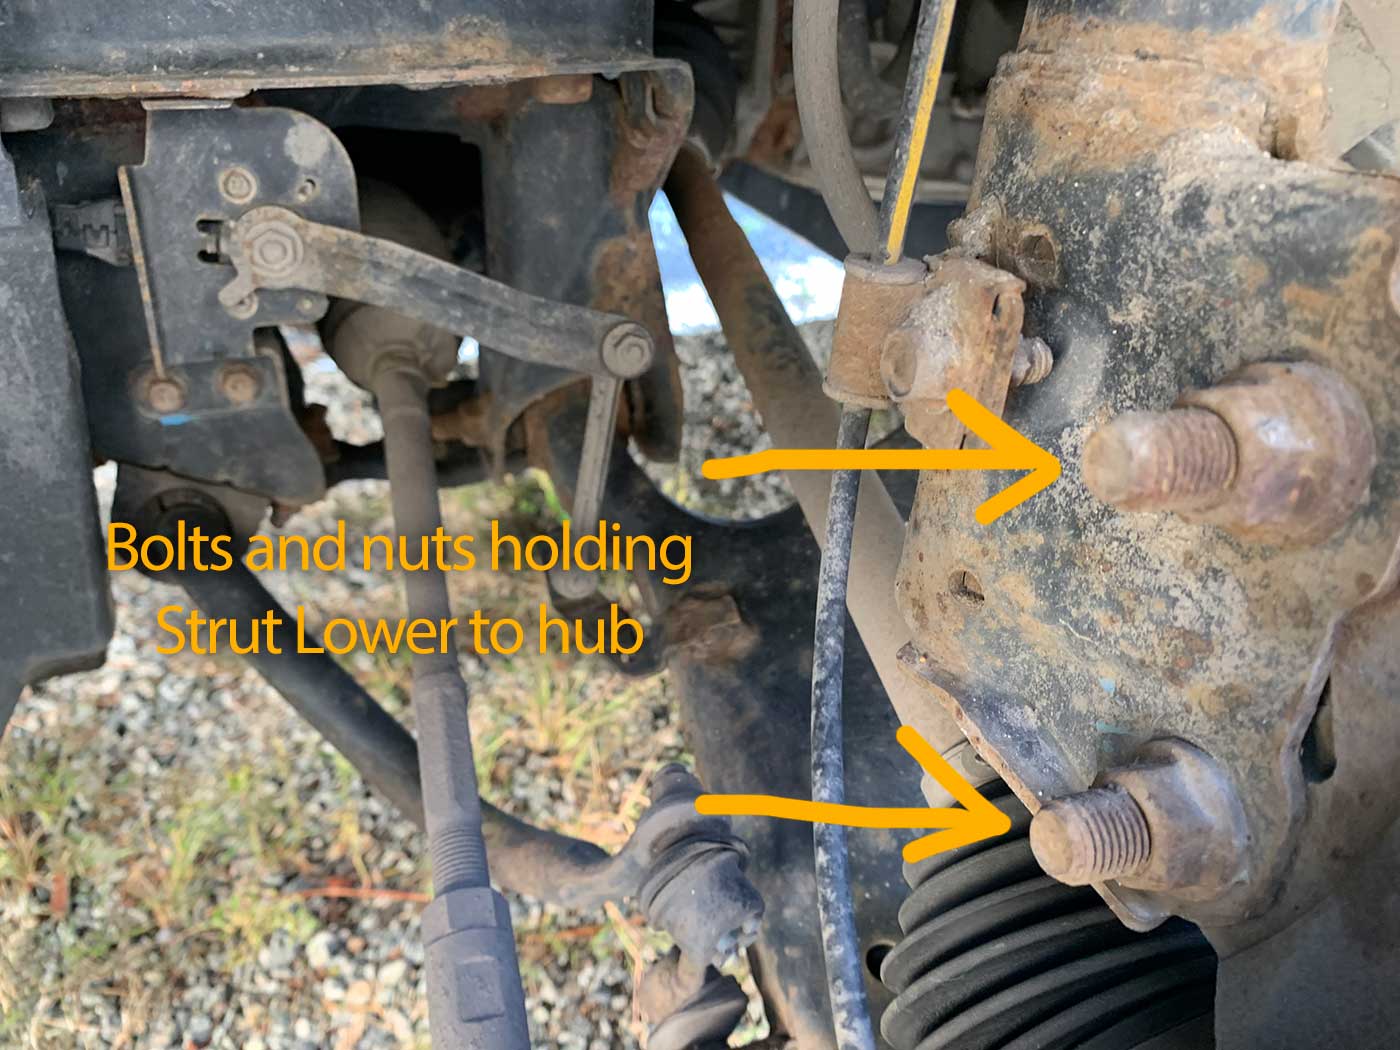
Step 3 remove the bolts and nuts holding the strut to the vehicle’s hub.
Note: The top bolt is used for adjusting camber. There’s a washer on the top camber bolt. Make note of the position of the camber bolt if you want to retain the original height. (I didn’t do this as I had an alignment booked at a shop, but would have been easier to set camber had I marked it).
Step 4 disconnect the nuts from the top strut mounts
Then with one arm on the strut drop it out
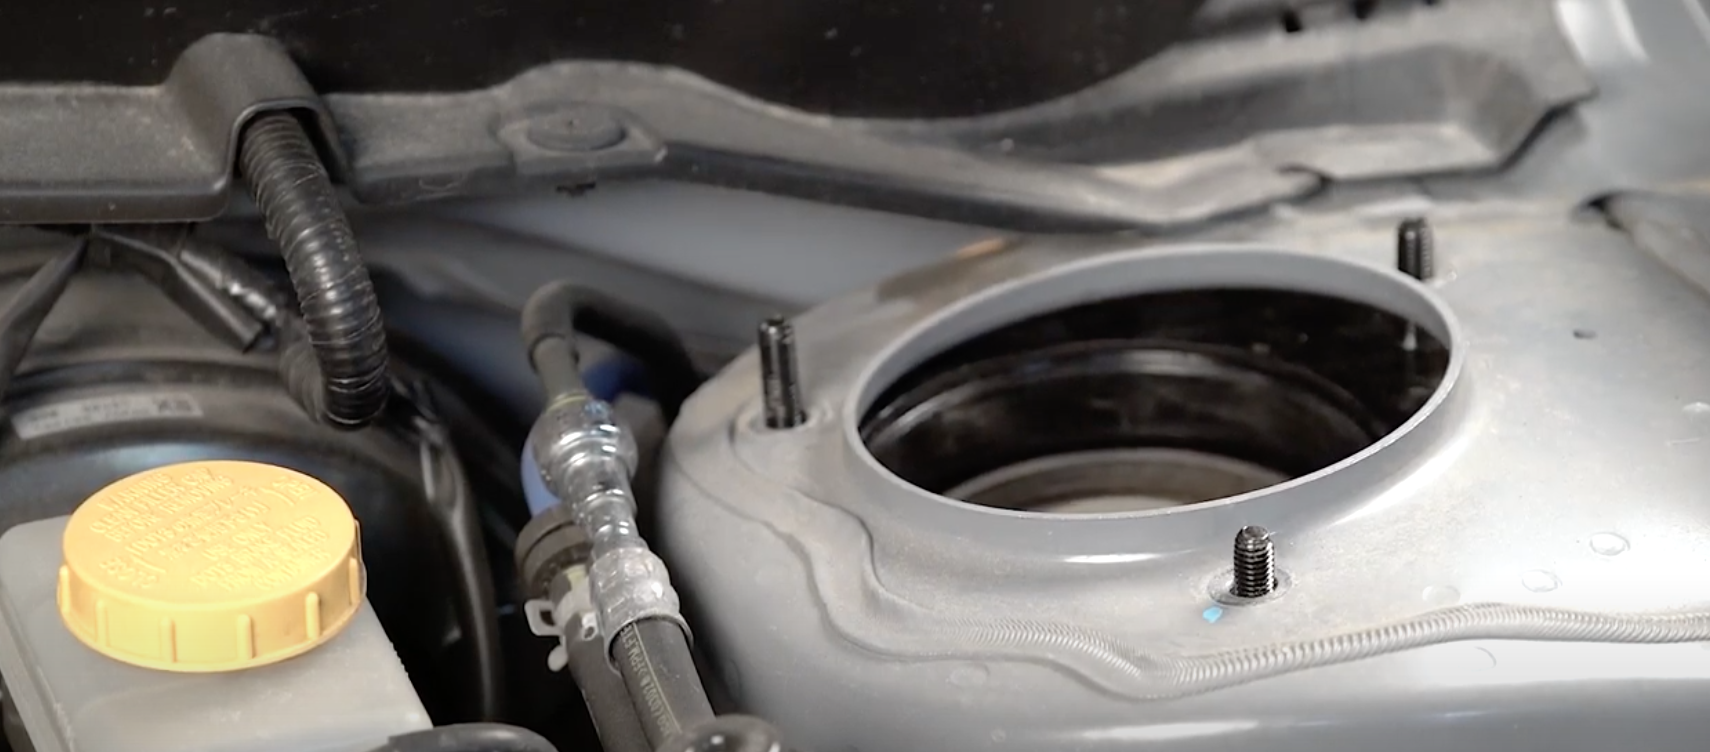
Step 5 Install the new front strut
Remove the top mount nuts from the new strut, install the front strut and screw the new nuts on top.
Step 6 Install the bolts and nuts holding the strut lower to the hub
*Note I had to disconnect the sway bar link to drop the control arm enough for it to fit.
Step 7 reconnect the brake line and sensor brackets.
Step 8* reconnect the sway bar link
Using a jack under the control arm hub, lift it up until the sway bar link lines up. Then reconnect. I found this step straight forward.
Step 9 reinstall the wheel.
Hand snug the bolts while in the air, then tighten them when on the ground.
*Once finished installing the suspension check the bolts on all the wheels use a torque wrench to tighten them all to spec
Step 10* check the height of the your wheel well
Do this step after all suspension is installed to ensure the vehicle is level. After measuring the height of your wheel well compare it to the heights you measured on step 1. Now you can make adjustments to the suspension to raise/lower it to your desired height.
To raise the suspension on the front twist the whole strut assembly, and it will unscrew. Using the locking ring as a guide, you can measure the distance you’ve raised it. You can also add preload using the lockout ring at the top if you need additional height. Again, use the lockout rings to measure the space adjusted.
Step 11. Tighten the lockout rings
Once happy with the heights of your suspension use a hammer and the lockout wrench supplied and tap all the lockout rings tight. You’ll see it tighten approximately a quarter turn.
Now do the other front wheel (repeat above steps).
Installing the rear suspension.
Step 1. Remove the wheel (see step above)
Step 2. Remove the nut and bolt holding the sway bar end link to the lower control arm
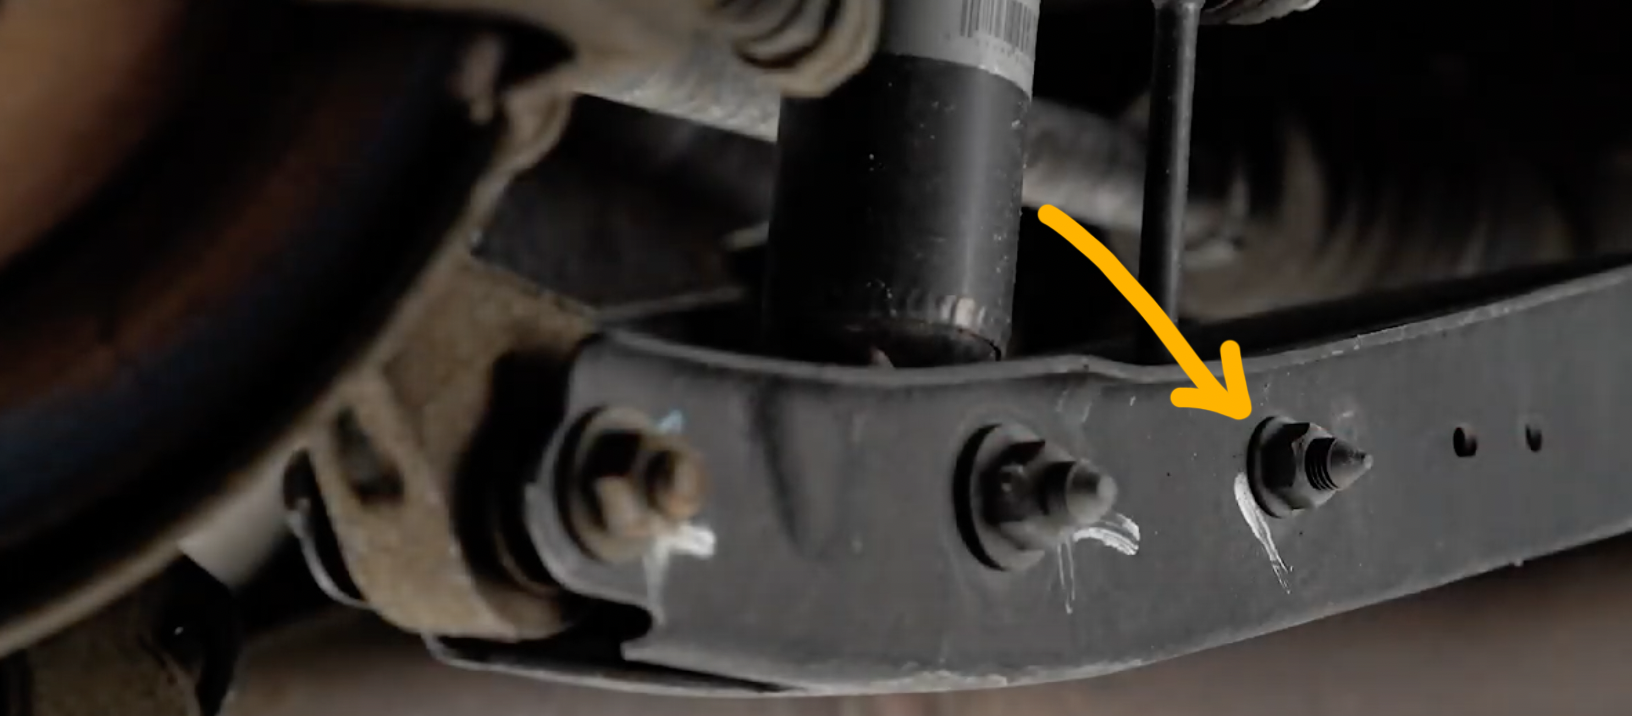
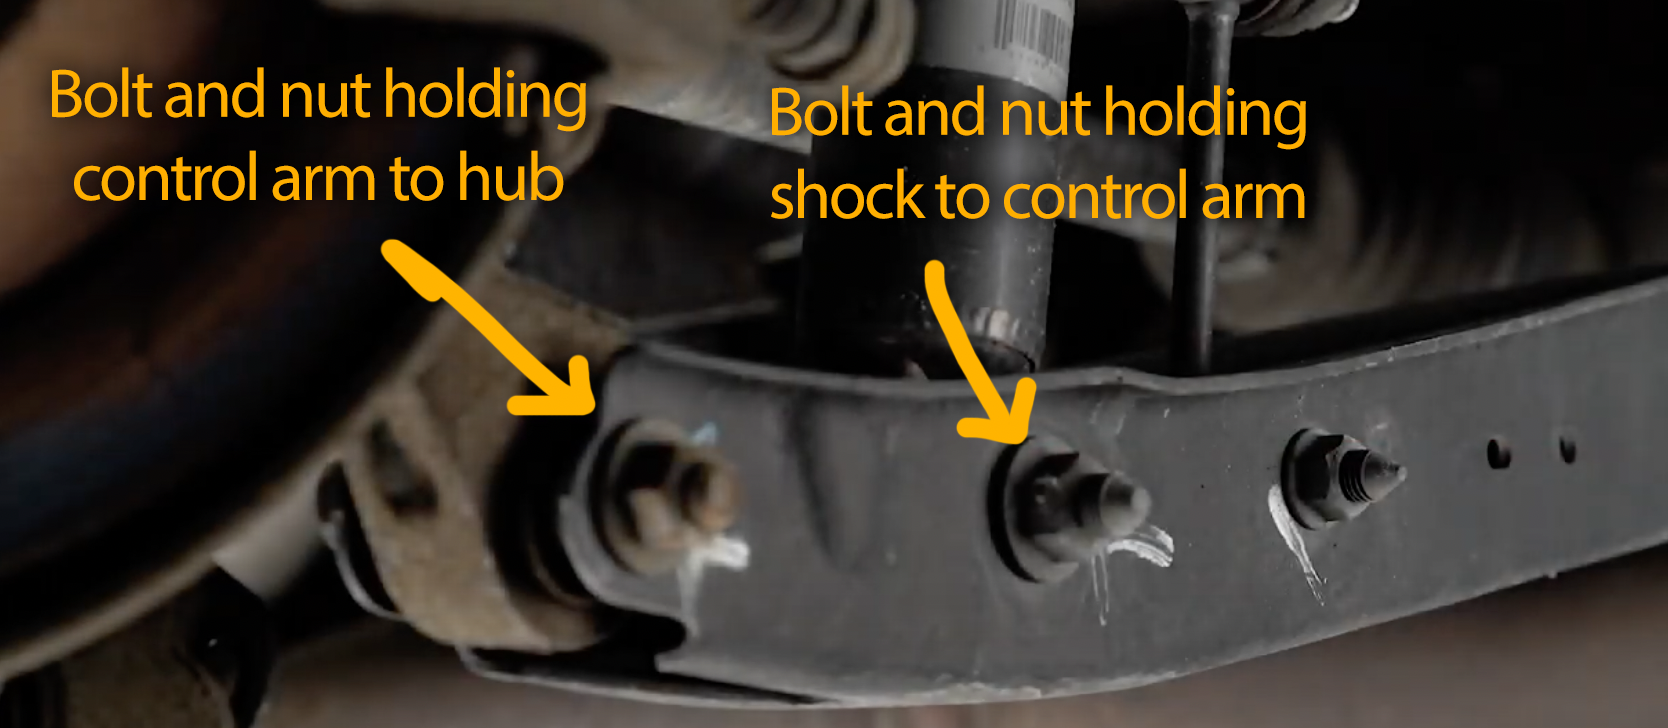
Step 3. Remove the nuts and bolts holding the shock to the lower control arm and the lower control arm to the vehicle’s hub.
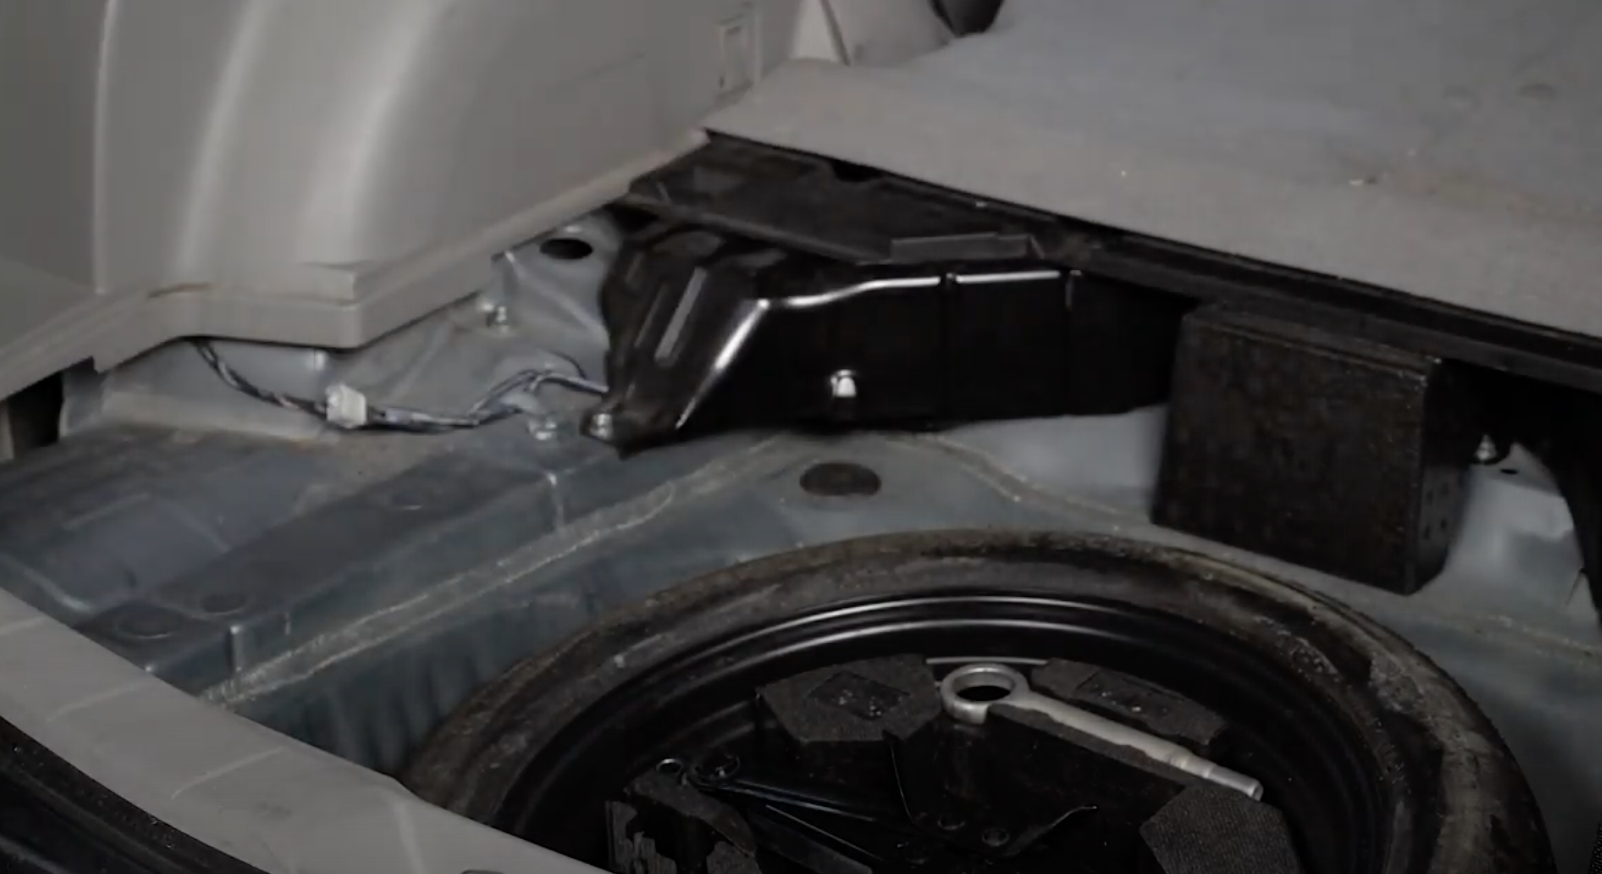
Step 4. Open the trunk and remove the carpets and foam filler pieces
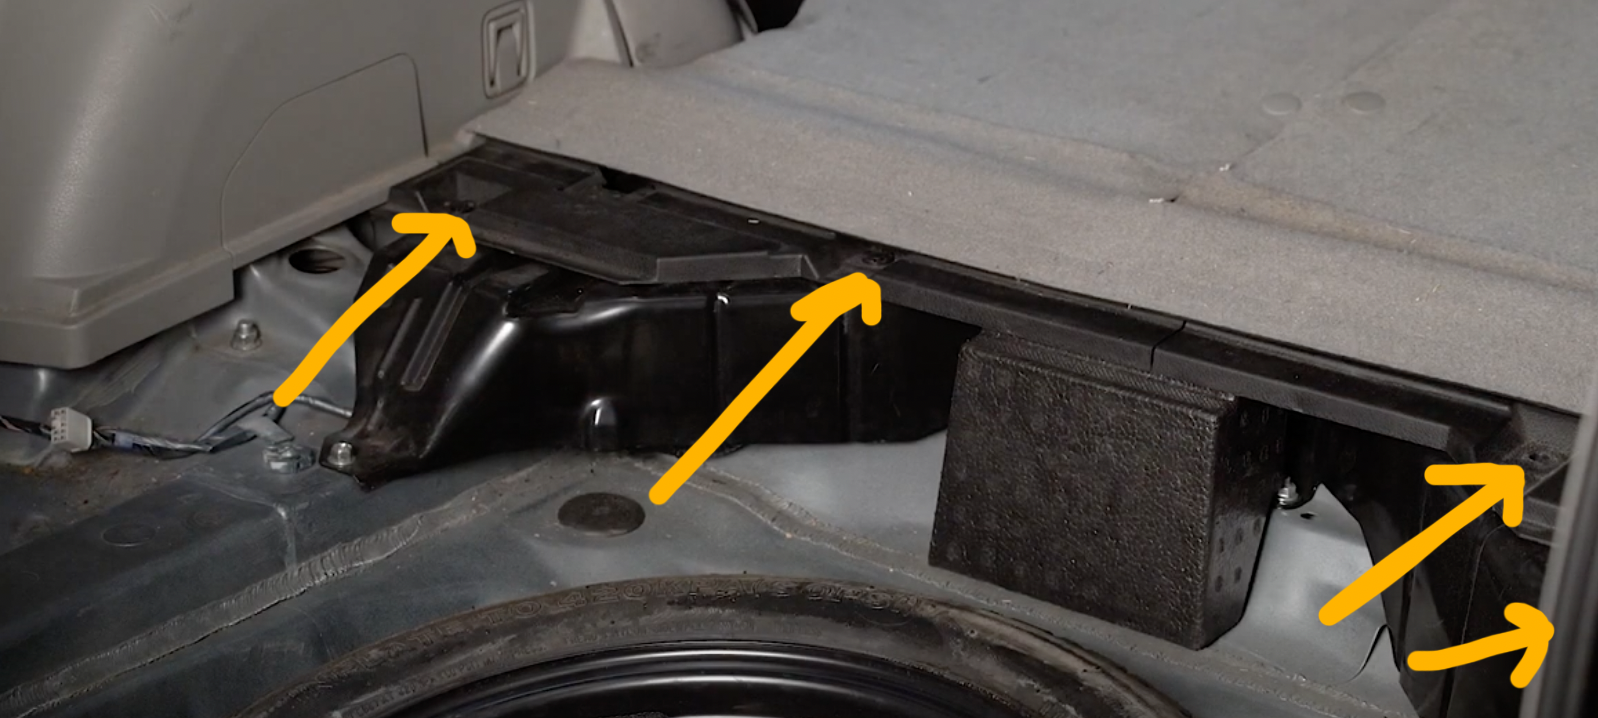
Step 5. Remove the clips holding the seat back carpet panel to the trunk and fold the trim forward
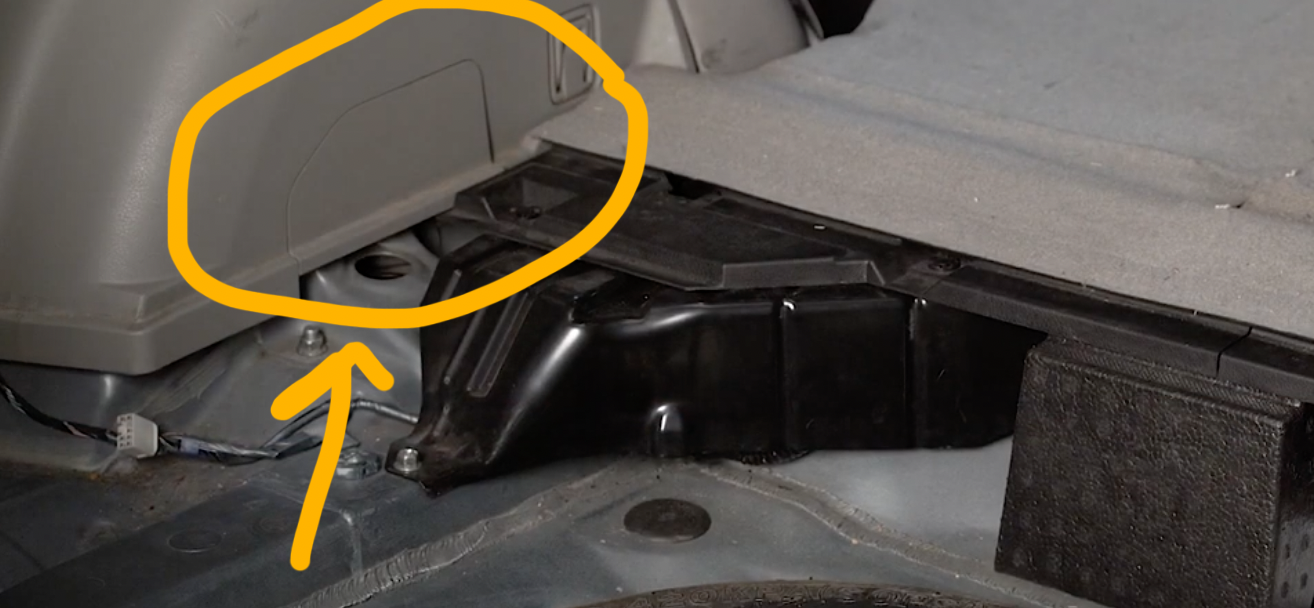
Step 6. Remove the plastic trim piece that covers the upper strut tower. (both sides)
Step 7. Remove the 2 nuts holding the strut mount to the strut tower and remove the strut from the vehicle
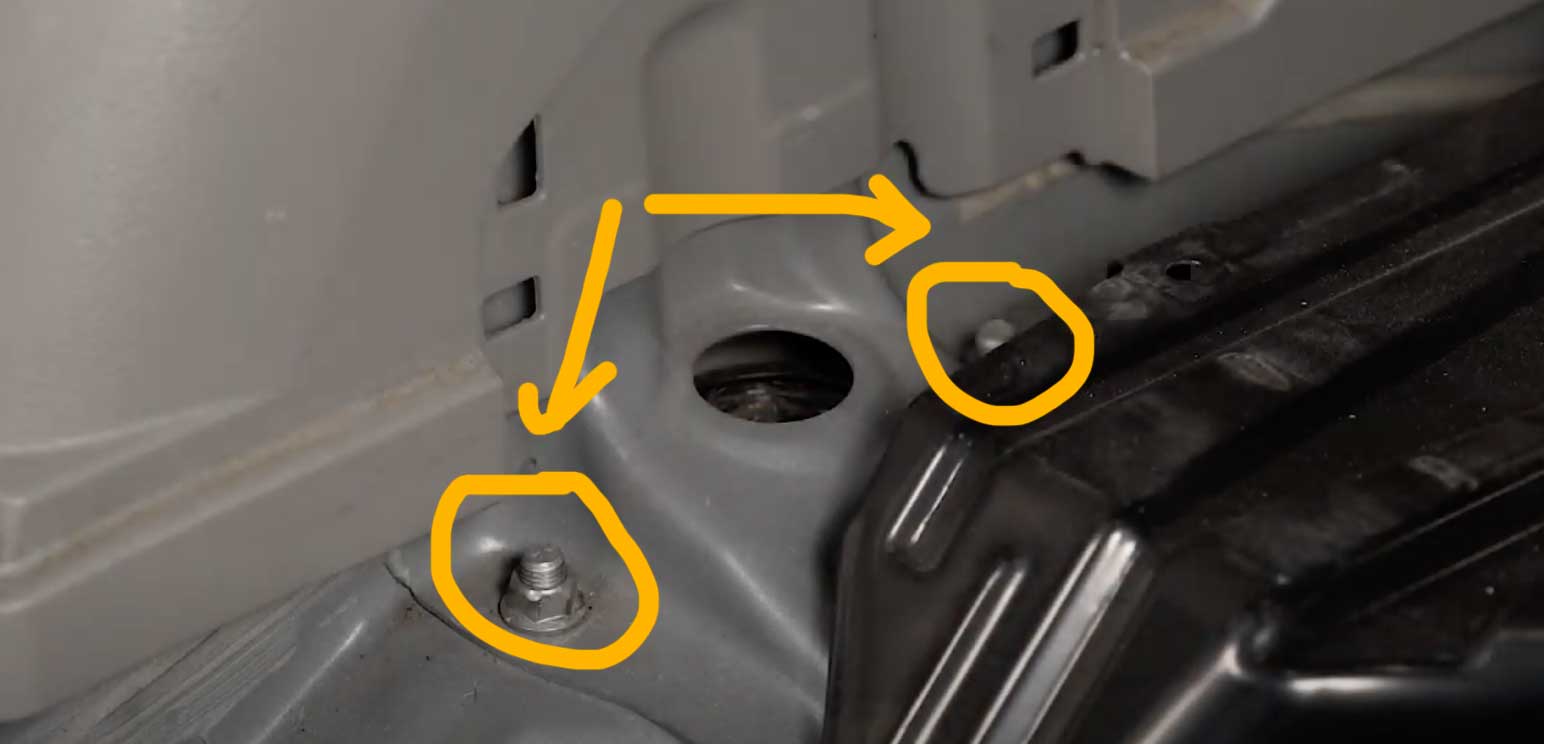
Step 8 Install the new rear strut
Remove the top mount nuts from the new rear strut, install the rear strut and tighten the new nuts on top.
Step 9 Loosely reattach the shock to the control arm
Do not tighten these bolts until the control arm is at ride height. Otherwise the rubber parts will twist and wear out sooner.
Step 10 Using a jack, raise the control arm
The Flatout suspension is longer than stock, so raise the control arm using a jack until the sway bar end link and hub mount line up.
Step 11 Loosely reattach the sway bar end link and hub with the control arm
Step 12 Load the suspension using the jack until it is holding the vehicles weight. Then tighten all the bolts.
Tighten the sway bar, shock, and control arm with the hub.
(Now do the same to the other side).
Step 13 Clip the side panel piece back in place
Step 14 Attach the clips holding the seat back carpet panel to the trunk and fold the trim back in place
Step 15 reinstall the foam pieces and the carpet pieces.
And you’re done. Almost.
Step 16 after all suspension is installed check and adjust the heights of your suspension around the vehicle.
With the vehicle on level ground measure the heights from the ground the centre of the wheel well.
After measuring the height of your wheel well compare it to the heights you measured on step 1. Now you can make adjustments to the suspension to raise/lower it to your desired height.
To raise the suspension on the front twist the whole strut assembly, and it will unscrew. Using the locking ring as a guide, you can measure the distance you’ve raised it. You can also add preload using the lockout ring at the top if you need additional height. Again, use the lockout rings to measure the space adjusted.
To raise the suspension on the rear simply rotate the locking ring using the locking ring wrench. Use the lower lockout ring to measure the distance raised.
Once complete reinstall the wheels and torque to specs.
Congrats, you’ve installed your new Flatout GR Lite suspension.
I also installed the Rallitek subframe spacers to help center the rear wheel. I may add another article to walkthrough how I installed those. They were somewhat straightforward to install.
The Subaru Forester build:
