Welcome to part 2 of the MAMP tutorial. In this part we will go over setting up Mysql on your Mac’s localhost. Part 1 goes over everything you need to do to setup PHP on a Mac
What green means: any lines that you need to replace in this tutorial will be in green.
Step 1
Download MYSQL:
You need to download and install Mysql on your mac.
1. Go to the MySQL site, scroll down the page and look for version Mac OS X ver. 10.6 (x86, 64-bit), DMG Archive. Click the blue download button.
This will take you to a page that asks you to login or signup. You don’t have to signup, instead there is a link right below these buttons. Click the link “No thanks, just start my download.” This will start the download.
2. After downloaded you will need to install all 3 of the components in the package.
Double-click on each package to install them.
mysql-5.6.10-osx10.6-x86_64.pkg – MySQL software
MySQL.prefPane – Allows mysql to stop/start
MYSQLStartupItem.pkg – Allows mysql to start when booted
Step 2
Start MYSQL:
To start MySQL via the command line
sudo /usr/local/mysql/support-files/mysql.server start
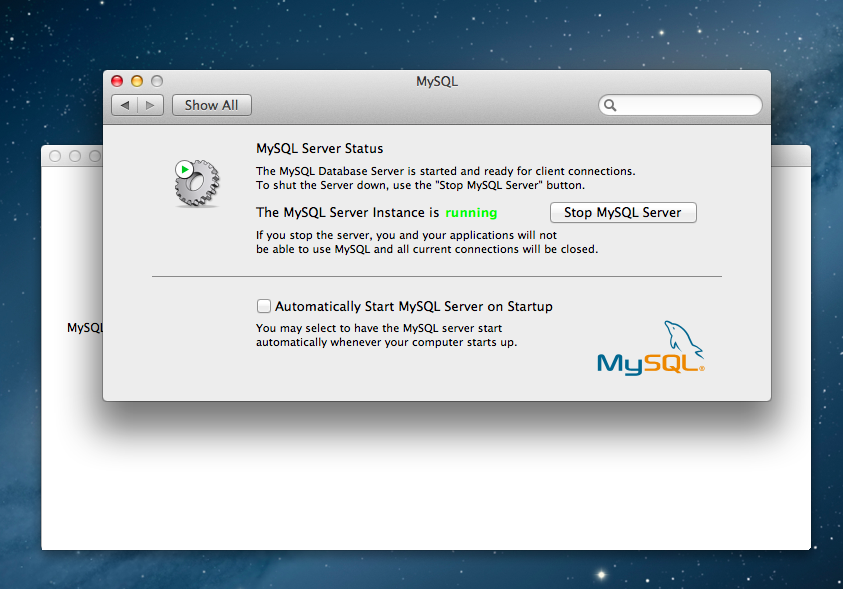
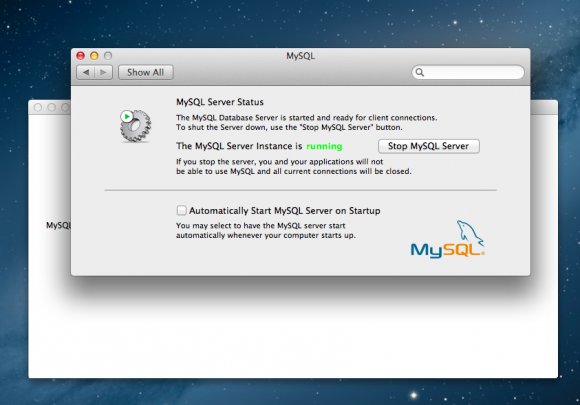
Or you can click Start MySQL Server when the dialog opens after installing the 2nd package.
Step 3
Set MySQL root password:
/usr/local/mysql/bin/mysqladmin -u root password 'yourpassword'
That’s it. You have MySQL installed and running on your localhost.
In part 3 I will be going over setting up phpMyAdmin
Part 1: How to install Apache and PHP on a Mac with OSX 10.8 + (MAMP Part 1)
Part 3: How to setup phpMyAdmin on a Mac with OSX 10.8 + (MAMP Part 3)
Part 4: How to enable and setup php.ini on a Mac with OSX 10.8 + (MAMP Part 4)
Part 5: How to host multiple sites on your Mac (MAMP Part 5)
22 replies on “How to setup MySQL on a Mac (MAMP Part 2)”
Hello Jonathon,
I used this: /usr/local/mysql/bin/mysqladmin -u root -p password and it accepted my password but then it asks me to enter password and I can’t write in the space. . .
Hi Jessica. I think what you are saying is that you cannot see the password? That’s normal, you won’t be able to see the password that you type, but once completed press return.
thanks.!! It worked…
Awesome!
Those who are getting access denied error. Use your system (mac root) password. Mysql default set root password as system password. And you will be able to login.
I used your information to install MySQL on my MacBook running Maverick. Thank you for that information.
I did as you suggested:
macinto6066fa70:~ brendahall$ /usr/local/mysql/bin/mysqladmin -u root password ‘mypw’
but I am still getting this error. I have spent approximately 30 hours trying to get around this error:
mysql> create database ruby;
ERROR 1044 (42000): Access denied for user ”@’localhost’ to database ‘ruby’
Any assistance you can provide would be greatly appreciated.
Thank you
mysql>
There are something wrong when I run step 3.
The indication is as follows,
/usr/local/mysql/bin/mysqladmin: connect to server at ‘localhost’ failed
error: ‘Can’t connect to local MySQL server through socket ‘/var/mysql/mysql.sock’ (2)’
mysqladmin: connect to server at ‘localhost’ failed
error: ‘Your password has expired. To log in you must change it using a client that supports expired passwords.’
…
Please help me i can not access my phpmyadmin : show a password login but i insert the password its say not connect sql sever …please help me
Hi Tarun. It sounds like your server has put the client in sandbox mode. To reset the password you can use SET_PASSWORD. You will need to login to Mysql using Terminal and run the following command. SET PASSWORD FOR ‘user’@’localhost’ = PASSWORD(‘cleartext password’);
You can learn more here http://dev.mysql.com/doc/refman/5.6/en/password-expiration-sandbox-mode.html
This worked for me, thanks. Beware the quotes–they must be straight, not curly 🙂
Hi Bob, glad it helped!
Hi Jonathan,
I try with; /usr/local/mysql/bin/mysqladmin -u root -p password, but when I hit enter and don´t ask me for new password …
Terminal show me this:
error: ‘Access denied for user ‘root’@’localhost’ (using password: NO)’
Please help!!! 🙂
Thks!
Hi Sofia,
Hopefully I will be able to help. When you run the command are you entering your password after -p ?
example
/usr/local/mysql/bin/mysqladmin -u root -p yourpassword
Best of luck.
I have the same problem. I get
“connect to server at ‘localhost’ failed
error: ‘Access denied for user ‘root’@’localhost’ (using password: NO)'”
If I try your command I get “connect to server at ‘localhost’ failed
error: ‘Access denied for user ‘root’@’localhost’ (using password: YES)'”
Thanks for the information.
Is there any reason why you chose the “Mac OS X ver. 10.6 (x86, 64-bit)” and not the “Mac OS X ver. 10.7 (x86, 64-bit)” Version. For me the difference is not clear.
That was the stable version I used when creating the tutorial. But I’ve setup MAMP using the Mac OS X ver. 10.7 (x86, 64-bit) version as well and it works fine too.
Hi Jonathan,
Everything seems fine till I got to step 3. Here is what appeared:
/usr/local/mysql/bin/mysqladmin: connect to server at ‘localhost’ failed
error: ‘Access denied for user ‘root’@’localhost’ (using password: NO)’
Help!
Hi Jo, Try this.
Type:/usr/local/mysql/bin/mysqladmin -u root -p password
When it asks for a password, do not enter anything, just hit enter. It will then ask you to enter new password, then confirm.
That should work.
Hello Jo, look I am having the same problem I mean
ERROR 1045 (28000): Access denied for user ‘root’@’localhost’ (using password: YES)
I have been trying all the possible solutions I have found on the net and still nothing helps, please could You provide me with something… How can I get into phpmyadmin. Believe me I have been trying really hard, I have searched a lot of web pages and tried a lot of solutions nothing helps me…
Hubert
Hi Hubert, will take a look at the error later tonight. Hopefully we can get this resolved for you shortly.
Hi Hubert.
I’ve just bumped into the same problem, and it took me quite some time to find a workaround. I’m leaving it here as it might help you, and others.
I basically reused the procedure described in http://www.rackspace.com/knowledge_center/article/mysql-resetting-a-lost-mysql-root-password to reset manually the password.
– 1 – stop mysql server and launch it in safe mode skipping the user privileges table :
sudo /usr/local/mysql/support-files/mysql.server stop
sudo /usr/local/mysql/bin/mysqld_safe –skip-grant-tables &
– 2 – launch mysql with user root :
/usr/local/mysql/bin/mysql -uroot
– 3 – reset root password and flush privileges, and quit mysql :
use mysql;
update user set password=PASSWORD(“mynewpassword”) where User=’root’;
flush privileges;
quit;
– 4 – stop and start mysql in regular mode :
sudo /usr/local/mysql/support-files/mysql.server stop
sudo /usr/local/mysql/support-files/mysql.server start
– 5 – Type the following and type your newly created password at the prompt, it should work :
/usr/local/mysql/bin/mysql -u root -p
Hi Olivier, thank you for sharing your solution. Have a great day