Categories
mac Tutorials

How to clear your scratch disks on your Mac

Here’s how to free up space on your Mac scratch disks.

Have you seen the message when opening Adobe Photoshop? “The currently selected scratch disks are full. Please modify scratch disk preferences that will come into effect in the next launch.”
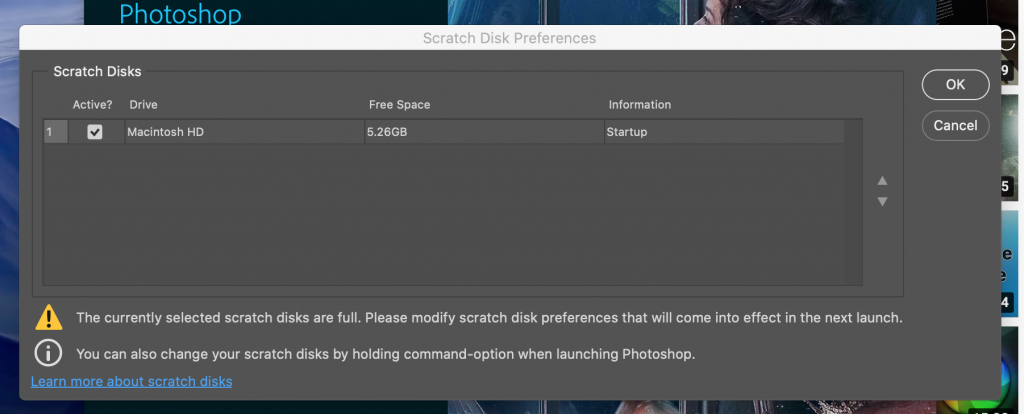
This means that your internal hard drive is full, or almost full. And some apps need a few gigs to run.

Here’s how to fix it

Step 1. Go to About this Mac

Click the Apple icon on the top left hand side of your screen. A list of dropdown options will appear. Then click “About This Mac”

Step 2. Click on the Storage tab

A new window will appear. Click the “Storage” tab.
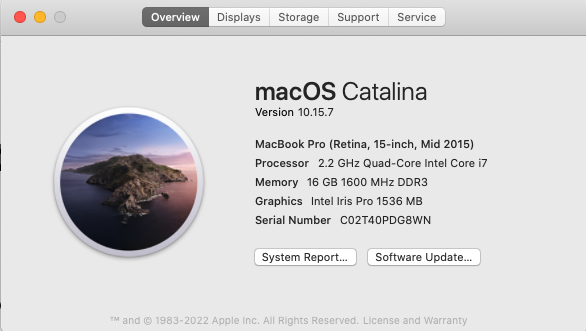
Give it a minute for the Storage to calculate which files are using the space. The more full it is, the longer it will take.

Step 3. Next, Click the button “Manage”

This will open up a new window. Here you will see a list of things taking up a lot of space on the left hand column.
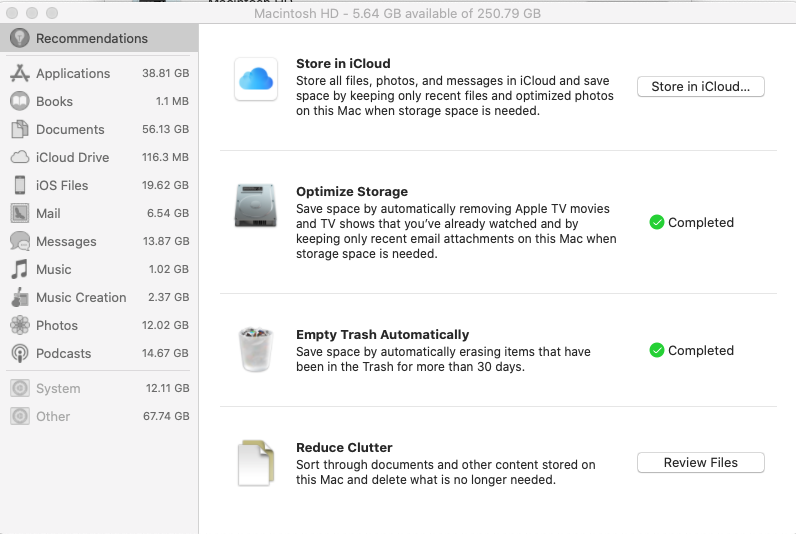

Step 4. Review your apps

You can see in my screenshot above the Applications are taking up 38.81 GB of space. There may be some apps that you just aren’t using. You can delete those from here.

Click on the app. Then click on the “delete” button.
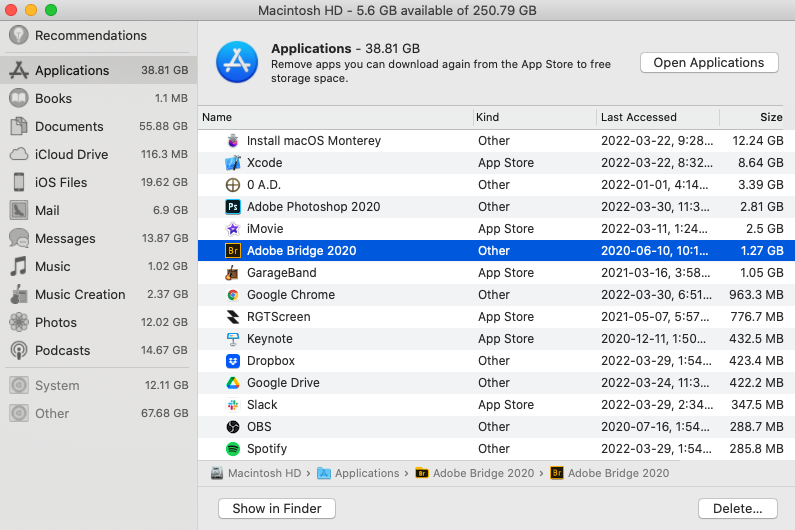
Step 5. Next, review your documents

Documents is a common place where you will find files that are taking up a lot of space.

Click on the “Documents” on the left hand column. You will see a list of documents appear on the right hand side. Again, review your documents and click on the ones taking up too much space. And click delete.

Go throughout the list and delete anything you can.

If you are unsure what it is, click on Show in Finder to open the file and see what it is.

Step 6. Continue to review any other places that you have unneeded files

Step 7. Go to your trash bin and empty it out.
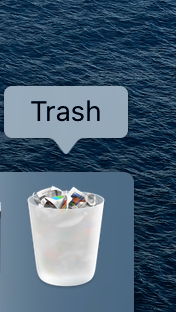
Step 8. Close out your applications. And relaunch them. They will now be able to run with your free space.

Congrats! You’re done.

Categories
Apache mac MAMP PHP Tutorials

Migrating PHP and Apache to latest Mac OS after update

After upgrading you MacOS, you will need to reconfigure your MAMP server. Fortunately, it’s pretty easy to do. However, sometime hiccups happen. Here’s a quick guide to follow that will walk you through the things to check.

1. enable php.ini

cd /etc

move default to php.ini

sudo cp php.ini-5.2-previous php.ini

If you need to resetup php.ini follow these directions here.

2. Enable virtual hosts

See part 1 of :

Follow the directions of part 5

How to setup multiple sites hosted on your Mac with OSX 10.8 + (MAMP Part 5)

3. Restart Apache

sudo apachectl restart

Check if it’s working.

4. Getting 500 internal error

check error log

5.  Enable rewrite engine

/etc/apache2/httpd.conf

uncomment following line

#LoadModule rewrite_module libexec/apache2/mod_rewrite.so

6. Enable PHP

/etc/apache2/httpd.conf

uncomment following line

#LoadModule php5_module libexec/apache2/libphp5.so

If you’re using php version 7, uncomment this line instead

#LoadModule php7_module libexec/apache2/libphp7.so

7. save and restart apache

sudo apachectl restart

8. If you’re still getting “ERR_CONNECTION_REFUSED”

ERR_CONNECTION_REFUSED apache php error

Run configtest to see if any modules in httpd.conf need to be removed or enabled

sudo apachectl configtest

9. If you’re getting error 403

403 Forbidden You don’t have permission to access / on this server.

Check Apache is able to read the mime types. Add this line to the Mime types section in your /etc/apache2/httpd.conf file

AddType application/x-httpd-php .php


Categories
Apache MAMP Tutorials

How to restore your Mac’s Apache settings after upgrading your Mac OS

How to get your virtual host MAMP Server (Mac Apache, PHP, and MySQL) up and running again after upgrading to the latest macOS. Mac High Sierra (as of this post).

After upgrading the macOS and navigating to the directory of my localhost website, this is what I see. Instead of showing the webpage it is supposed to (as per the settings of my virtual host prior to the upgrade), it is displaying the default apache directory.

Follow the these directions to easily restore your Mac’s Apache settings (while keeping a copy of the new ones).

It works


Step 1. Restore your Apache configuration file

When apple upgrades its servers, it sets it’s Apache settings back to default. Thankfully, it does store the original files as filename~previous.

1. Open your Terminal application found in Utilities

2. Navigate to your apache directory

cd /etc/apache2

3. Move the new config file to keep it as a backup

sudo mv httpd.conf "httpd.conf~new"

4. Move the original config file back

sudo mv “httpd.conf~previous” httpd.conf

Step 2. Restore your Virtual Host settings

1. Navigate to your apache extra directory

cd /etc/apache2/extra

Run the following command to reset your virtual host file

2. Move the new file.

sudo mv httpd-vhosts.conf "httpd-vhosts.conf~new"

3. Move the old file back

sudo mv "httpd-vhosts.conf~previous" httpd-vhosts.conf

Step 3. Restart Apache

Run the following command

sudo apachectl restart

Congrats! You’re done.

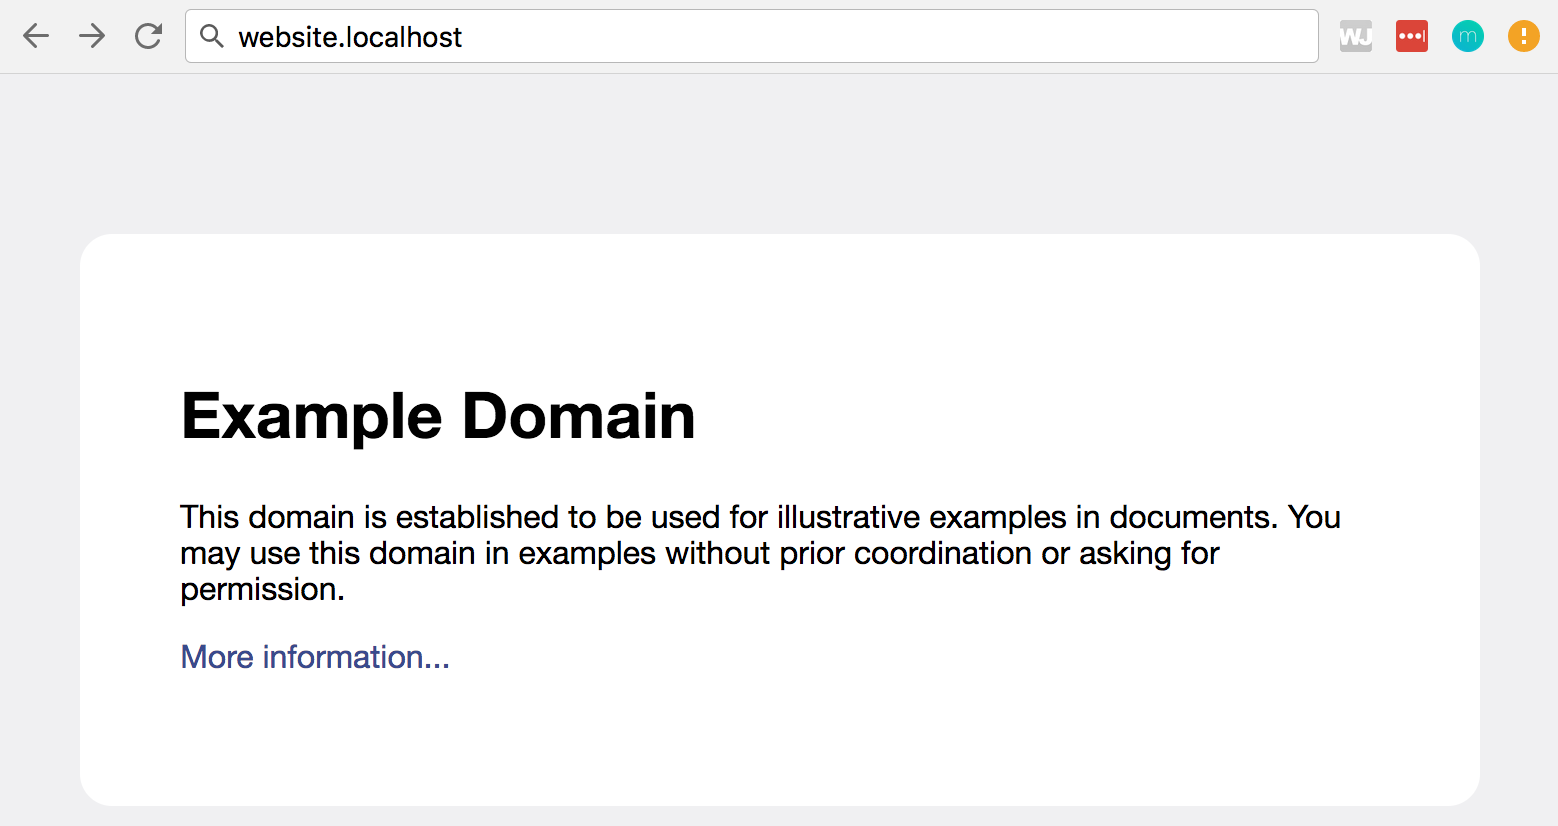
Navigate to your localhost website and refresh the page. It should appear as it did before the upgrade. This website below is an example, your website will appear however you have designed it.

Apache example website


If you’re stilling having issues, I’ve added a checklist of steps here.

Categories
Auto Body On Bicycles Resource Tutorials

Benotto Bicycle Restoration – Sanding and Primer – Part 3

The restoration is coming along nicely. Ordered some NOS Benotto forks and they arrived safely today. The forks are made of Columbus SL tubing, the kind found on Benotto modelo 2500 and 3000. Part 1 and Part 2 of the restoration are here.

Step 1: Sanding (3-4 hrs)

I started with 180 grit sandpaper. Because I had previously sprayed the bike black, I wanted to make sure I got all the old layers of paint off to bare metal.

Next I switched to 200 and then 400 grit sandpaper.

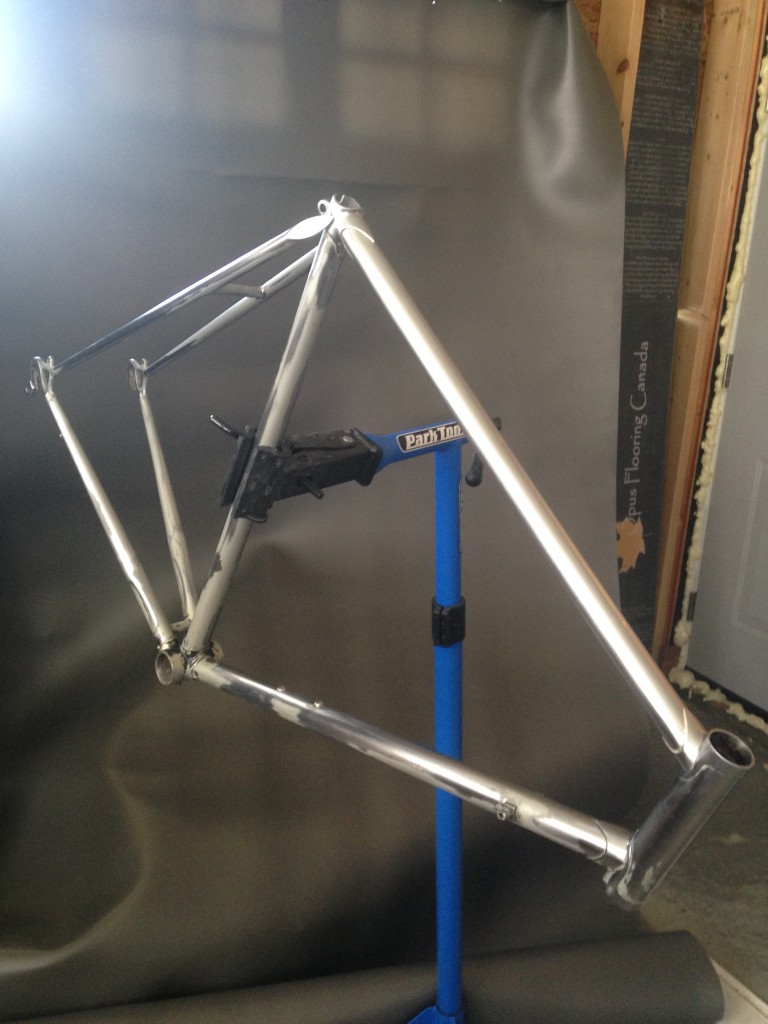
Sanding the bicycle frame
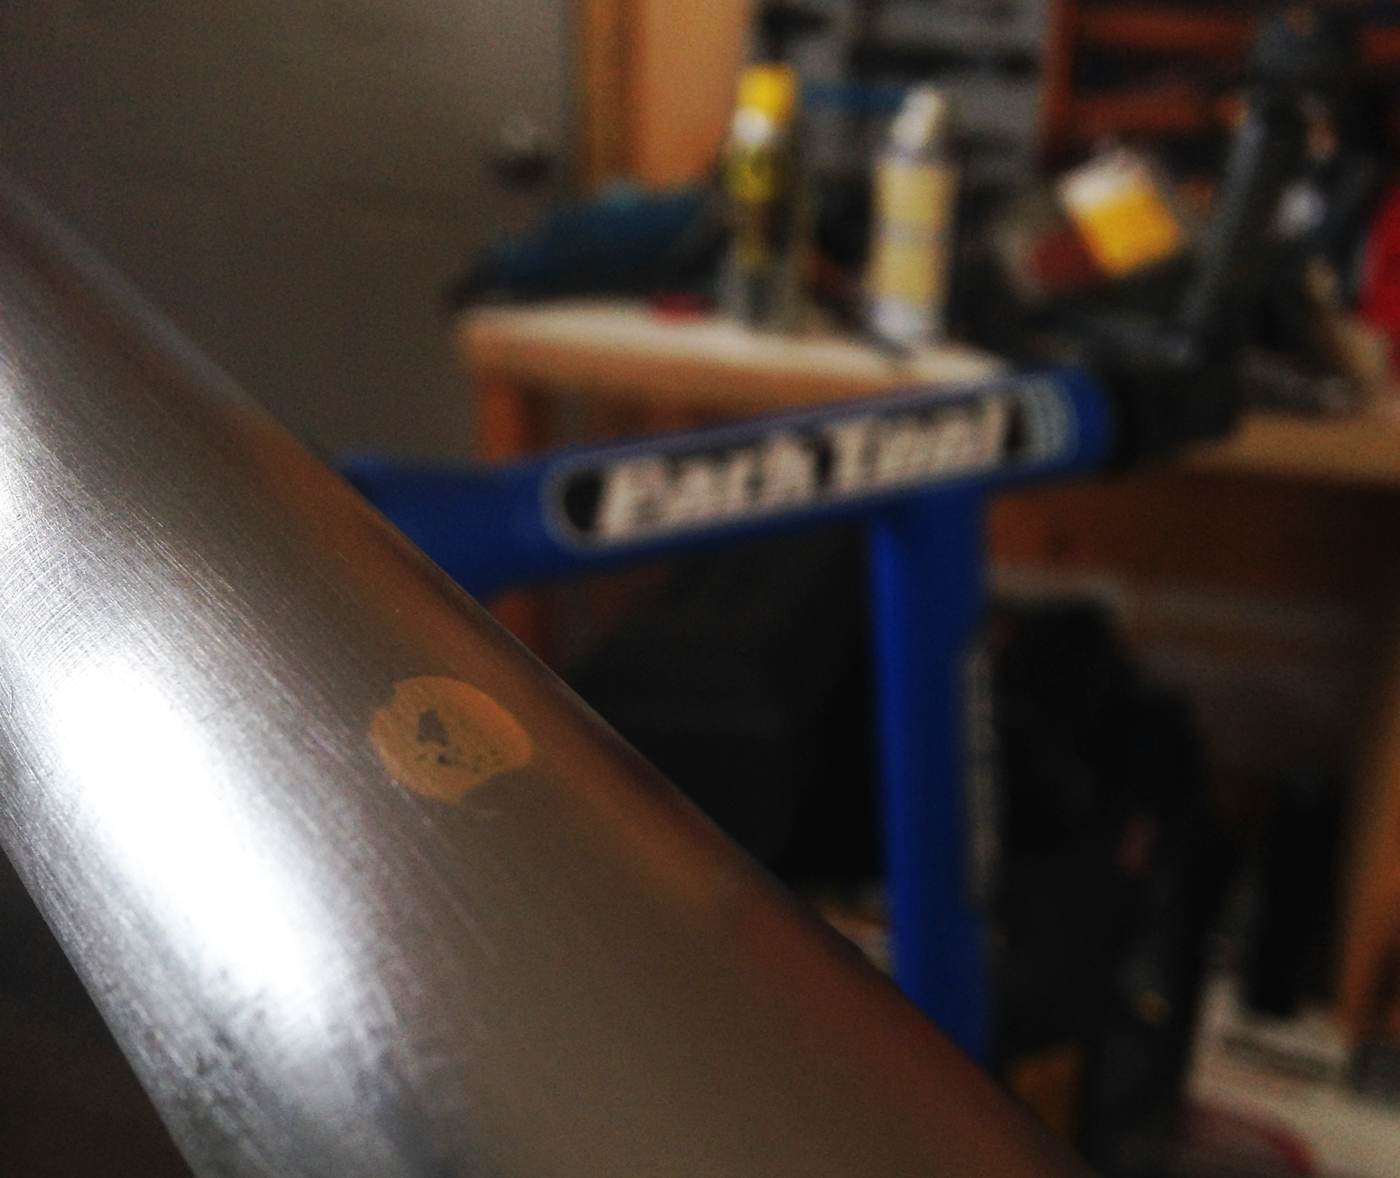
Sanding the bicycle’s frame reveals metal in great condition.

I used 400 grit sandpaper on a drill wheel to clean the brazed areas.

Sanding revealed a really nice metal frame. Almost made me want to clear coat the whole frame.

Step 2: Cleaning (20 min)

I don’t like using water on freshly sanded metal as it creates rust. So I started off with a cotton clothe and wax and grease remover. Went over the frame about 3 or 4 times until the rag came out clean. I wore gloves while doing this to prevent the oil from my hands getting on the bike frame.

Step 3: Taping (5-10 min)

Once the frame was clean I taped the bottom bracket area as I didn’t want the threading painted. I also taped part of the rear dropout.

Step 4: Metal Adhesion and Primer (10 min)

To help the bare metal areas that I will be clear coating I sprayed some metal adhesion promoter first. I will be sanding this again prior to clear coating.

Next I did 2 coats of primer over the frame. When using spray paint shake the spray can really well for about 60-120 seconds.

When spraying hold the can about 8inches away from the area and use smooth sweeping movements. Start the spray before you move over the part to paint and release the spray after completing the pass.

Start with the intricate areas first. I sprayed the bottom bracket, lugs, and dropouts first.

Next I did the frame by sections, spraying with the length of the tubes.

Step 5: Wait 10-15 minutes for the primer to dry (15 min)

Step 6: Second coat (10 min)

Spray the sections of the frame a second time.

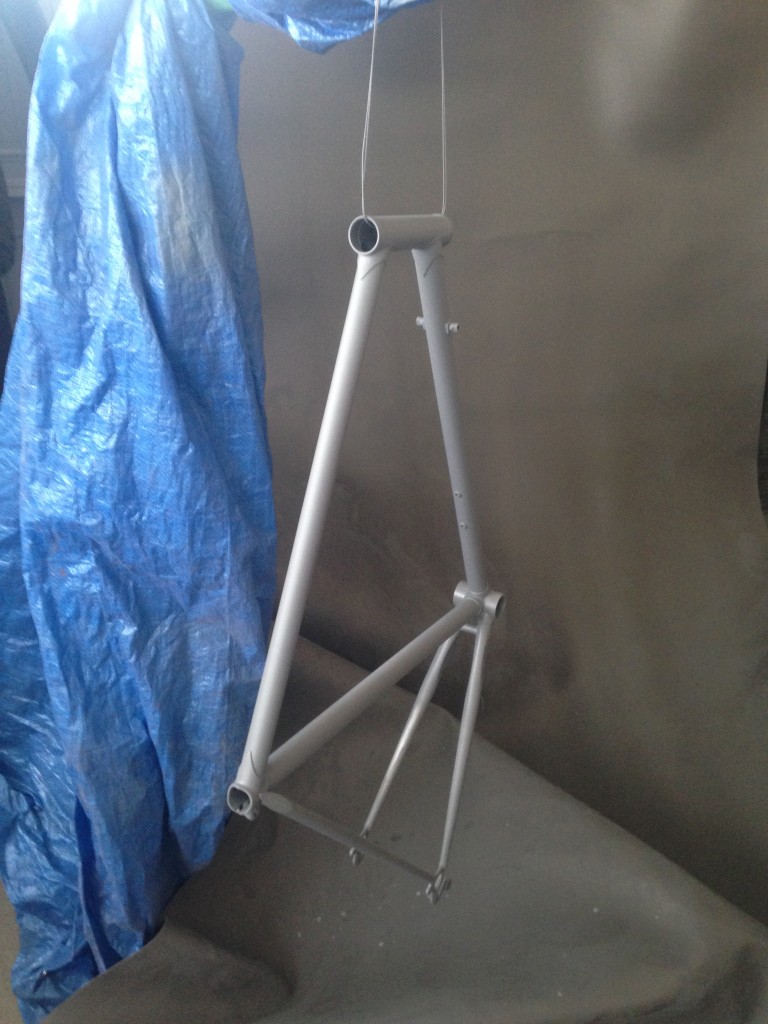
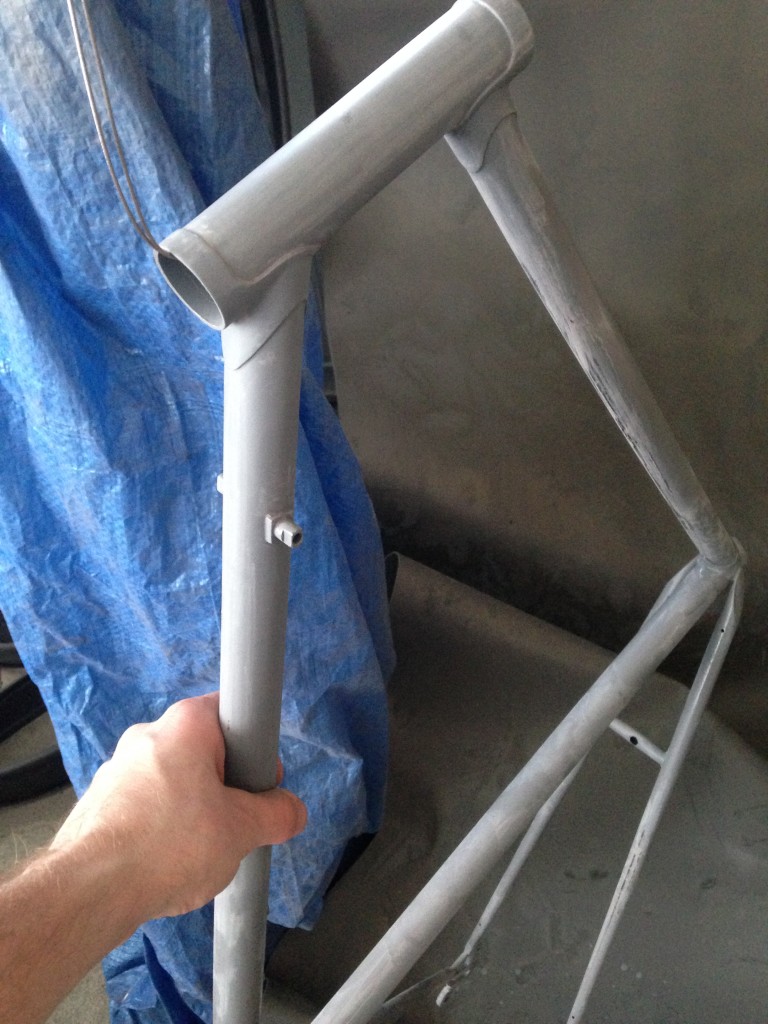
Bike frame primed
Bike frame primed, doesn’t look like the same bike

Step 8: Go for a long ride (4-8hrs)

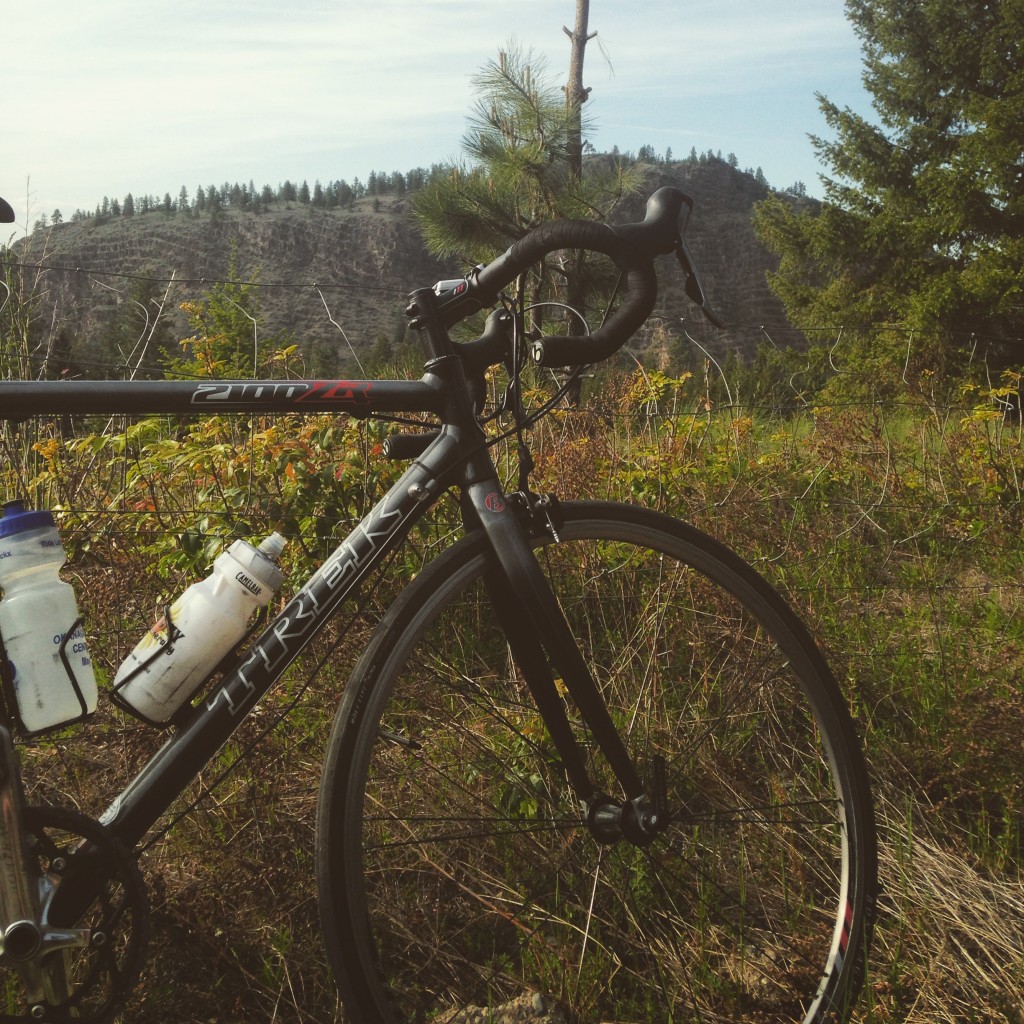
I wanted the primer to set well before sanding to get the best finish, so I left it overnight and went for a ride on my Trek.

Mid way through the bike ride
This was mid way through the afternoon bike ride

Step 9: Wet sanding (10 min)

1 day later (tonight) I prepped the frame for the second coat of primer. Once your primer is set, you will want to wet sand the frame. I used 400 grit sandpaper, a bowl of water and a cotton cloth. Keep the sand paper wet at all times while working over the paint. Primer is easy to sand and you don’t need to press too hard.

I used a rounded block to keep the sanding as even as possible.

After wet sanding all the tubes I then sanded the lugs and more detailed areas.

Once everything is smooth and your hand glides easily over the paint, it’s time to prep for the next coat of paint.

Wet sanding the benotto frame

Step 9: Clean and prep (5-10 min)

A cotton rag with wax and grease remover works well to clean sanded areas. You want to use a lint free rag. It took about 3 passes for the frame to come clean.

Step 10: Final coat of primer (10 min)

I did one more coat of primer, the same way I did the first one. Starting with the bottom bracket, dropouts and lugs. Next I used smooth sweeping motions to paint the frame tubes as evenly as possible.

Step 11: 

Next you are ready for the base coat, I haven’t got the paint yet, so I will need to wait for the next step. I plan on sanding one more time prior to the base coat. It’s not necessary… but hey it’s a classic.

Part 1: The story

Part 2: Identifying the frame (sorta.. it’s a work in progress)

Categories
Auto Body Auto Repair Tutorials

How to replace the front sway bar bushings on a 1999 Nissan Pathfinder R50

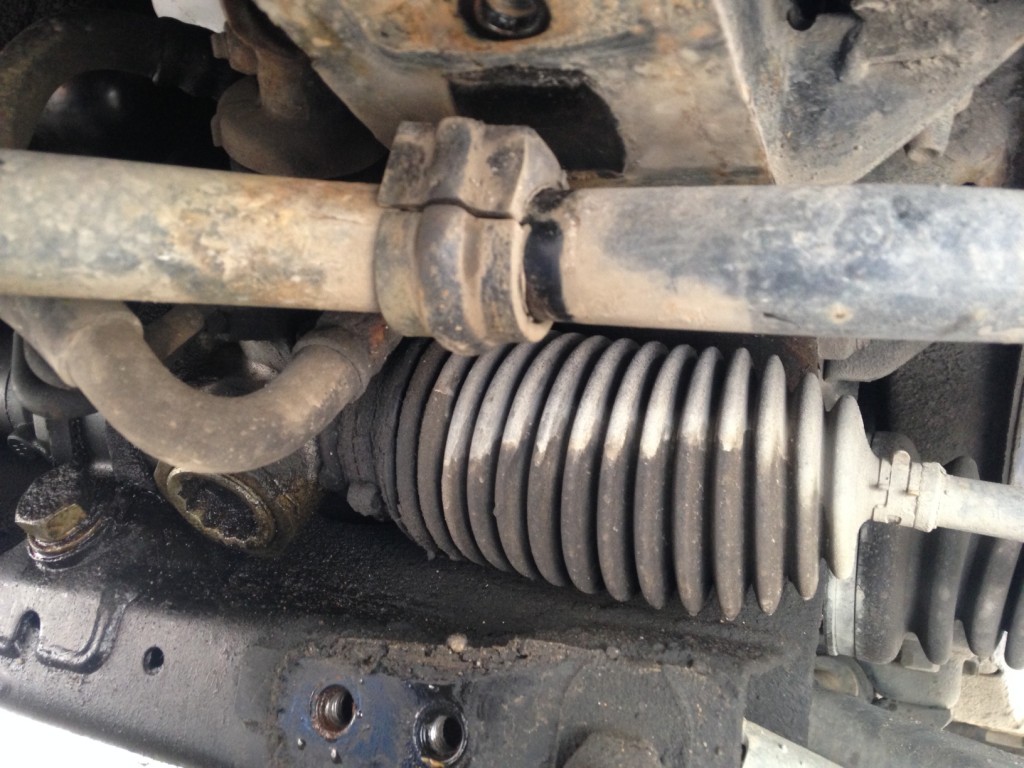
If you are noticing a clunking sound coming from the front of your vehicle when going over uneven roads and speed bumps it’s likely that their is play in your sway bar. If your front bushings are worn then your sway bar will move when your wheels go up and down. Resulting in a clanking sound.

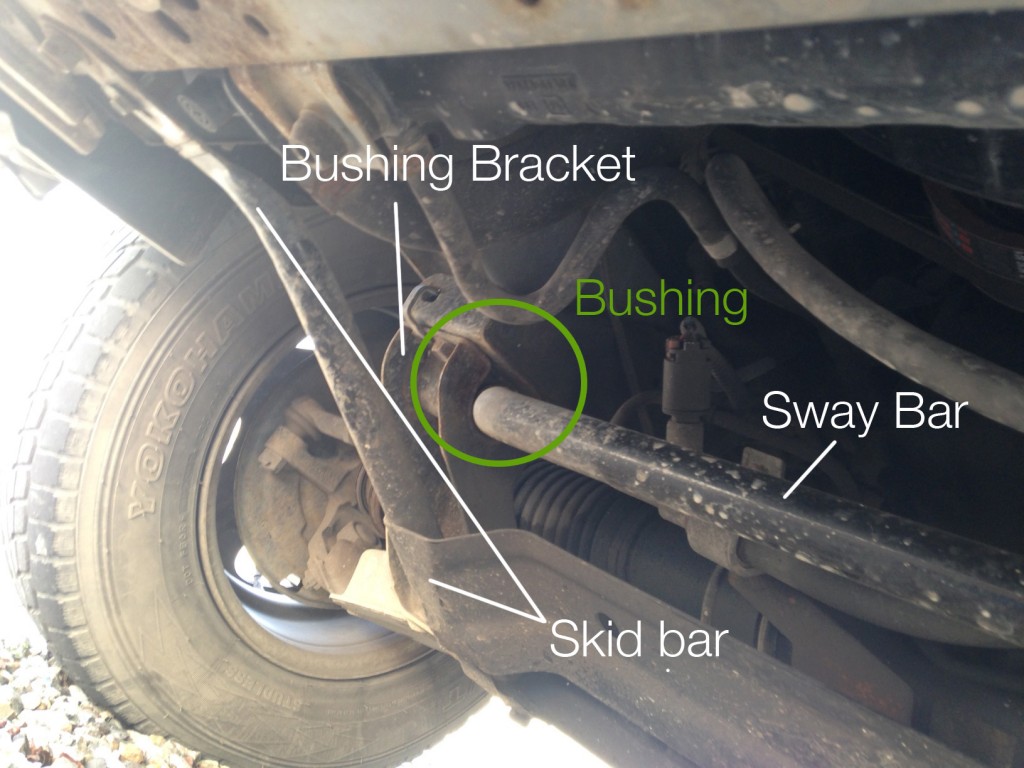
Nissan Pathfinder Sway Bar and BushingIt’s really easy to replace your bushings. It’s essentially the same procedure for all vehicles.
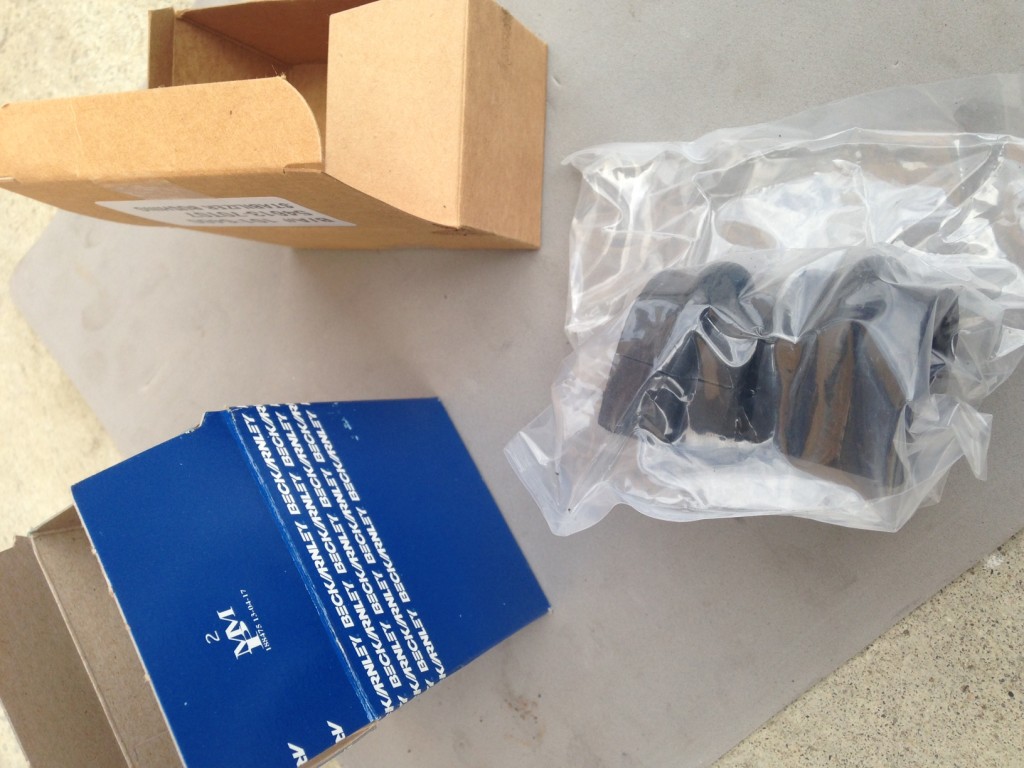
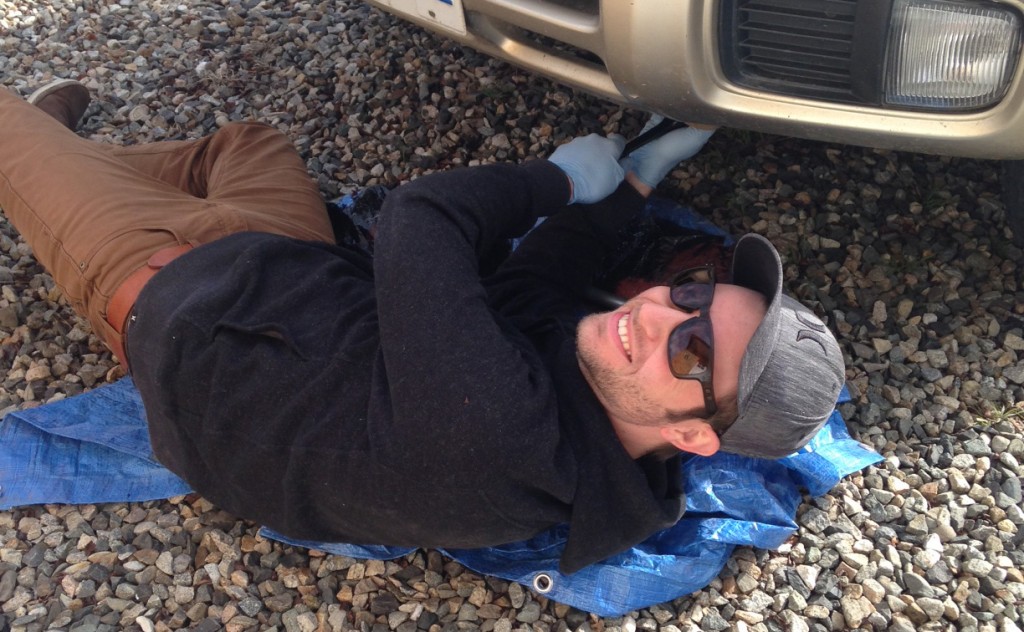
Here are the steps to replace your front sway bar (stabilizer bar) bushings

1. Check if there is play in your sway bar. I had Shawna jump up and down on the sidestep of our truck while I checked the sway bar underneath. Sure enough, the sway bars were loose and clunking.

2. You will need:

Replacement bushings. These usually go for around $20-$30 for the pair. You can find them online for less. They are called Suspension Stabilizer Bar Bushing Kit.Nissan Pathfinder r50 replacement sway bar bushings

14mm socket and ratchet

Socket extension

A rag

The nice thing about the Pathfinder is that it’s got good clearance. You won’t need to use a jack for this. (As you can see in the example photo Shawna took)working under the Nissan Pathfinder

3. Remove your skid plate or skid bars so that you can get at the bolts on the stabilizer brackets holding the bushings. (If you don’t have skid plate skip this step).

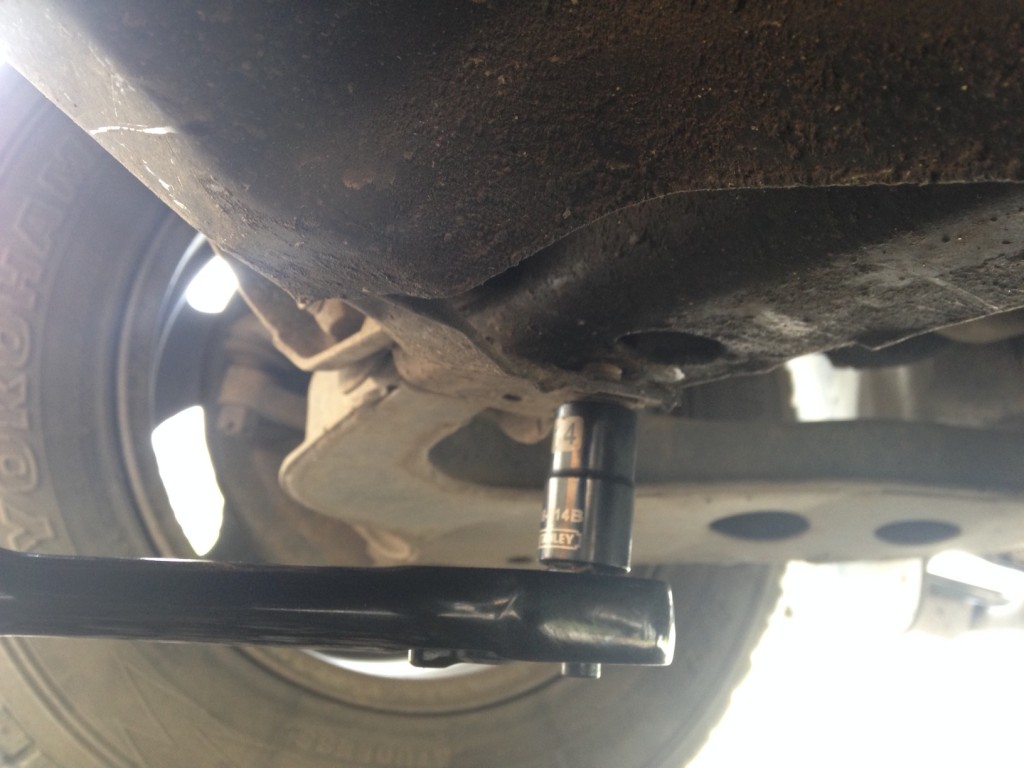
There are 4 bolts holding your skid plate in place. Remove them all.

Removing skid plate

4. There are 4 bolts holding each of the front stabilizer brackets

Remove them all.

example

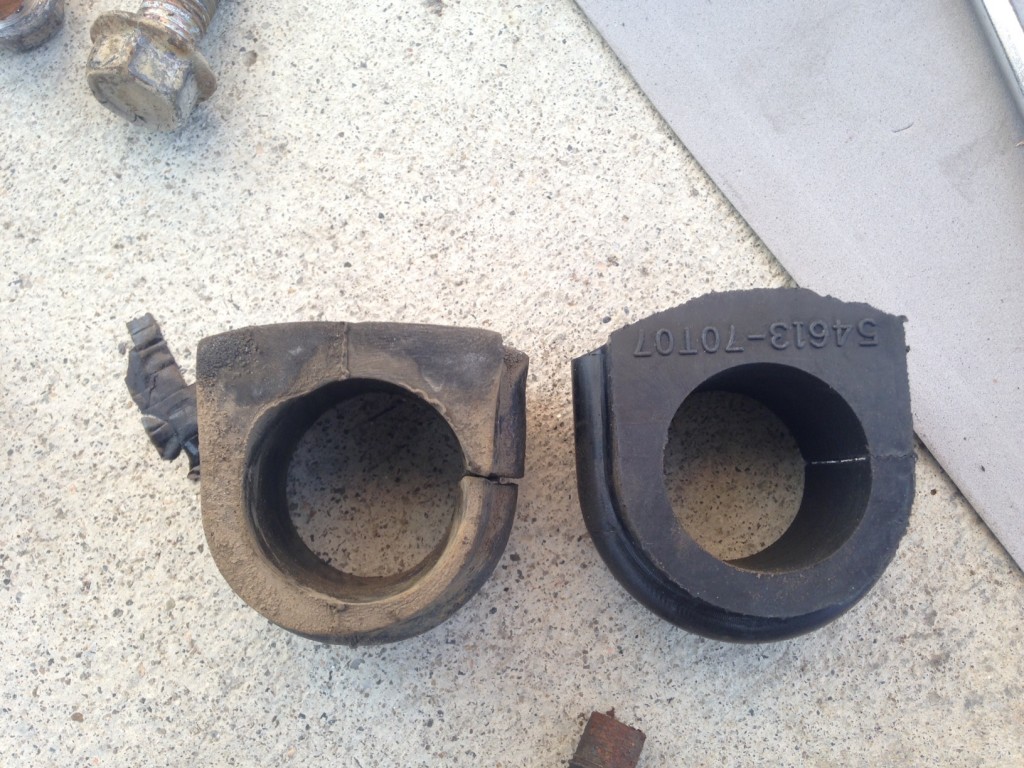
5. Once the brackets are removed, your bar will swing freely. Remove the bushings. They have a slit on one side making them easy to slip off.

worn sway bar bushing

You can see the just how much the old bushings have worn when compared to the new one.

worn sway bar bushing compared to new bushing

6. Clean the area on the sway bar where your bushings sit with a rag.

7. Replace the bushings.

8. Bolt the stablizer brackets back in place.

9. Reattach the skid plate with the 4 bolts.

10. Go for a drive and enjoy your solid front sway bar.

This is a great DIY project. Will save you a few bucks doing it yourself and shouldn’t take more than an hour or two. Best of luck

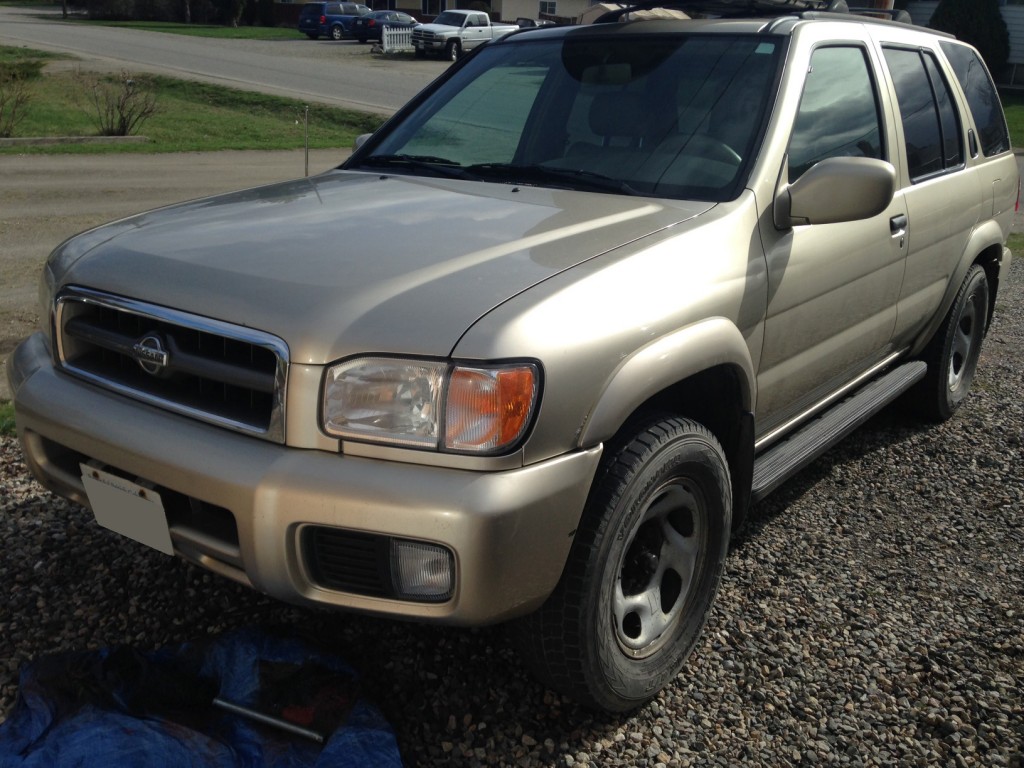
1999 Nissan Pathfinder r50


Categories
CSS Downloads Tutorials

How to use the simple responsive CSS grid – SimpleGrid

Introducing an easy-to-use and lightweight css grid. 

  • Flexible 12 column grid
  • Easily extend for custom styling
  • Fluid (works no matter the size of the containing div)
  • Responsive (looks nice on mobile & web)
  • Option to maintain grid column layout on mobile screens

Download latest release 

Categories
PHP Tutorials

What does the symbol “&” “&&” “||” “::” “%” “!!” “**” mean in PHP?

This is the best guide on PHP symbols I’ve every seen. If only something like this existed when I was first learning to code.

Reference:

& =& &= && % !! @ ?: : :: \ -> => ^ >> <<< = == === !== != <> | || ~ + += ++ .= . , $$ ` <?= [] ... **

A list of every symbol in PHP that you’ve ever wanted to know the meaning of.

::

The “::” symbol (Scope Resolution Operator) explained

Categories
mac Terminal Tutorials

Mac – How to clear a file’s contents using Terminal command

A quick trick to empty a file using Terminal on Mac.

1. Open Terminal

2. enter the following command in Terminal

cat /dev/null > fileName

If you get a warning Permission Denied you can do the following trick.

sudo sh -c 'cat /dev/null > fileName'
Categories
Linux MAMP Tutorials

How to setup multiple sites hosted on your Mac with OSX 10.8 + (MAMP Part 5)

Welcome to part 5 of the MAMP tutorial. In this post we will go over setting up friendly URLs on your Mac server. We will be adding a new site called http://mysite.localhost

You will also learn how to run multiple domain sites on your local server. Having Virtual Hosts enabled is really useful when developing sites on your localhost. It’s also super easy to setup.

Categories
mac MAMP PHP Tutorials

How to turn display_errors to on in php.ini file

This is a quick tutorial that will walk you through turning display errors on in your php.ini file.