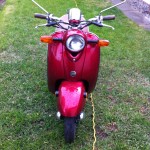
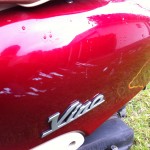
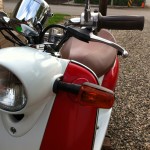
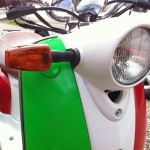
This tutorial will walk you through the steps to repaint your scooter (or any vehicle) using spray cans at home. This is what my scooter looks like after respraying it. I’m not a professional, this is my first time working with most of this stuff. If I can do it so can you.

Part 1: Supplies you will need:
Sandpaper
– 80 Grit
– 180 Grit
– 400 Grit Wetordry
– 800 Grit Wetordry
-1200 Wetordry


Primer
– I used Pro Form High Build Primer
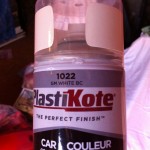
Acrylic Base Coat
– Any color you want. For the classic style scooter I went with the colours of Italy. Red, White and Green
Acrylic Clear Coat (optional for flat colours)
– I like using clear coat, it adds that extra layer of protection and brings out the shine

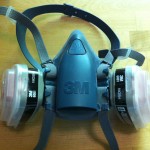
Respirator
– Paint fumes suck, protect your lungs
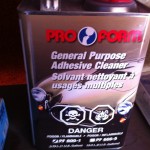
Wax and grease remover (This is to clean the parts of old wax and grease prior to painting them)
– I used a Pro Form general purpose adhesive cleaner
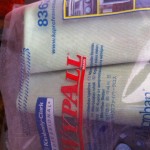
Lint free cloth wipes
Sanding Block
Masking tape
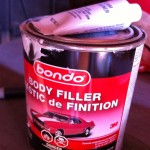
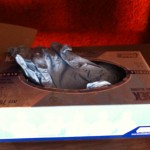
Body Filler and mixing board
Gloves (You don’t want body filler and paint all over your hands – that’s no good)
Trim pry tools – This is to remove any trim or logos from your body

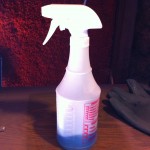
Spray bottle (to easily spray wax and grease remover where you are working)
Part 2 – prep work
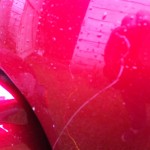
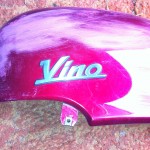
Now that you have all of the supplies you need, it’s time to get to work. I will demonstrate how to paint your project with my Yamaha Vino YJ50 Scooter. It had a bunch of scratches and it was an opportunity to give it a fresh look. Here’s the before photos.

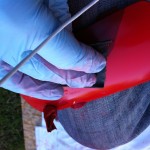
Step 1. Wash every part you will paint and then wipe it down with wax and grease remove.
This is a boring step, but it pays off. The cleaner your parts are that you are repainting the easier it is. And you don’t get dirt on your nice new paint when moving parts around. When using wax and grease remove use one cloth to wipe it on and another to wipe it off. Or spray it on using a spray bottle and then wipe it off.
Step 2. Tape off anything that you don’t want to paint.
Important tip #1. Make sure to tape off all small holes. I missed a couple, and even though the holes were tiny the overspray still went through them and ended up everywhere it wasn’t supposed to be.
Important tip #2. Don’t use newspaper. During the process I taped off some newly painted areas with newspaper and it was a bad idea. The ink of the newspaper rubbed off on the piece and I had to re sand it. The next time I used printer paper and the result was much better.
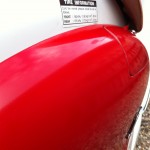
Take your time when taping. The final quality will reflect how well you taped off any areas you don’t want painted. I taped all important stickers (with serial numbers and such) and any part I couldn’t remove but didn’t want sprayed.
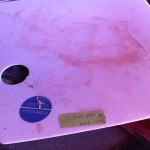
Step 2. Sand any scratches.
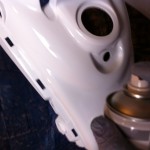
Start with 180 grit sand paper around any dents or scratches. Sand gently until it is smooth. Sand in two directions. Sort of a crosshatch style. I started sanding aggressively to get rid of the scratches and then much more gently. You don’t want to sand too firmly because that will create deep scratches from the sandpaper that may show up later when painting.
The above pic shows a part after using 180 grit sand paper on some scratches.
Step 3. Use body filler if you need it.
If you have any deep scratches that you can’t sand smooth you will need to use the body filler.
When mixing body filler make sure you mix the hardener and putty really smooth. Should all be 1 color. Use 50 parts filler to 1 part hardener. The method I was taught to do was put squeeze one thin line of hardener over the putty you are using.
Apply the bondo in thin smooth layers. Don’t apply more than 1/4 inch at a time. The smoother you apply it the easier it will be to sand. I waited about 30-45 minutes until the bondo was mostly set. Shape it with 80 grit sandpaper. Once you have the shape you need, then move back to 180 grit sandpaper. Sand it until it is smooth. (Don’t sand too hard, you don’t want to leave deep scratches)
Step 4. Final sand (the smoother the prep work the better the paint finish)
Next sand the entire piece with 400 grit wet or dry sand paper. Sand everything until it is nice an smooth. I used my hand to go over the sanded area to check for scratches. When it feels as smooth as glass I know it is ready. Don’t worry about the really tiny scratches. Those get filled in with the primer.
Step 5. Clean off any sanding dust
Next clean off the part with wax and grease remove. Wipe it off with a clean rag.

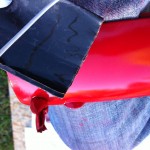
Step 6. Paint the primer
In a dust free area paint your primer. ( I didn’t really have one so I hung a sheet of plastic on the ceiling of my shed to stop dust from falling down)
Wait 10-15 minutes between coats. I painted 2-3 coats to get a nice smooth finish.

Step 7. Sand the primer until it is smooth.
Use 400 grit sand paper to sand the piece until it is smooth. I sand the entire part I will be spraying at this stage.
Step 8. Again clean everything with wax and grease remove
Step 9. Paint the base coat.
A simple trick to make the paint flow nicely is to warm up the spray can in hot water for about 15 minutes before using it. The shake the can for about 60 seconds to get an even flow. Hold the can about 8-12 inches away from the area you are spraying and use smooth hand movements to cover the area. I spray from one end to the next with each movement.
Spray edges and hard to reach areas first. Overlap each spray by about half it’s width. This is to get an even covering of paint.
Wait 15 minutes between coats and spray about 3-4 coats. Don’t rush the dry time. I did on one piece and the paint cracked when it dried. That part needed to be re-sanded and painted again.
Step 10. Check for dust.
We’re doing this at home remember. There is likely dust. There was for my pieces.
If there is any dust in your paint, no fear, use 800 grit wet sand paper to sand everything nice and smooth. (wait until your pieces have dried for at least 1 hour before sanding the dust)
Wet your sand paper and and use water to keep it wet while sanding. Sand gently, you don’t want to sand aggressively, just enough to smooth the pieces. If you want a glassy smooth finish, you can sand all your parts this way after the base coat. This will help prevent the bumpy “orange peel” finish that some people get from spray paint. I sanded everything before using the clear coat and I didn’t get an orange peel finish.
Step 11. The clear coat
Make sure you warm up your clear coat spray cans for 15 minutes in hot water prior to using them. You want the spray to come up as smoothly as possible.
Spray 3 coats. Again about 15 minutes between each coat.
Leave everything to dry overnight before driving or assembling the parts.
Congrats!
There you have it. A DIY paint job from start to finish. Depending on how big your job this will take 2-3 days. So a long weekend.
Let me know of any projects you are doing in the comments.
Here is how my project turned out.


I’m considering repainting my 2001 Vespa 150 ET4. Thanks for this tutorial! I’m wondering if you took the pieces off the scooter to paint or if you left them assembled? Also, did you tape things like the handles and side mirrors or do you only need to tape the parts adjacent to the places you want to paint? Also, about how much paint do you need for a full paint job?
Hi Jeanie, good luck with your project. I did remove the pieces. It is much easier painting them individually. I didn’t paint the side mirrors or handles.
I can’t remember the exact amount of paint.
Thanks for the great guide.
I’m gonna try it this weekend.
How many cans did you use? I’m going for 1 solid colour but don’t know how many spray cans to buy.
Hi Sander, If I remember correctly I think I used about 6 or 7 cans
Thank you for the inspiration. My Yamaha Vino 50cc body is all washed and degreased. I’m ready to go!!!
That’s awesome Arlene, good luck! Let me know how it went
Started to do my Vespa in hulk green following you advice fingers crossed!
Awesome steve, looking forward to the final pictures
great I’ll do it with my Lambretta Li
Thanks for the tips. I’m just about to start on my first Vespa ET4 project, and haven’t sprayed in years.
Thanks again.
Mark
Hi Mark,
Sounds like a great project. Be sure to share the before and after photos.
Thought I’d finally share my success with painting my Honda. Thanks again for the great tips! http://s22.postimg.org/kxgp2ur75/IMG_8744.jpg
Hi Logan. Your scooter looks great. Nice job!
This is terrific. I’ve been thinking about painting my Gmax220. It’s a fading neon green color, and it could really use a clean up job. I’m actually really excited about this project. I already love my bike to death, but this will make me cherish her even more. Avada is due for some “me time” lol
Hi Garion, good luck with the project. Be sure to share a picture here when you are done!
This is an awesome reference- thank you Jonathan. I’m wondering, how did the paint job hold up over time? I read on a forum that some paint jobs can crack quickly if you’re not experienced, like within a year. Did you experience this at all?
Thank you.
Hi Lida, the paint holds up really well. I haven’t experienced any cracking. I think it’s largely because of the primer as it gives the paint a great surface to bond to. Also, if too much filler is used to fill holes (more than a few millimetres thick), this can cause cracking when it dries later. For best results, gradually fill a hole allowing the filler to dry between each layer.
Thank you!!
Hi there thank you for the tutorial. I have just tried painting my plastic panels with direct to plastic black gloss but can still see some light scratches. Any advice pls
Hi Wayne,
Best thing to do would be to give the new coat a wet sand with 1200 grit sandpaper. Sand it down until smooth and then do another coat.
Great tutorial! How much paint do you think you used? Are those 12oz cans? Thanks!
Hi John, yes they were 12oz cans. I believe I used about 2-3 cans for the primer, and 4 cans for the base coat and 3 cans for the top coat. The base coat seemed to require the most paint.
Also, did you even use the 1200 grit wetordry sandpaper? I am having a difficult time finding anything above 600 grit sandpaper where I live. I’m not sure where to go to get wetordry sandpaper. The hardware store didn’t have any. Thanks.
Hi Logan, 1200 grit wetordry sandpaper is good to if you want to get a really smooth finish. You can use 600 grit. It will still turn out okay. I picked mine up at my local auto parts shop.
Thanks for the tutorial! This is just about the only quality guide that I have been able to find about how to paint a scooter with spray paint. Are the parts you painted plastic or metal? They look like metal, but I am not sure. If they are metal, do you know if the process is the same with plastic panels? I have a 1986 Honda Elite 80 that I want to paint. Thanks so much!
Hi Logan,
Glad you found it helpful. The process is the same. I painted plastic parts. The only difference between metal and plastic is you need to use a etching primer spray paint for plastic for the bond with the plastic to be really good.
I’m about to paint my Honda Elite CH150D!! Thinking of going from faded red to a nice electric indigo. Do you have pics of your before and after for inspiration??
Hi Jai,
Good luck with the painting, sounds like it will look really sharp. The only pics I have are the ones on this page.
Hi I want to try to paint my scooter, did you take all the pieces off? If so how did you remove the front cover? I’m having trouble figuring that one out
Hi Melisa,
I had a trouble removing the front bumper as well. What I did was covered the wheel, you can put a garbage bag around it. And taped off all the visible parts really really well (You don’t want any overspray from the paint getting on anything else). And then I painted the bumper with it still on the scooter. I did one side at a time. Tilting the handle bars to get a better angle at the back.
It was the hardest part to paint. Take your time and it will turn out fine.
Thank you for taking time to do this, although it looks simple is always good to look after details, I want to paint my vespa and this article will be of much help.
From Costa Rica
Good luck with your Vespa? How has it turned out?
hey thanks for the advice by the way i just want to know how to remove dust particles from scooter. becoz i had paint my scooter previously but the results are zero the dust particles covered up so i finally wants to get rid off from that . plzzzzzz mail me the solutions
Before painting the scooter use a degreaser with a cloth to wipe the parts free of dust. Try to paint in a dust free environment too. What I did was hang a tarp above the area I was painting to prevent dust from falling from the ceiling. It seemed to work pretty well. Also, a good tip is to paint after it rains, that way there is less dust in the air.
Jonathan, the only base paint the shop had in store was meant for metal underground, and to be applied with a brush. My son gave it two coats, and now it’s way too thick and uneven, wet-sanding cannot seem to get it smooth. Do you have any suggestions how to solve this?
Many thanks in advance
Sandra
I would try sanding it down with something like 360 or 240 grit sandpaper. And then with 400 grit after you get it smooth to take out the smaller scratches. It might take longer to do, but the end will still be worth it.
Thanks, Jonathan. In the end, he re-assembled it as is, and by the end of the week, his girlfriend’s father will take it to his workshop and sand it down and spray it professionally…
Anyway, it was an experience, and still thanks for your suggestions!
Thanks, Jonathan! My son has asked me to help him give his old scooter a make-over, it will be our next weekend’s project. After lots of different information, now thanks to you I have a comprehensive list of everything I’ll need to buy, and how to go about it for a decent result!
Greetings from Israel
Sandra
That’s awesome. Good luck Sandra.
I’m doing it tomorrow so pictures by Friday hopefully